Fixing lifted laminate starts with spotting moisture and installation issues. Inspect for hidden moisture behind the lifts, fix leaks, and dry the area thoroughly. Check room humidity and keep it steady, then verify expansion gaps and acclimation per manufacturer guidelines. Reseat loose boards, or replace damaged planks with color-matched pieces. Use a thin adhesive where needed and restore proper edge alignment. Stay on top of the causes, and you’ll prevent future lifts—more details await if you continue.
Key Takeaways
- Identify moisture sources and surface irregularities, document findings, and decide if replacement or resealing is needed.
- Acclimate replacement planks per manufacturer guidelines and ensure uniform expansion gaps around edges.
- Dry the area thoroughly, remove nearby trim if needed, and reseat or glue loose planks with matching color.
- Align tongue-and-groove joints, use a tapping block, and gently press until seams are flush.
- Control humidity, use dehumidifiers, place mats, and prevent future lifting by proper furniture placement and regular cleaning.
Diagnose the Cause: Why Laminate Is Lifting

When laminate is lifting, start by identifying whether moisture, improper installation, or surface irregularities are the root cause. You’ll inspect three factors: moisture present, leveling of subfloor, and edge gluing or click-strip performance.
If moisture shows through, seal the area and plan a full replacement if necessary; otherwise, dry the space thoroughly before proceeding.
If installation is the issue, verify expansion gaps, acclimation of planks, and proper interlock.
For surface irregularities, address high spots, debris under panels, and subfloor flatness within tolerance.
Keep color coordination in mind when selecting replacements to match existing tones and grain, ensuring seamless look.
Consider flooring patterns that minimize noticeable misalignment during repair.
Document findings, then decide whether to repair, reseal, or replace the affected section.
Look for Moisture Sources Behind the Lifts
Start by inspecting for moisture sources that could be hidden behind the lifted planks. You’ll want to confirm moisture is the culprit before planning fixes that affect color matching and aesthetics. Look for signs of dampness around edges, subfloor staining, or lingering humidity.
If moisture is present, address it after this step, but keep your focus on prevention and appearance now.
- Check baseboard gaps and subfloor seams for hidden moisture clues, noting any discoloration that could affect color matching.
- Assess the integrity of underlayment and how moisture might alter its look or feel, considering aesthetic considerations for future patches.
- Photograph areas for reference to preserve color consistency when you replace boards later.
Fix Leaks and Condensation That Lift Floors
If you’ve confirmed moisture behind the lifted boards, the next step is fixing the leaks and condensation causing the issue. Start by locating the water source, seal any plumbing or appliance leaks, and fix roof or door flashing if needed.
Wipe away standing moisture and allow the area to dry completely with fans or a dehumidifier. Reevaluate moisture levels before reinstalling flooring; address any recurring condensation by improving ventilation and addressing drainage issues.
For color options, choose a laminate that hides minor water marks and matches existing trim. When reassembling, leave space for expansion and guarantee seams stay dry.
Plan furniture placement to avoid moisture traps, and keep high-traffic zones away from damp edges. Maintain ongoing checks to prevent future lifting.
Check Your Room’s Humidity Swings
Humidity swings can push laminate boards up or down, so you should monitor how moisture varies room to room and over time. You’ll spot trends that help you prevent further lifting and protect your investment. Track humidity with a meter and note seasonal shifts, especially in kitchens and bathrooms where moisture fluctuates most.
1) Keep furniture off damp areas and spread weight evenly to minimize pressure changes that reveal gaps or lift.
2) Reassess room use and adjust furniture placement to balance airflow and reduce humidity pockets, honoring aesthetic considerations while staying functional.
3) Use dehumidifiers or humidifiers as needed to stabilize levels, then recheck after changing seasons to assure consistency across rooms.
Confirm Installation Gaps and Acclimation Rules
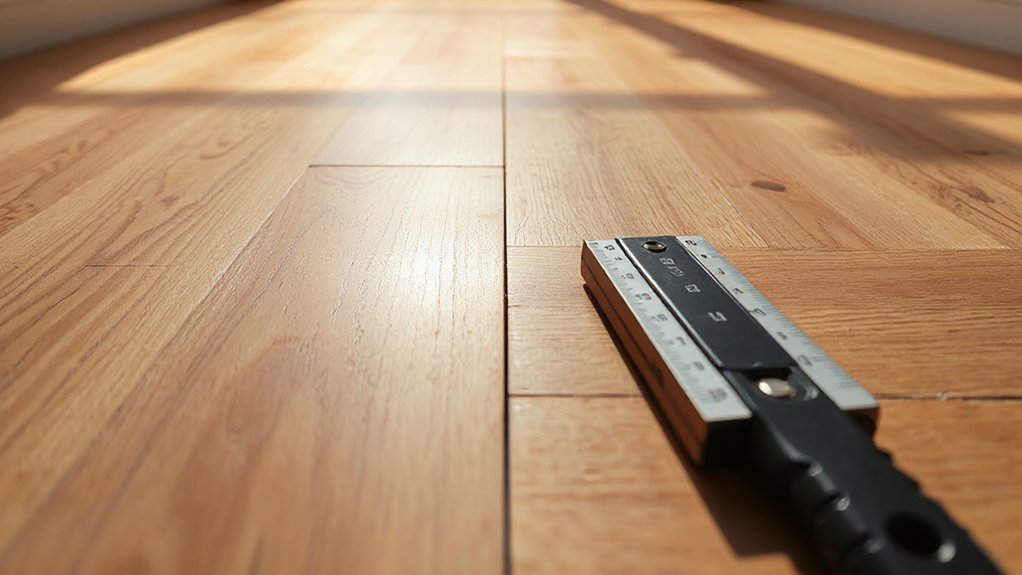
Once you’ve stabilized the room’s moisture, verify that your laminate boards were installed with proper gaps and have been acclimated to the environment. Check the gaps around walls and fixed obstacles; they should match the manufacturer’s spec, typically 1/4 inch or per sheet thickness.
If boards aren’t acclimated, allow panels to rest in the room for the recommended time before continuing. Confirm the color coordination of edges and joints to avoid visible mismatches after laying. Document any deviations for reference during future repairs.
When choosing Flooring alternatives, consider how expansion gaps will affect the overall look and stability. If gaps are inconsistent, pause and re-check acclimation and layout plan. Prioritize uniform spacing to prevent lifting and ensure a clean finish.
Correct Expansion Gaps Before Replacing Planks
To guarantee a smooth replacement, verify and correct expansion gaps before you remove any planks. You’ll prevent buckling and ensure a tight seam, while preserving the floor’s uniform look. Check for consistent gaps around walls, transitions, and fixed objects, then adjust with spacers or shims as needed.
If gaps are irregular, relevel the subfloor or reseat existing boards before pulling planks. Maintain color consistency by choosing replacement planks that match the original shade and grain for an even finish. Consider aesthetic considerations like edge visibility and how the gap frames the room. Small, deliberate corrections now save frustration later and aid flawless results.
- Align gaps evenly, or you’ll notice seams.
- Match color and texture to avoid distracting mismatches.
- Recheck after final installment to lock in a clean look.
Assess Board Orientation for Proper Seaming
Before you lay the next row, confirm the board orientation to guarantee clean seams. Start by inspecting each plank’s pattern and selecting the side that aligns with the room’s longest wall. Maintain consistent edge patterns across the entire run so joints stagger naturally.
When you snap boards, ensure the tongue stays facing the same direction for every row; misoriented pieces create gaps and visible seams. Check that muting channels and grooves fully engage, avoiding partial connections that loosen later.
Avoid mixing left- and right-handed interlocks within the same row, which can misalign seams. As you proceed, pause to verify the overall line remains straight; slight deviations complicate later steps.
Board orientation right, proper seaming follows, delivering a professional, tight finish.
Inspect Underlayment and Moisture Barriers
Start by checking the underlayment: make certain it lies flat with no wrinkles, bubbles, or overlaps, and that it runs smooth under the entire floor area. Then verify moisture barriers are intact and properly positioned, preventing any hidden dampness from reaching the core.
If you see creases, re-lay the underlayment or replace it to avoid trip hazards and future lifting. Guarantee seams are sealed and taped where required to maintain a continuous moisture block.
Consider decorative patterns and color matching when selecting a replacement layer to blend with the plank tones.
- Re-lay damaged sections so the surface remains even and secure
- Test moisture levels and fix leaks before continuing
- Match decorative patterns and color to your existing style
Quick Bubbling Fixes You Can Try Now

You’ll start with quick bubbling fixes that don’t require removing the floor, so you can act fast. We’ll cover simple steps to re-secure edges and flatten minor bubbles using basic tools.
Plus, practical laminating lifting remedies if a panel loosens. Stay practical and targeted as you assess which fixes fit your flooring and avoid overdoing repairs.
Quick Bubbling Fixes
Quick bubbling on laminate floors can be a sign of trapped moisture or a loose glue seam. You can tackle this with quick, decisive steps that don’t require full replacement.
1) Press and seal: gently lift the bubbled edge, reapply adhesive or tape, and press flat until it sticks.
2) Dry and inspect: wipe excess moisture, dry the area, and check for underlying dampness that could recur.
3) Finishing touch: clean the surface with a mild cleaner and color-match it to nearby boards if the patch is visible.
Tips for real results: use cleaning tips to avoid residue, and pick a matching color when resealing. If you’re unsure, test a small area first to prevent color mismatches.
Laminate Lifting Remedies
Laminate lifting is a common issue when moisture seeps in or a seam loosens, and you can tackle it with quick, hands-on fixes. Start by drying the area completely.
Then press the lifted plank back into place using a kneeling pad and a tapping block. If edges won’t stay, apply a thin bead of construction adhesive under the lifted seam and clamp until set.
For ongoing bubbles, drill tiny vent holes along the bubble’s edge, release trapped air, then reseal.
Keep color coordination in mind; replace damaged planks with matching shade to avoid a patchy look.
During reassembly, consider furniture arrangement that minimizes traffic over weak spots, and use felt pads on legs to reduce future humidity exposure.
Regular checking prevents recurrence.
How to Reseat Loose Laminate Planks
If a plank has loosened, start by lifting the trim edge or baseboard near the seam to access the gap. You’ll reseat it by aligning tongue and groove with neighboring planks, then gently press down along the seam until the row sits flat. Check for a solid lock and run a quick sweep to confirm evenness.
Use a tapping block if needed to avoid edge damage, and keep the surface clean to prevent debris from causing lift again. For aesthetics, consider color matching and how flooring stains could affect appearance after reseat.
- Clear debris and align the plank precisely
- Apply even pressure across the seam until it clicks
- Inspect for flush, gap-free seating and consistent color tone
When to Glue Loose Laminate Pieces
You should glue loose laminate pieces when you notice a gap that won’t stay seated after reseating, or when a planks’ tongue-and-groove lock shows visible separation.
Before you glue, clean the area and dry-fit the piece to confirm it stays in place.
Use a laminate adhesive suited for floating floors, apply a thin bead along the edge of the plank, and press firmly until it seats.
Wipe excess adhesive immediately to prevent residue on the surface.
If color variation is noticeable, consider color matching to minimize contrast, and avoid overusing glue on visible seams.
For rooms with decorative accents, test a small hidden area first.
Limit glue to problem spots, then recheck for lift or movement after installation.
Tongue-and-Groove: Seams and Edge Repairs
Seams aren’t hidden by chance, they move when you walk, so start with alignment checks and adjust planks for a tight fit.
For edge repairs, keep cuts straight and use a scoring or tapping technique to seat damaged pieces without forced pressure.
We’ll cover seam alignment tips and edge repair techniques to keep your laminate looking seamless.
Seams Alignment Tips
Over time, misaligned tongue-and-groove joints can show gaps or buckling, so start by checking each row as you go and adjust before the adhesive sets. You want tight, flush seams that resist lifting, not gaps that trap moisture. Keep your color coordination in mind when selecting filler or touch-up colors, so repairs blend with the surrounding planks.
Pay attention to edge transitions and avoid forcing pieces past their natural stops. For best results, plan furniture placement after seams settle, since shifting items can stress seams anew.
1) Pause, align, and tap seams with a rubber mallet until they sit flush.
2) Inspect every other row for misalignment and correct immediately.
3) Reinstall heavy furniture only after seams are fully stable.
Edge Repair Techniques
Edge repairs require precise handling of exposed edges and damaged tongue-and-groove joints to prevent moisture intrusion and maintain a tight fit.
You’ll fix gaps by inspecting the damaged edge, removing loose fragments, and cleaning the joint. Apply matching laminate adhesive along the groove, then press the damaged panel back in place, ensuring the tongue seats fully.
Use a small block of wood to guide rotation and avoid bending the plank. If edge swelling exists, clamp gently and allow the adhesive to cure fully before walking on the area.
Lightly sand the repaired edge to blend with surrounding planks, then wipe away dust. For a seamless look, consider color matching and style coordination with adjacent boards and trim.
Recheck seams and test moisture resistance before resuming normal use.
Repair Edges Without Replacing the Whole Floor
If an edge is damaged but the rest of the laminate is solid, you don’t have to tear out the whole floor. You can repair the edge with a simple patch, adhesive, or backing strip to hide the flaw and keep the room usable while you save for a full replacement later.
Focus on a clean seam, matching color, and securing the edge so it doesn’t lift again. Plan layout around color coordination and furniture placement to minimize attention to the repair.
- Align the patch with neighboring planks, then secure it firmly.
- Use color-matched adhesive and a light touch to blend the repair.
- Reassess placement of rugs and furniture to conceal the area.
When to Replace Damaged Boards vs. Repair
You’ll assess whether to replace or repair by weighing the damage, cost, and impact on the floor’s appearance.
If the boards are warped, cracked, or swelling beyond quick fixes, replacement is the practical choice.
Minor scratches or warped edges may be repaired.
Start by evaluating the extent of damage and the overall condition to decide between repair or replacement.
When To Replace
When a laminate board is chipped, swollen, or cracked beyond simple lift-and-replace fixes, you should replace it rather than attempt a fragile repair.
You’ll save time and avoid future failures by choosing a matching board that fits the existing color and texture.
Replacing at the first sign preserves the floor’s uniform look, color options, and resale appeal.
Check your flooring warranties to confirm coverage and proper installation requirements before ordering replacement planks.
Note: If you’re unsure, consult the manufacturer’s guidelines to ensure compatibility and proper underlayment.
A clean, precise replacement reduces edge lifting and minimizes ongoing maintenance, keeping your space cohesive and durable.
Repair Or Replace?
Damaged boards don’t always mean you must replace the whole floor. You weigh repair versus replacement by cost, effort, and the board’s role in the pattern.
If a few boards are warped or chipped, patching or spot-replacing with a matching plank can suffice, especially when substitutes exist in your color range. When choosing repair, you prioritize minimal disruption and seamless appearance, using precise cuts and adhesive suitable for laminate.
If damage travels beyond a single row, or the core structure is compromised, replacement is more predictable and durable.
Remember color matching matters for a seamless look, and material selection should align with your existing wear layer and profile.
Assess feasibility, budget, and long-term performance before committing to a full swap.
Assessing Damaged Boards
Often, you’ll reach a decision by weighing how widespread the damage is, how the board’s role fits the pattern, and whether repair can restore appearance and strength without compromising the floor.
When evaluating damaged boards, focus on whether the flaw is localized or widespread, and if replacement matches the surrounding modules for Flooring aesthetics. Consider the subfloor condition, click integrity, and moisture history to guide material selection.
1) If a single board or two are buckling or swelling, repair with replacements that match color and texture to preserve unity.
2) If multiple boards show edge lifting or looseness, replacement is typically safer than spot fixing.
3) If damage threatens structural support or adjacent planks, opt for full-row replacement to maintain consistency and durability.
Preventive Steps to Keep Laminate Stable
Preventive steps keep laminate stable by controlling moisture, weight, and movement. Start with moisture: place mats at entry doors, wipe spills immediately, and maintain indoor humidity around 35–50%. Use dehumidifiers in damp areas and vent kitchens and laundry rooms.
Next, weight and traffic: use furniture pads, avoid dragging heavy items, and distribute loads with wide feet or coasters. Place area rugs in high-traffic zones, ensuring edges lie flat to prevent peeking planks.
Maintain stability by securing long runs with expansion gaps, and trim rugs to prevent buckling. Regular cleaning prevents surface swelling—dampen, don’t soak, and dry promptly.
For appearance, consider color matching and aesthetic considerations when choosing replacements or add-ons, ensuring new pieces blend with existing tones for a seamless look.
How to Handle Recurring Lift in a Dry Room
When a dry room still shows recurring lift, start by confirming the moisture source and the length of each lift. Then, log the drying progress and set a concrete target for humidity levels before proceeding. You’ll address the root cause quickly, so repeats don’t derail the project. Use color coordination to mask temporary fixes and align with current flooring trends for a cohesive look while you test.
- Identify the moisture source, seal it, and recheck humidity to prevent future lifts.
- Time repairs to match stable moisture readings; avoid rushing, document results.
- Choose interim fixes that blend with décor, so your space remains appealing during stabilization.
This approach keeps you practical, decisive, and focused on long-term stability.
DIY vs. Pro: What to Consider for Repairs
Start by weighing the scale of the repair and your comfort with risk. DIY can save money and speed, but major lift or water damage may need a pro to avoid further harm.
If you’re handy, you can reseat panels, apply proper adhesive, and replace damaged planks, focusing on keeping laminate durability intact.
For complex fixes, a pro guarantees correct underlayment, flashing, and floating-floor tolerances, preserving stability and reducing future lifting.
Consider whether you have the tools, time, and ventilation for adhesives and dust control.
If the project affects multiple boards or reveals a water source, a professional assessment may protect flooring aesthetics long term.
Balance cost, skills, and potential downtime to decide the best route for your laminate.
Maintenance to Maintain Laminate Lifting Control
To keep laminate from lifting, establish a simple maintenance routine that targets moisture, movement, and surface wear. You’ll guard against expansion by wiping spills immediately, using mats at entrances, and keeping humidity steady. Regular checks for loose seams let you catch issues before lifting spreads.
When moving furniture, lift rather than drag, and place felt pads to minimize friction. Clean with a damp, not soaking, cloth and use gentle cleaners to preserve decorative patterns and color matching.
- Schedule a monthly inspection of edges and seams to spot early lift signs.
- Re-seat loose boards promptly and reseal with manufacturer-recommended adhesive.
- Choose decor-safe cleaners that preserve patterns and tone without dulling finish.
Frequently Asked Questions
Can Laminate Lifting Indicate Structural Floor Movement?
Yes, it can indicate floor movement. You should check floor expansion and subfloor stability, look for gaps or squeaks, and confirm the structure isn’t shifting before refitting the laminate to prevent future lifting.
Do Temperature Changes Cause Ongoing Lifts, Not Just Moisture?
Did you know 60% of lifts relate to temperature-driven floor expansion? Yes, temp changes can cause ongoing lifts, not just moisture. You’ll want to manage climate impact, seal gaps, and control humidity for stable laminate floors.
Can Underlayment Choice Alone Fix Recurring Lifts?
No, underlayment choice alone won’t fix recurring lifts. You’ll need proper flooring adhesion and durable underlayment. Check seams, moisture, and installation, ensuring underlayment durability supports the system and provides a solid, continuous layer for stability.
Is There a Safe Temporary Fix for Active Leaks?
Yes. If you’re dealing with an active leak, apply a floor sealant as a temporary fix and lay a moisture barrier to protect adjacent panels, then monitor for ongoing moisture and schedule professional repair soon.
When Should I Consult a Professional for Repair Vs Replacement?
You should consult a professional for replacement when damage affects structure or multiple areas, otherwise consider repair. Also factor in furniture rearrangement and storage considerations to minimize future laminate stress and prolong flooring life.
Conclusion
You’ve got the power to stop laminate lifting in its tracks. Fix the moisture, seal the leaks, and control humidity like a pro. Align boards, respect acclimation rules, and don’t skip the gaps. If the lifts keep coming, call in a pro—your DIY hero cape only goes so far. Stay vigilant with spills, mats, and vents. With the right steps, you’ll keep floors flat, durable, and looking sharp—no more buckling drama.