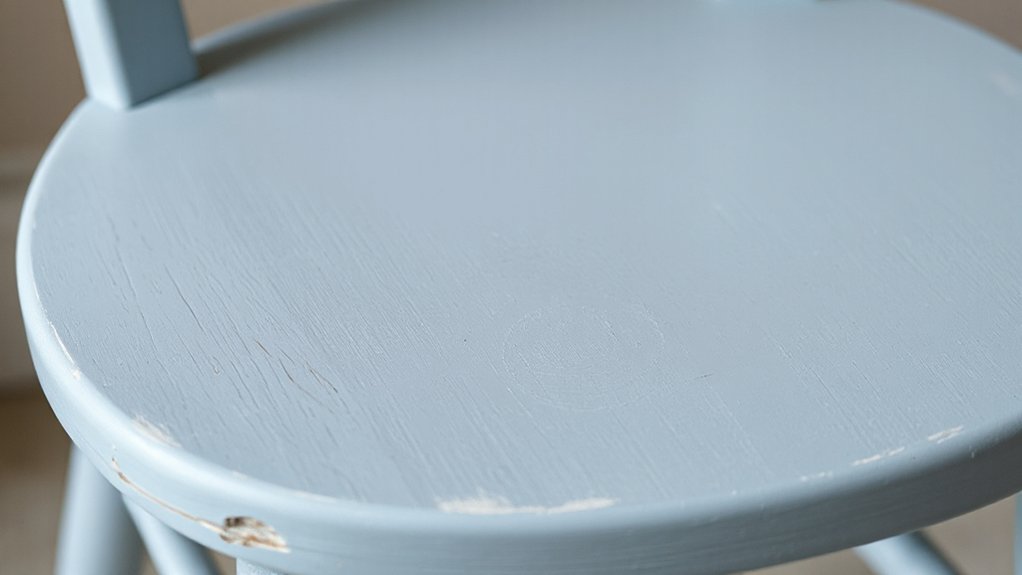

Refinishing furniture with chalk paint gives you a durable, velvety finish that hugs detail and hides wear, with minimal priming. Start by cleaning and deglossing to boost adhesion, then plan a color scheme that fits your space. Use quality brushes, sand lightly between coats, and apply thin layers for even coverage. Choose a wax or polycrylic topcoat to protect your piece, and distress strategically for character. With these steps, you’ll master a timeless, low-fuss look that’s sure to inspire—more tips await.
Key Takeaways
- Chalk paint provides a matte, velvety finish with strong adhesion and minimal priming for furniture surfaces.
- Clean and degrease the piece, lightly scuff glossy areas, and prepare with sandpaper or a deglosser for better paint grip.
- Plan color scheme with a dominant base, supporting neutrals, and a contrasting accent; test samples under various lighting.
- Use layering: base shade, midtones, and highlights; distress selectively for authentic, vintage character.
- Seal with wax or polycrylic after curing; maintain with proper cleaning and periodic re-waxing or re buffing as needed.
What Chalk Paint Is and Why It Works on Furniture
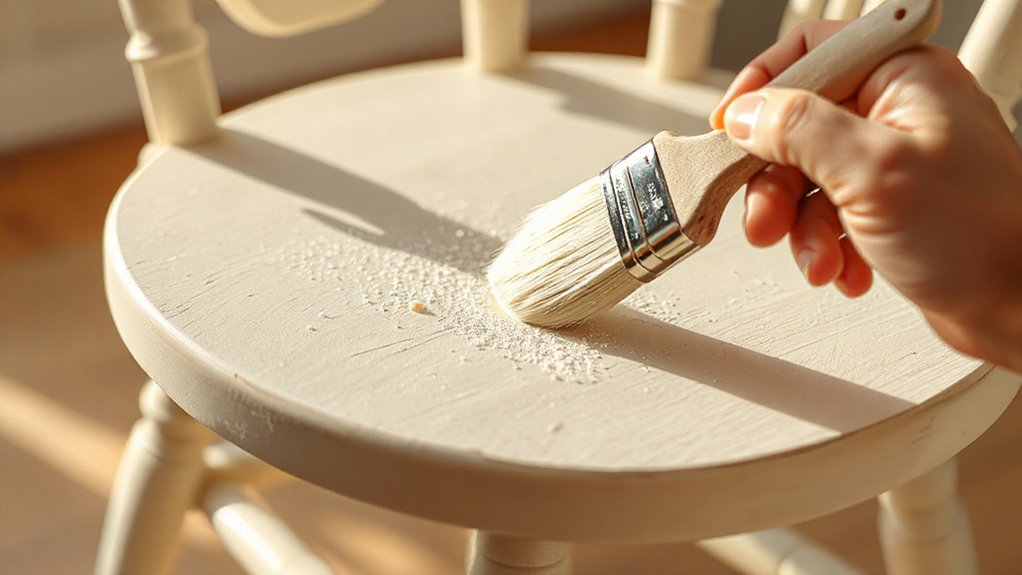
Chalk paint is a thick, matte latex paint that contains calcium carbonate or chalk, which gives it a velvety finish and excellent grip on bare or glossy furniture. You’ll appreciate its forgiving nature: minimal priming, strong adhesion, and easy blending.
The formula’s texture lets you skim over uneven surfaces while maintaining coverage, so you can reclaim character without stripping. Color mixing lets you tailor shades on the fly, reducing waste and expanding options for matching or updating pieces.
In furniture restoration, you control patina and distressing by layering, timing, and gentle abrasion, all without harsh chemicals. You’ll achieve a durable, matte finish that accepts wax or topcoat for protection.
This balance of ease, versatility, and tangible results makes chalk paint a practical choice for refinishing.
Choosing Chalk Paint Brands and Finishes
Consider whether a tinted primer is needed for consistent color, and whether the line offers a true flat or low-sheen option that matches your desired Decor color.
Finish sheen matters for durability and washability, so pick a product that suits daily use and clearance between coats.
Assess drying times to fit your schedule, and verify compatibility with wax or polyurethane topcoats if you plan long-term protection.
Informed selections reduce surprises and help you achieve a smooth, professional look without sacrificing ease of use.
Prepare the Piece: Cleaning and Deglossing for Better Adhesion
Before you start painting, give the surface a thorough cleaning to remove dust, oils, and grime that can guarantee drag on adhesion.
Then, degrease or wipe with a pin-mole solution as needed, focusing on tricky areas like hardware holes and crevices.
This prep ensures the chalk paint sticks cleanly and yields a smooth, durable finish.
Clean Before Painting
Is your furniture ready for chalk paint? Start by a thorough clean to ensure proper adhesion and a flawless finish. Wipe down surfaces with a mild, non-greasy cleaner to remove dust, oils, and grime, then rinse with a damp cloth and air-dry.
For stubborn residue, use a gentle scrub with a soft sponge, avoiding harsh abrasives. Lightly scuff glossy areas with fine sandpaper to promote sticking, but don’t over-sand; you’ll dull details.
If your piece has vintage charm or intricate carvings, clean into crevices with a soft brush. After drying, assess for any remaining shine; if present, repeat degreasing before painting.
Clean prep minimizes peeling, enhances color blending, and helps the finish look intentional rather than patched.
Deglossing For Adhesion
Deglossing helps guarantee chalk paint bonds firmly by removing the glossy layer that can resist adhesion. Before you start, wipe the piece with a damp cloth to remove dust, then use a deglosser or mineral spirits according to manufacturer directions.
You should avoid solvents that leave residues that interfere with bonding. Work in a well-ventilated area and wear gloves for protection.
Apply the deglosser with a clean, lint-free cloth, rubbing evenly to lift the sheen without saturating the wood. Allow to dry completely, then proceed to light sanding if needed to create a micro-porous surface.
Deglossing supports vintage distressing and color layering, ensuring even uptake of pigment. This step reduces peeling risk and yields a smoother, durable finish.
Plan Your Color Scheme
Choosing a color scheme sets the tone for your refinished piece, so start by noting how the room’s lighting, existing décor, and your personal style influence your color choices.
Plan thoughtfully to avoid clashes and maximize cohesion across furniture and surrounding decor. Color inspiration should come from what you already own, then be refined into a practical palette.
Prioritize palette harmony by selecting a dominant color, a complementary secondary, and an accent for contrast.
- Identify a dominant hue that feels timeless and ties into the room.
- Choose a secondary color for balance that supports the dominant shade.
- Pick an accent that provides a pop without overpowering.
- Test samples under different lighting before committing.
Tools and Supplies You’ll Actually Use
You’ll start with quality tools and a focused supplies list that stay practical for chalk paint projects. Prioritize a few reliable brushes, a lint-free rag, and a sleeve of fine-grit sandpapers.
Plus, a compatible sealant and cleaner. With the right basics in hand, you’ll work efficiently and achieve smoother, longer-lasting results.
Quality Tools Selection
Quality tools don’t have to break the bank, but they do need to be reliable and suited to the job. When you’re renovating with chalk paint, the right tools save effort and improve results. Focus on durability, comfortable grips, and easy cleanup to keep furniture restoration tasks efficient and enjoyable.
- High-quality wax brushes
- Fine-grit sanding blocks or discs
- Synthetic bristle brushes for smooth coats
- soft microfiber cloths and tack cloths
These essentials support clean color coordination and even application, without crowding your project space. Choose a small, medium, and large brush set to cover edges, contoured surfaces, and broad areas. Keep a polishing cloth for final touches.
With dependable tools, you’ll achieve crisp lines, minimal brush marks, and professional-looking finishes that highlight the furniture’s character.
Essential Supplies List
To tackle chalk‑paint refinishing efficiently, assemble a focused set of supplies you’ll actually use. Start with quality brushes: a 1–2 inch sash brush for edges, a larger flat brush for broad surfaces, and a small angled brush for detailing.
Keep a microfibre cloth, roller or foam brush for even coats, and mineral spirits for cleanups. Use medium-grade sandpaper or a sanding sponge to scuff surfaces between coats.
Have painter’s tape, drop cloths, and a soft tack cloth to prevent dust. Choose a stain or soft wax for protection, plus a clear wax option for a subtle finish.
Reference furniture styles and paint color palettes when planning, so you select compatible hardware, glaze, and distressing techniques that feel cohesive and durable.
When to Prime Chalk Paint
When should you prime chalk paint? You prime when your project demands durability, even color, or a flawless base. Priming necessity becomes clear on porous woods, old surfaces, or when you’re changing dramatically from dark to light.
Surface preparation is critical before any paint lands; skip it and expect standout grain, stains, or tackiness. If you’re applying white or light tones over stained or varnished wood, prime first to prevent bleed-through.
If the piece has peeling finish or slick surfaces, primer helps adhesion and longevity. For small, clean, sealed surfaces, you may skip priming, but treat bare or uncertain areas with a compatible primer.
- Assess surface porosity and stain history
- Clean and de-wax thoroughly
- Choose a compatible primer for chalk paint
- Test adhesion on a hidden spot
Techniques for a Smooth, Velvety Finish
Achieving a smooth, velvety chalk paint finish starts with proper surface prep and careful technique. Begin by dusting and cleaning, then scuff-sand in small, even circles to create bite without gouging.
Use a high-quality brush or roller designed for chalk paint to lay down a thin, uniform layer. Work in sections, maintaining a wet edge to avoid lap marks.
If you’re aiming for vintage charm, don’t overwork the surface; slight texture adds character. For color blending, apply a base coat and lightly blend in a second hue while the first is damp, using gentle, feathered strokes.
Seal with a compatible wax or topcoat after cure, and avoid heavy pressure that dulls the velvet finish. Patience and controlled motions yield the most refined result.
Create a Distressed, Vintage Look
A distressed, vintage look emerges most convincingly when you selectively reveal the piece’s natural character—bare wood, underlying grain, and subtle wear—after your base chalk paint has cured.
You’ll balance color and texture with controlled distressing to achieve authenticity, not heaviness, using precise tools and timing. Focus on edges and high points to expose warmth beneath, while preserving intact panels where needed for contrast.
Maintain a quiet, deliberate approach so vintage techniques feel deliberate rather than accidental. Seal with a compatible wax or satin finish to lock in the distressed textures and unify the surface.
Practice on scrap before tackling furniture you value, and adjust pressure to control reveal and depth.
- Selective distressing at edges
- Gentle wear on corners
- Bare-wood exposure in focal areas
- Finishing for cohesive patina
Layer Colors for Depth
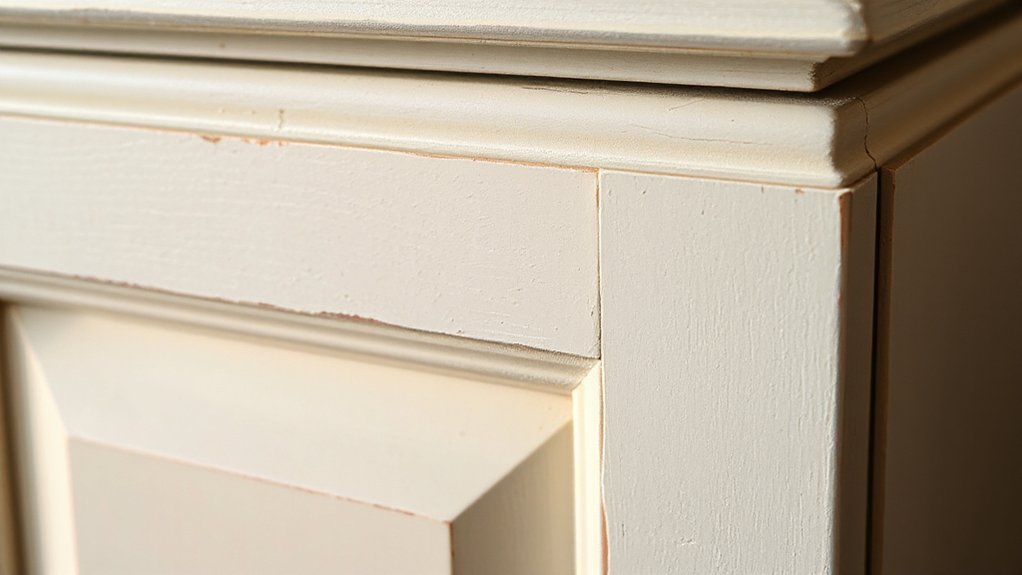
Layering colors adds depth by building subtle, interwoven tones that mimic natural aging. You’ll layer chalk paint in staggered passes, letting each color peek through where light plays on the surface.
Begin with a base shade that aligns with the piece’s undertone, then add midtones to emphasize contours and panel edges. Use quick, directional brushstrokes to create natural grain hints without overworking the finish.
Color blending happens on the surface as you brush, slightly overlap layers, and wipe back where necessary to avoid harsh lines. Emphasize texture layering by incorporating a contrasting highlight along raised details and a muted shadow in recessed areas.
Allow each layer to set briefly, then assess contrast and harmony before sealing. This approach yields depth without sacrificing authenticity.
Wax vs Polycrylic: Pros and Cons
Wax and polycrylic are both viable protective finishes for chalk-painted furniture, but they behave differently and suit different goals. You weigh appearance, durability, and maintenance when choosing between them for your project.
1) Finish feel and look: wax adds a soft, velvety sheen that deepens color, while polycrylic delivers a crisper, more film-like surface.
2) Paint durability: polycrylic generally resists moisture and scuffs better, whereas wax requires reapplication to maintain protection.
3) Maintenance: wax needs periodic buffing and re-waxing; polycrylic cleans with mild soap and water.
4) Furniture style: wax suits antique or shabby chic aesthetics; polycrylic suits modern or high-contrast schemes.
Consider long-term care and expected use when deciding.
Wax Application Tips for Durability
A durable wax layer starts with even coverage, using light, overlapping passes to build a consistent finish.
Focus on ideal wax techniques like controlled heat, gentle pressure, and mindful buffing to boost longevity.
Durable Wax Layer Tips
To guarantee lasting protection, apply a thin, even coat of wax and allow it to cure fully before buffing to a soft sheen. You’ll maximize durability by layering strategically and maintaining a steady hand during application.
1) Work in a dust-free space, and wipe surfaces with a clean microfiber before waxing.
2) Use minimal wax for high-traffic areas, and build only as needed to avoid globs.
3) Allow ample cure time between coats, then buff gently to a smooth finish.
4) Inspect for uneven patches; repair with a light touch and consider matching a Vintage hardware aesthetic or subtle paint color mixing to harmonize tones.
Optimal Wax Techniques
If you want durability, start with a thin, even wax layer and let it cure fully before buffing to a soft sheen. Begin with a clear wax to seal chalk paint, then add color selectively for depth.
Work in small sections, applying with a smooth, circular motion to avoid streaks. Use a quality brush or cloth, and avoid overworking—wax builds, not presses in.
Allow the layer to cure according to product instructions, usually 12 to 24 hours, before handling.
For vintage charm, selectively blend waxed tones at edges and raised details, using a lighter shade where light hits. When setting color, blend promptly to prevent harsh lines.
Finish with a light buff to achieve a satin, durable surface.
Longevity Through Buffing
Ever wonder how to make wax last on chalk-painted furniture? Buffing locks in durability, seals the finish, and enhances either gloss or a matte vintage look.
Start with clean, dry surfaces and proper surface prep to prevent dust or residue from affecting adhesion. Use a high-quality wax and a natural fiber pad, applying thin coats that you can buff to the desired sheen.
Let each layer cure before the next, minimizing squeaks and wear. Consistent buffing builds a protective barrier without overworking the paint.
Remember, patience and precision matter for long-lasting results.
- Prep first for superior adhesion and vintage charm
- Apply thin, even wax layers, allowing cure time
- Buff gently in small circles until you reach the desired sheen
- Maintain by light re-buffing when wear appears
Sealing With Dark Wax for Aging and Contrast
Dark wax seals and ages the piece, adding depth and contrast when you want antique character. You apply it after your chalk paint is fully dry and sanded smooth, using a soft cloth or brush to rub the wax into recesses, edges, and details.
The goal isn’t heavy coverage but selective emphasis; wipe away excess promptly to prevent smear or residue. As it dries, the dark patina builds richness, enhancing shadows and highlighting raised surfaces.
For color blending, work in small sections, blending the wax into lighter areas to create subtle gradations. Employ distress techniques sparingly to avoid over-darkening.
Buff lightly with a clean cloth to lift sheen only after the wax has cured, ensuring a durable, refined finish.
Common Chalk Paint Fixes
1) Tighten a loose edge with a lightweight bead of adhesive and a clamp, then touch up with matching paint texture.
2) Even out thin spots by applying a fine, thin layer and blending with a dry brush for subtle texture.
3) Blemishes or brush marks? Lightly mist and rebrush in the direction of the grain for a smoother surface.
4) Minor chipping? Feather the edge with a small brush and reinterpret the finish with a compatible glaze or wax.
Proceed with confidence, maintaining a deliberate, polished result.
Handling Knots, Resin, or Metal Surfaces
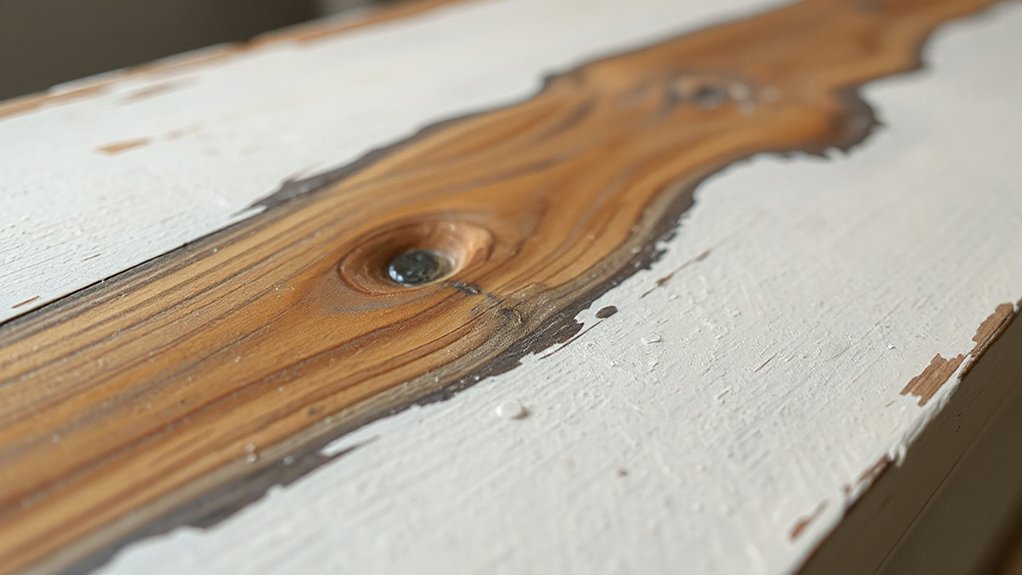
For knots, apply a knot-inhibiting primer to prevent tannin bleed; you’ll see the resin or sap blocked before you paint.
Metal surfaces need a rust-inhibiting primer and thorough deoxidation; wipe with alcohol to remove oils. Sand lightly with fine grit to create a key, then wipe dust away.
When applying chalk paint, use thin, even coats and allow each coat to dry completely to avoid lifting.
Finish with a compatible sealer to protect the pine, oak, or maple from future moisture and wear.
Tackling Shiny Finishes or Old Varnish
- Degloss with a dedicated cleaner or fine-grit sandpaper until the sheen is dull.
- Wipe clean, dry, and inspect for remaining slick spots; spot-treat stubborn areas.
- Prime if needed with a chalk-based bonding coat to improve grip and even absorption.
- Apply chalk paint in thin, consistent layers, alternating directions for depth and a refined finish.
This approach preserves vintage charm while delivering smooth color blending and lasting results.
Drying Times and Weather Considerations
Drying times for chalk paint depend on temperature, humidity, and ventilation—and you can optimize results by pairing a steady indoor climate with light, even coats. In practice, expect 20–40 minutes between light passes, and 1–2 hours before handling, longer for cooler rooms.
Humidity slows curing, so aim for a stable environment around 60–70°F (16–21°C) when possible. If you’re painting outdoors, choose a calm, dry day and avoid direct sun, wind, or sudden heat shifts.
Quick-dry tricks include sanding between coats only when the surface is dry to the touch and maintaining consistent ambient conditions. Plan ahead for longer drying when you’re mixing paint colors, as color blending can extend cure times.
This approach supports furniture restoration with predictable results and minimizes touch-ups.
Care and Maintenance of Your Finished Piece
Maintaining a chalk-painted finish is straightforward when you treat it with consistent care. With proper upkeep, your piece stays vibrant and durable, resisting everyday wear while preserving color integrity.
Regular cleaning and minimal moisture exposure protect the painted surface without harsh abrasives. When you notice slight shine loss or micro-scratches, a light touch with the original paint or a compatible wax maintains depth and luster.
Avoid aggressive cleaners that can erode the finish; opt for a soft cloth and mild soap if needed. Protect high-traffic areas with felt pads and avoid direct heat or prolonged sun.
For long-term value, document restoration steps and touch-ups, reinforcing furniture restoration best practices and paint durability.
- Clean gently and routinely
- Shield with pads and away from heat
- Touch up only as needed
- Record care and repairs for future reference
A Budget-Friendly Refinishing Workflow
When you tackle a budget-friendly refinishing workflow, start with choosing practical Materials And Tools that fit your project and store-bought or DIY options for prep and sanding.
I’ll guide you through efficient Prep And Sanding steps that minimize work while maximizing adhesion, followed by simple Finishing And Waxing routines that protect your piece without breaking the bank.
This approach keeps the process clear, cost-conscious, and repeatable for future projects.
Materials And Tools
To refinish furniture on a budget, start with a lean, well-chosen toolkit: chalk paint, a few brushes, a sandpaper assortment, a high-adhesion primer if needed, and a clear topcoat. Your materials should balance performance with price, emphasizing vintage inspiration and color psychology to guide your choices. Keep tools simple, durable, and easy to replace.
- Chalk paint variety (matte finish options for depth)
- Natural-bristle brushes (0.5–1 inch for detail, larger for panels)
- Sandpapers (80–220 grit, plus a sanding sponge)
- Primer and sealer (bonding primer if needed, water-based topcoat)
Prep And Sanding
Lightly inspect for damage; minor repairs save money later. When sanding, choose a chalk-paint-friendly grit: start with 120 or 150 to remove the old finish without gouging, then progress to 180 for a smooth base. Wipe down with a tack cloth between passes to keep dust low.
If you encounter stubborn finish, a quick mineral spirits wipe helps without stripping character. This approach supports antique restoration aims and fits Modern decor palettes, yielding a reliable, ready-to-paint surface.
Finishing And Waxing
Now that the surface is prepped, you’re ready to seal the look with a budget-friendly finishing and waxing plan. You’ll control shine, protection, and color harmony in a few simple steps, keeping the process efficient and durable. Focus on even application, minimal atmosphere for dust, and mindful color mixing to achieve the desired tone.
Pair wax with chalk paint for a soft luster and easier touch-ups, while antique distressing adds character without compromise. Use a clear wax for the final seal or a tinted option to deepen depth. The goal is a resilient finish that’s easy to maintain and repair over time.
- Prepare tools and workspace, then select a wax type and color mix.
- Apply wax in small, circular motions for uniform coverage.
- Buff to reveal subtle shine and depth.
- Inspect, touch up, and label care guidance.
Real-World Project Walkthrough: Start to Finish
Begin with a clear plan: set a realistic goal for your piece, gather your tools, and lay out each step from prep to finish. You’ll approach a real-world project with discipline: evaluate the furniture’s condition, choose a compatible chalk paint, and estimate timeframes.
Prep method matters as much as the finish, so you’ll sand lightly, clean thoroughly, and protect surrounding surfaces. Apply a thin, even coat, letting it dry fully before assessing coverage. If you spot imperfections, touch up with a careful second coat.
Finish with a protective topcoat, then cure before use. Throughout, prioritize historical preservation by honoring original lines and patina where appropriate.
Favor eco-friendly paints and low-odor options to minimize impact while delivering durable results your space can admire.
Upcycling Mindset: Planning Future Chalk Paint Projects
Cultivating an upcycling mindset starts before you pick up a brush: plan your chalk paint projects with intent, focusing on longevity, versatility, and impact. You’ll build a practice around Sustainable sourcing and Creative inspiration, ensuring each piece serves multiple roles and endures beyond trends.
- Define goals for each project—function, style, and resell or donation potential.
- Audit materials and sourcing options to favor sustainable suppliers and local availability.
- Sketch layouts and color palettes that maximize compatibility with existing décor.
- Create a flexible project calendar that accommodates repurposing opportunities and seasonal themes.
Frequently Asked Questions
How Long Does Chalk Paint Finish Realistically Last?
Chalk paint finishes typically last several years, depending on prep and topcoat. You’ll extend color durability and finish longevity by sealing with wax or polyurethane, applying evenly, and avoiding heavy wear areas. Regular cleaning helps preserve the look.
Can Chalk Paint Be Used on Outdoor Furniture?
Yes, you can use chalk paint on outdoor furniture. It’s not inherently weather-resistant, so seal with a durable topcoat. You’ll gain weather resistance and color durability, but recoat periodically to keep your setup looking sharp and resilient.
Is Sanding Between Coats Always Necessary?
Sanding between coats isn’t always necessary, but it improves smoothness. You should assess sheen and texture first. Preparation techniques like light sanding and dust removal help. When choosing paint color, consider base shade and finish for best coverage.
Will Chalk Paint Peel on High-Use Surfaces?
Like a shield, chalk paint durability depends on prep. You’ll minimize peeling on high-use surfaces by thorough Surface prep techniques, then sealing. Yes, it can peel without proper prep and topcoat, so follow steps, maintain, and recoat when needed.
How to Fix Stained or Faded Color Mistakes Quickly?
Color correction helps you fix stained or faded color mistakes quickly; start with stain removal, then apply a fresh coat. You’ll buff gently, seal, and test a small area first to confirm even color before finishing.
Conclusion
Chalk paint isn’t magic, it’s momentum—easy to start, hard to stop once you see the transformation. With gentle hints of color and patient, even imperfect edges, your piece becomes a quiet star in the room. You’re not saving money alone; you’re slowing time, preserving character, and inviting touch. So lean into the process, accept small flaws as charm, and let the finish whisper, not shout. Your furniture will thank you with renewed life and daily purpose.