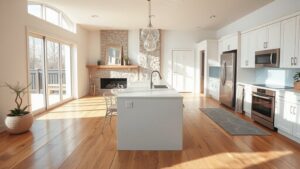
A side return extension can change a home’s footprint, but the price isn’t one-size-fits-all. You’ll weigh footprint, roof shape, finishes, and how much structural work you’re willing to tackle. Materials, labor, and planning permissions all push costs up, while solid design choices can save you money down the line. Start with a clear scope, get multiple quotes, and build in a contingency. Curious about what your project might actually require and cost? Let’s map it out.
Will a Side Return Extension Work for You? Key Concepts
A side return extension can add valuable space and light to your home, but it isn’t right for every layout. The key concept is alignment: your existing footprint and roofline must tolerate the extra width without compromising circulation. You’ll want to confirm load paths, foundations, and party-wall responsibilities before planning.
Consider how the new area will interact with doors, windows, and stairs, since awkward adjacencies waste potential. Think about constraints like drainage, party-wall agreements, and local planning constraints that can guide or halt progress.
Structural feasibility often hinges on how the existing building supports extra weight and how utilities run. If you value natural light and seamless living zones, a side return can fit, yet it’s not a universal fix.
Evaluate site, budget, and long-term needs to decide.
Design Options and How They Change the Cost
Design options for a side return extension mainly hinge on how you shape the roof, floor plan, and finishes, and each choice nudges the price in a predictable direction. You’ll see costs rise with taller, more complex roofs or multiple pitches, while simple flat or lean-to forms keep labor and materials leaner.
The layout affects space use, daylight, and structural work, so minor tweaks can shift overall project timing and price.
Finishes—from basic plaster and common tiles to premium cladding, glass, and statement doors—drive finish costs more than rough carpentry. Keep in mind window sizes and door locations influence glazing, insulation, and thermal performance, which in turn affect long-term running costs.
In short, design choices set the baseline, then refinements push it up or down.
Key Price Drivers for a Side Return Extension
The shell’s footprint and access options matter too: a larger extension, higher ceilings, or multiple openings raise labor and material costs.
Roof design and insulation quality influence long-term performance and upfront spend, especially if you choose a velodrome-style pitch or triple-glazing.
Finishes drive visible value and price: premium timber or brickwork, high-end doors, and Kerb-level drainage add to the bill.
Services—plumbing, electrical, networking—and compliance work push up labor without changing the core structure.
Finally, site conditions, access, and warranty expectations shape quotes, so clarity here reduces surprises.
Budgeting Your Side Return Extension: A Practical Range
Budgeting your side return extension comes down to turning those drivers into realistic price bands you can rely on. Start with a target range rather than a single figure, then map your priorities to that band.
Define must-haves (width, roof type, openings) and nice-to-haves (bi-fold doors, finishing touches) so you can adjust the range without derailing the plan. Use a conservative lower bound for essential elements and a comfortable upper bound for extras you’d accept if funding allows.
Consider regional price quirks, permit costs, and potential site access issues that pressure the bottom line.
Create a simple worksheet: row of items, column for minimum, typical, and maximum.
Revisit the range as you refine drawings, ensuring your budget remains aligned with your vision.
Labor, Materials, and Construction Timeline
Labor, materials, and the construction timeline are intertwined, so you’ll want a clear plan upfront. You’ll estimate timelines by trade, sequencing tasks from foundations to finishes, and you’ll build in buffers for weather, delays, and ordering lags.
Material choices drive pace: doors, windows, and cladding affect lead times, so confirm availability with suppliers early.
Communication keeps things on track, so appoint a single point of contact for updates and decisions. You’ll coordinate with your contractor to lock in a start date, milestones, and weekly progress meetings.
Contingencies matter, so include a preliminary schedule with critical-path items and estimated durations. A well-ordered plan minimizes stoppages, controls costs, and helps you forecast the finish date as your project unfolds.
Permits, Financing, and Approvals You’ll Need
Before you start the Side Return extension, sort out permits, financing, and approvals you’ll need. You’ll likely need local planning permission or a permitted development notice, plus building regulation compliance. Check your council’s rules early to avoid delays.
If you’re in a conservation area or listed building, you’ll face stricter scrutiny and may need a detailed application.
Financing comes next: secure a mortgage, equity loan, or short-term loan with a clear budget and contingency.
Your project may require party wall agreements if neighbors are affected.
Hire a chartered surveyor or architect to prepare drawings and elevations for submission.
Once approved, confirm you’ve met insurance requirements and contractor warranties.
Plan your payments to align with milestones and inspections.
Hidden Costs and Risk Management
Hidden costs always pop up, so you should forecast them early and build a contingency into your budget. You’ll likely face unexpected site issues, such as hidden structural requirements or utility relocations, that can delay progress and add fees.
Set aside a realistic contingency—typically 10–20% of your project total—to cover surprises without jeopardizing cash flow. Keep a tight change-control process: document requests, approvals, and updated quotes before work continues.
Track contractor warranties and material lifespans to avoid premature replacements that blow your budget later. Schedule regular on-site reviews to catch errors early, minimizing rework.
Insist on clear contracts with payment milestones tied to completed milestones. Finally, align permits, inspections, and lender conditions with a risk register so you can respond swiftly if plans shift.
Get Better Value Without Sacrificing Quality
To get better value without sacrificing quality, focus on smart planning that aligns cost with performance from the start. Define clear goals for your side return: what rooms you’ll gain, how you’ll use natural light, and which materials satisfy durability needs without overkill.
Compare bids with a checklist: structural changes, insulation quality, window placement, and finish options. Prioritize systems that pay back over time, like efficient glazing and air sealing.
Consider modular or off-site elements to reduce labor time and waste. Negotiate inclusions and warranties upfront, and confirm scope in writing to prevent scope creep.
Schedule trades to minimize downtime and disruption. Revisit your plan mid-project to confirm decisions still meet your budget and quality expectations.
Conclusion
If you’re weighing a side return extension, you’ve got solid guardrails: expect $20,000–$60,000+ depending on size, design, and materials, plus potential planning, utilities, and finish-out costs. Prioritize clear quotes, contingency funds, and a realistic timeline. Choose a design that maximizes light and flow without bloating the budget, and don’t skip permits or approvals. With careful planning and smart value choices, you’ll boost space and value while keeping surprises to a minimum.