



To prepare for a home inspection, gather all property documents ahead of time—titles, permits, warranties, tax records, and a concise update summary with contact details. Do a thorough pre-inspection walkthrough: check exterior grading, doors, windows, lighting, and attic or crawlspace for leaks, pests, and insulation. Address safety hazards first—electrical outlets, GFCIs, gas venting, and trip hazards. Fix obvious maintenance, stage to improve visibility, and be honest about known issues. This approach keeps repairs, negotiations, and move-in plans clear as you proceed. You’ll learn more soon.
Key Takeaways
- Gather and review property documents (titles, permits, warranties) and create a one-page update summary for quick reference.
- Conduct a pre-inspection walkthrough, noting exterior grading, drainage, entry points, and attic/crawlspace conditions.
- Prepare a detailed inspection plan with a checklist to assess electrical, plumbing, HVAC, roof, and structural components.
- Bring notes, questions, and a pen to document findings, timelines, and follow-up recommendations during the inspection.
- Create a repair priority list labeling must-fix items, cost estimates, responsible parties, and proposed deadlines.
What the Home Inspection Covers

A home inspection assesses the condition of a property’s visible systems and components, focusing on safety, functionality, and potential defects. You’ll see what inspectors examine, from the roof and exterior to the interior, plumbing, electrical, and HVAC.
The goal isn’t perfection but risk assessment: identify safety hazards, existing flaws, and likely repair needs. Expect a written report detailing observations, photos, and recommendations with priority levels.
Structural integrity, moisture intrusion, and drainage receive close scrutiny, along with appliance operability and code compliance. The inspector notes maintenance items that affect performance and longevity, guiding you on essential repairs.
You’ll benefit from understanding how each area impacts value and safety, reinforcing your home maintenance habits. Accurate property documentation supports future decisions and negotiations.
Gather Your Property Documents Ahead of Time
Gather all relevant property documents before the inspector arrives to streamline the process and prevent delays. You’ll want clear, organized records ready for quick reference.
Start with current title documentation to confirm ownership and any liens, restrictions, or easements. Include a copy of the deed and any recent amendments.
Compile Property history, noting past renovations, permits, and compliance with local codes.
Gather recent tax bills and utility records to verify assessments and ongoing payments.
If you’ve had recent repairs, assemble contractor invoices and warranties.
Have warranty information for major systems (HVAC, electrical, plumbing) and appliance manuals when applicable. Bring copies for the inspector and keep originals secure.
Prepare a simple one-page summary of updates and dates to facilitate efficient review.
Make sure contact details are up to date in case questions arise.
Do a Thorough Pre-Inspection Walkthrough
You’ll start with a thorough walkthrough, using the checklist to guide your inspection. Check each key system as you move through rooms, noting any irregularities.
Record potential issues clearly so you can plan repairs or disclosures before the inspector arrives.
Thorough Walkthrough Checklist
Before you start, map out the entire walkthrough to guarantee no area is overlooked. This thorough walkthrough checklist guides you through essential checks without duplicating future topics.
Start at the exterior, inspecting foundations, grading, and entry points for water intrusion or damage.
Move indoors to doors, windows, and seals, confirming operability and weatherproofing.
Test lighting and outlets, then assess alarms, carbon monoxide detectors, and battery backups.
In kitchens and baths, verify venting, exhaust fans, and moisture control.
Check insulation in accessible spaces and review attic and crawlspace conditions for signs of leaks or pests.
Confirm smoke detectors, HVAC access, and obvious safety hazards are addressed.
Use this as a baseline for Homeownership tips and Maintenance routines, keeping notes for follow-up.
Stay concise, precise, and action-oriented.
Inspect Key Systems
Move inside to evaluate the electrical panel, outlets, and visible wiring for signs of wear or overheating. Inspect heating and cooling components for unusual noises, corrosion, or leaks, and verify thermostat responsiveness.
In the mechanical domain, look for damp patches, water stains, and confirm smooth operation of faucets and valves. Note any foundation concerns such as cracks or shifting floors, and assess basement or crawlspace conditions for moisture.
Finally, observe overall system functionality and accessibility, ensuring maintenance records exist for reference during Plumbing inspections and future repairs.
Document Potential Issues
Begin with a thorough walk-through to document potential issues before the inspector arrives. You’ll systematically verify fixtures, seals, and fittings, noting flaws you can address.
Check for water damage, stains, warped flooring, and peeling paint, then assess caulking around tubs, showers, and sinks.
Inspect electrical panels, outlets, and GFCIs for accessibility and labeling, recording any outdated components.
Look at HVAC filters, ducts, and insulation in reachable areas to flag efficiency concerns.
Test doors, windows, and locks for operation and weather sealing.
Document plumbing signs like leaks, drips, or corrosion, and verify moisture readings if you have a meter.
Compile clear notes for each area, linking findings to potential costs.
This Home maintenance focus supports accurate Property documentation and strengthens your preparedness.
Address Common Safety Hazards: Electrical, Gas, and Trip Hazards

Start by checking Electrical Safety Checks to guarantee outlets, cords, and panels are intact and up to code.
Then address Gas Hazard Mitigation by securing gas meters, shutting off valves if you smell leaks, and scheduling a pro if you’re unsure.
Finally, eliminate Trip Hazards by clearing clutter, securing loose rugs, and using proper lighting to spot risks.
Electrical Safety Checks
Confirm that all receptacles are properly grounded and that GFCI outlets exist in moisture-prone areas.
Check that circuit breakers align with labels and that the panel is free of corrosion or water intrusion.
Look for overloaded extension cords or daisy chains that can overheat, and verify cords are intact without fraying.
Maintain clear access to the electrical panel, with breakers tripped to reset if needed.
Document any concerns for the inspector, and avoid DIY fixes that could mask issues; hire a licensed electrician for repairs beyond basic troubleshooting.
Gas Hazard Mitigation
- Inspect connections for corrosion and tightness
- Verify proper venting and clearance around appliances
- Test gas detectors and shutoffs regularly
Trip Hazard Elimination
A quick follow-up after checking gas safety is to address trip hazards that can pose immediate risks in everyday use. You’ll inspect high-traffic areas for loose mats, cords, and rugs that puddle or curl.
Secure cables against walls and under furniture, using cable covers or cord channels to reduce snagging. Remove clutter from halls and doorways, keeping a clear path of at least 36 inches.
Make certain lighting is bright enough to reveal pits, thresholds, or uneven flooring. Check stair treads and handrails for stability, repairing loose nails or securing carpeting.
If you use extension cords, switch to properly rated, grounded options and never daisy-chain multiple cords. Address safety concerns promptly, and document fixes for the inspector to review.
Fix Obvious Maintenance Beforehand
Start by handling obvious maintenance issues before the inspector visits. You’ll reduce questions and speed the process by tackling small, visible fixes now. Focus on routine maintenance tasks that signal overall care, not perfection.
Address cosmetic repairs only where they’re noticeable, since minor flaws can detract from your home’s presentation without affecting safety or structure. Confirm exterior surfaces are clean, doors and windows operate smoothly, and obvious leaks are repaired.
Check lighting and outlets for function, and secure loose hardware. Keep documentation ready to show you stay on top of upkeep.
- Tidy the entryways and trim any overgrowth that blocks access
- Patch visible drywall flaws and touch up paint for a cohesive look
- Service HVAC filters and tighten fussy fixtures to reassure inspectors
Check Major Systems You’ll Be Asked About
Now that you’ve handled obvious maintenance, you’ll want to verify the major systems inspectors routinely check. Start with the roof, gutters, and drainage to prevent leaks that threaten home value.
Check the HVAC for age, efficiency, and proper operation; confirm filters are clean and temperature controls respond quickly.
Inspect electrical panels, breakers, and outlets for safety and compliance, noting any outdated components.
Verify plumbing lines, fixtures, water heater capacity, and pressure, looking for leaks or corrosion that could signal bigger issues.
Test appliances that stay with the home for functional reliability.
Review insulation and ventilation in key living areas to gauge energy performance.
Understanding these areas helps manage inspection costs and safeguards home value during negotiations.
Attend the Inspection and Take Notes
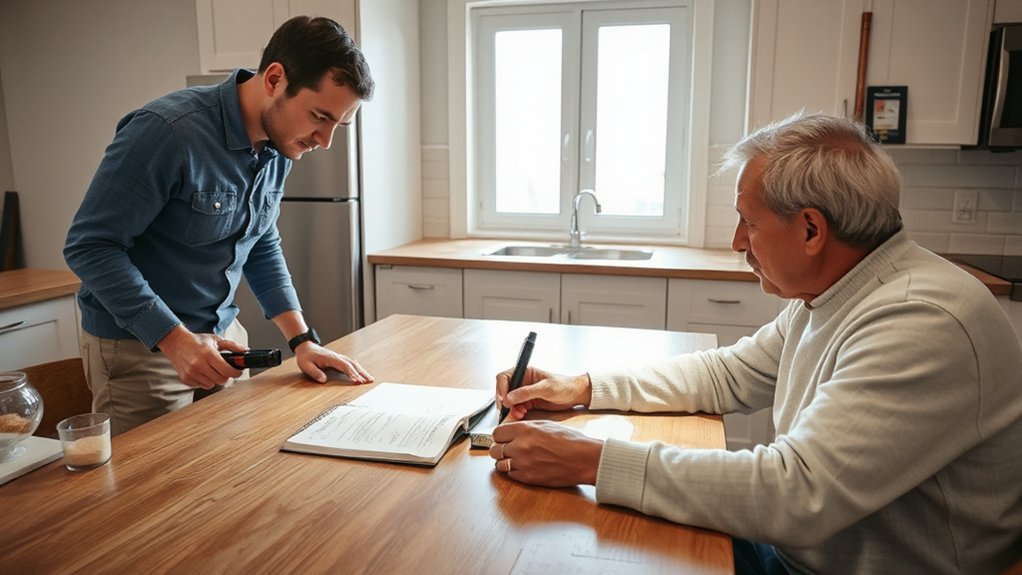
Attend the inspection with a plan: bring your notes from the major systems review, a checklist, and a pen to capture details and questions. During the walkthrough, stay focused on homeowner responsibilities and observe with objective questions. Note discrepancies, potential safety concerns, and obvious defects, but avoid overreacting to minor issues. Ask for explanations, timelines, and recommended follow‑ups, tying each item to practical consequences.
Track inspection timing and who signs off, so you know when decisions are needed. Bring photos or measurements for reference and reference any warranties or past repairs that relate to findings. Communicate clearly to the inspector and summarize next steps for your records.
- Stay organized with a running list
- Capture dates, costs, and responsible party
- Verify follow‑up actions and deadlines
Create a Clear List of Repairs and Priorities
Create a clear, prioritized list of repairs by cataloging each item with the urgency, cost range, and responsible party. You’ll map issues from the home inspection into actionable tasks, separating must-fix items from nice-to-fix enhancements. Use objective criteria: safety, function, and code compliance drive urgency.
Record estimated costs where available and note who’s responsible for initiation—you, a contractor, or a broker—so accountability is explicit. Align repairs to your budget, negotiating leverage, and timelines for closing or refinancing.
Keep the document concise: summarize each item, its impact, and a proposed deadline. A well-organized list reduces homeowner responsibilities ambiguity and speeds remediation.
Be mindful of inspection myths and avoid overestimating problems; focus on verifiable defects and affordable fixes.
How Inspectors Report Findings: What You’ll See and What It Means
Home inspectors deliver a detailed, itemized report that explains what they found, why it matters, and how it affects your plan to move forward. You’ll see clear sections, each tied to inspection terminology, with condition ratings, photos, and recommended next steps.
Reports follow established reporting standards, so language is consistent and decisions are easier to compare. Expect concise summaries, technical notes, and practical implications for your home’s safety and reliability.
You’ll learn what’s urgent vs. optional, and how defects could influence your bargaining power and timeline.
- Condition ratings and severity
- Supporting evidence and photos
- Recommended actions and next steps
Plan Repairs: Budget, Timeline, and Contractors

Before you begin work, establish a clear repair plan that ties your inspector’s findings to a practical budget, realistic timeline, and trusted contractors. You’ll translate defects into actionable steps, separating must-fix from nice-to-fix.
Begin with budget planning that accounts for materials, labor, and contingencies. Then set a timeline that fits your schedule and permits. Prioritize safety-related items and code compliance to avoid rework.
When selecting contractors, use proven references, verify licenses, and request detailed quotes with itemized scopes. Compare estimates for scope clarity, warranty terms, and payment schedules, not just price.
Create a written schedule with milestone dates and buffer time for weather or delivery delays. Maintain a single point of contact to streamline decisions, approvals, and documentation.
This disciplined approach minimizes surprises and accelerates repair completion.
Stage Your Home for Better Visibility
To stage your home for better visibility, declutter and neutralize clutter-heavy areas so inspectors can focus on the underlying condition. You’ll guide attention to features that matter: clean walls, orderly spaces, and preserved surfaces.
Interior staging should emphasize function and flow, not showy accents, while curb appeal sets initial impressions before the door opens. Use neutral tones, minimal decor, and purposeful lighting to enhance perceived condition without masking flaws.
Maintain clear sightlines around utilities, appliances, and structural elements. Consistency matters; avoid mismatched styles. Capture a sense of well-maintained maintenance.
- Interior staging: balance simplicity with purpose
- Curb appeal: tidy frontage and welcoming entry
- Lighting and organization: enhance visibility and perception
Be Honest About Known Issues and Disclosures
Be honest about known issues and disclose them up front. You should document every disclosure so buyers understand what’s been addressed and what remains, avoiding surprises later.
Clear records protect you and speed the process, so stay thorough and precise.
Disclose Known Issues
When you disclose known issues, you establish trust and set clear expectations for buyers. You should be upfront about anything that could influence a decision, including hidden damages and cosmetic flaws.
Present each item calmly, with factual context and any impacts on use or maintenance. Transparency minimizes back-and-forth, reduces surprises, and protects you legally.
Focus on clarity, not drama, and keep emotion out of the description.
- Hidden damages: describe location, severity, and any known repairs or limits to remedies.
- Cosmetic flaws: note appearance issues, age, and expected maintenance costs.
- Disclosure scope: specify what’s included, what’s excluded, and the best way to address questions.
Document Every Disclosure
Be proactive: list problems, dates, and known limitations so buyers aren’t surprised later. Maintain a consistent approach by documenting every item in the same format, supported by receipts, reports, and expert notes when available.
The documentation process should be organized, labeled, and easily verifiable, allowing inspectors and buyers to verify history quickly. Avoid omissions, exaggerations, or vague language.
Be precise about whether issues are active, repaired, or known to require future work. This transparency protects you, speeds negotiations, and reduces post-inspection disputes.
Keep the record accessible and up-to-date throughout the transaction.
Insurance, Codes, and Red Flags to Watch For
Insurance, codes, and red flags are your early warning system for a smooth home inspection. You’ll verify insurance claims history, assure policy terms don’t block repairs, and confirm updates won’t surprise buyers.
Examine code compliance in electrical, plumbing, and structural components to prevent last‑minute conflicts. Look for permits and inspection records that back recent work, and flag any undocumented changes that rise red flags.
Being proactive saves delays and strengthens negotiation power.
- Verify insurance claims history and current coverage
- Confirm code compliance for major systems and recent renovations
- Identify undocumented work or permits that require review
Post-Inspection Next Steps: Negotiation and Moves

After you uncover issues, you’ll outline a clear negotiation plan focusing on repair requests, timelines, and financial terms.
You’ll prioritize a practical repair strategy, document everything, and set a reasonable move-in schedule that aligns with contingencies.
This guide starts the discussion on how to balance repair needs, negotiation leverage, and your timing for moving in.
Negotiation After Inspection
Negotiating after an inspection starts with a clear plan: review the defects, separate the major from minor issues, and decide which problems you’ll request the seller to fix or credit for.
You’ll base your approach on pricing strategies and real-time context, including any potential inspection delays that affect timelines. Stay focused on material defects that affect value, safety, or habitability, and avoid nitpicking cosmetic items.
- Prioritize issues by impact on price and closing timeline
- Propose concrete remedies: credits, price reductions, or negotiated fixes
- Document evidence and respond promptly to maintain momentum
Stay concise in negotiations, present options clearly, and set a firm but fair expectation for the seller’s response within your deadline.
Repair Request Strategy
As you move from identifying defects to requesting repairs, focus on a clear, strategy-driven plan. You’ll compile a concise repair request packet that prioritizes safety, reliability, and cost, then present it to the seller or their agent.
Begin with a precise summary of issues, referencing inspection findings and photos, followed by well-scoped repair requests rather than broad demands. Include a reasonable repair timeline and specify acceptable materials or methods when needed.
Create a maintenance checklist to track progress and guarantee items aren’t overlooked. For larger fixes, outline alternates or credits in case the seller can’t meet every request.
If you’re unsure about scope, consider contractor selection and consult a qualified professional to validate estimates before negotiation.
Move-In Timeline Planning
If the inspection reveals issues you can’t immediately fix, map a practical move-in timeline that aligns with repair work and possession dates, then use it to guide negotiations and scheduling.
- Moving logistics: coordinate utility transfers, lender-required deadlines, and contractor availability to avoid delays.
- Timeline coordination: align repair completion with closing or possession, build buffers for weather, and confirm interim living arrangements if needed.
- Negotiation focus: use the timeline as a leverage tool, request seller concessions for accelerated timelines, and document any agreed milestones in the addendum.
Frequently Asked Questions
Do Inspectors Declare Property Value as Part of Report?
No, inspectors don’t declare property value in the inspection report. They focus on condition, safety, and compliance. Property valuation is outside scope; rely on a separate appraisal or REALTOR’s valuation, which informs the overall Inspection report context and conclusions.
Can You Attend Remotely or via Video During Inspection?
Yes, you can attend remotely via video for the inspection. With virtual attendance, you’ll observe live findings and ask questions in real time, enabling remote participation while the inspector documents everything clearly for you.
How Long Does a Typical Home Inspection Take?
A typical home inspection lasts about 2 to 4 hours, depending on property size and issues. Your Home inspection timeline can extend if major concerns arise. The Inspection process duration varies with findings and accessibility, so plan accordingly.
Do Inspectors Test for Mold or Radon?
Yes, inspectors test for Mold testing and Radon detection. You’ll want professional results: expect specialized equipment, rigorous sampling, and clear results. You practically can’t skip it; detection helps protect you and your investment.
Are Cosmetic Issues Included in the Inspection Findings?
Cosmetic issues may appear in inspection findings, but they aren’t typically part of the required health or safety fixes. You’ll usually see them noted separately, not mandating repairs unless they affect structure or systems.
Conclusion
You’re ready for the home inspection, and you should feel confident. Follow the checklist, gather documents, and fix obvious issues before the inspector arrives. During the walk-through, be honest about known problems and disclose them clearly. Expect questions about safety, codes, and maintenance, and respond with precise details. Remember: a stitch in time saves nine. After the report, negotiate wisely, prioritize fixes, and keep communication open to minimize surprises and protect your investment.



