You’ll start by verifying your concrete subfloor is clean, dry, and structurally sound, then address flatness, repairs, and moisture control before choosing an installation method for hardwood. Assess laitance, dust, oils, cracks, and spalling, then level high spots and fill low spots to create a true plane. Test moisture with calibrated meters, apply barriers if needed, and re-test after cure. Remove contaminants, prime as required, and match your method—adhesive, nail-down, or floating. The rest will become clear as you proceed.
Key Takeaways
- Assess and repair the subfloor: clean, dry, crack-free, and flat; fix defects with compatible patching and ensure full cure.
- Verify moisture and control: test with calibrated meters, document readings, apply barriers if needed, and re-test after cure.
- Ensure dust-free cleanliness: contain dust during prep, use HEPA vacuums, damp-wipe, and achieve a clean surface for bonding.
- Choose appropriate underlayment and method: select suitable underlayment and adhesion, nail-down, or floating method based on conditions and moisture.
- Final surface verification: remove contaminants, prime if needed, check for protrusions and proper environmental conditions before installation.
Assess the Concrete Subfloor for Hardwood Prep

To assess the subfloor, start by verifying that the concrete surface is clean, dry, and structurally sound. You’ll evaluate concrete composition as the basis for adhesion, monitor for defects, and confirm flatness across the entire area.
Look for laitance, dust, oil spots, and previous patchwork that could hinder bonding. Record and address cracks wider than 1/16 inch, and note any spalling or hollow-sounding sections.
Guarantee the substrate is free of moisture risks that could compromise finish quality. Consider subfloor insulation properties, confirming insulation beneath the concrete won’t introduce differential movement or mold risk when the hardwood is installed.
Document all findings, establish remediation steps, and verify post-repair compatibility with your chosen underlayment and fastener schedule. Proceed once the substrate meets specified tolerances.
Test for Moisture: Is the Subfloor Ready?
You verify the subfloor moisture status using established thresholds to determine dryness levels.
If readings meet the moisture thresholds, you confirm readiness.
If not, you pursue corrective drying and re-testing until the subfloor is dry.
This step documents dryness verification to support a stable hardwood installation.
Moisture Thresholds Determined
Before proceeding with install, verify moisture thresholds to confirm the subfloor is ready. You determine acceptable moisture levels by device readings and historical behavior, then compare to manufacturer’s guidance for hardwood. Target thresholds depend on substrate type, adhesive system, and plank species, but you’ll use a conservative margin to reduce failure risk.
Record pin and surface readings, then assess variance across areas to flag hot spots. If readings exceed limits, address moisture source, allow curing, or modify installation method.
Concrete curing dynamics influence long-term stability, so you must confirm ongoing equilibrium before covering. Document results for future reference, including ambient conditions during testing.
Subfloor aesthetics can’t compensate for over- or under-dried material; material compatibility and moisture compliance protect performance and warranty.
Subfloor Dryness Verification
Subfloor dryness must be verified before any hardwood installation. You test for readiness by confirming moisture balance with direct measurements and practical indicators, not guesses. Use simple checks alongside professional methods to guarantee accuracy, especially on slabs with radiant heat or recent pours.
Record subfloor insulation conditions and airflow to understand how moisture moves through the concrete, and verify that ventilation remains consistent during testing. Look for even surface feel, absence of damp spots, and stable readings over time.
When in doubt, allow longer acclimation or implement corrective steps before proceeding with adhesion or fastening.
- Visual cues: uniform surface, no puddling, consistent color
- Humidity and moisture readings: steady over 24 hours, appropriate range
- Ventilation checks: active subfloor ventilation maintains airflow and dryness
Decide Your Installation Method: Adhesive, Nail-Down, or Floating
Choosing the installation method hinges on the concrete slab’s condition, your room layout, and the desired floor performance. You evaluate three options: adhesive, nail-down, and floating.
Adhesive provides a solid, continuous bond, suitable for one-piece flooring and rooms with minimal movement. It minimizes sound transmission but requires a clean, level surface and careful moisture management.
Nail-down works with nailed hardwood over plywood underlayment, offering a traditional feel and strong hold. Yet, it can transfer subfloor irregularities and may be noisy.
Floating installations rely on interlocking planks or panels that expand and contract with seasonal changes. They deliver easier repair and tolerance for subfloor irregularities.
Consider color options and design patterns you want to achieve, and guarantee chosen method aligns with moisture tolerance, installation budget, and anticipated traffic.
Finalize method before proceeding to subfloor leveling steps.
Level and Smooth the Subfloor: Planarize Before Proceeding
Begin by planarizing the concrete to achieve a consistently flat surface before any flooring work.
Check surface flatness and document deviations, so you know where high and low spots require correction.
Address those spots methodically to establish a true, uniform base for hardwood installation.
Planarize Before Proceeding
Before proceeding, you must assure the subfloor is planar and smooth. Planarization ensures a solid bonding surface, minimizes deflection, and reduces peak stresses during hardwood installation. You’ll target uniform thickness, consistent density, and controlled porosity to prevent telegraphing through the finish.
Consider concrete curing and surface porosity as you assess the texture and hardness, since these factors affect bonding agents and patch performance.
- Visualize a flawless plane: a quiet, even surface that rejects highs and lows.
- Hear the scrape of your trowel as you correct voids, feathering patches flush with surrounding concrete.
- Feel the subtle bite of your sander as you finish highs and pattern-lock deep pores.
Check Surface Flatness
To verify flatness, measure the entire subfloor with a straightedge or laser level, identifying high spots, low spots, and wavy areas that could telegraph through the hardwood. You then assess overall surface texture and plan for evenness, noting deviations within your project’s tolerance.
Maintain a strict focus on material compatibility between the concrete and the chosen underlayment or adhesive system, ensuring no chemical interactions affect adhesion or cure.
Document readings at multiple locations and cross-check for consistency across the field and edges.
Implement corrective steps methodically: grind high spots flush, fill low spots with compatible leveling compounds, and re-check for uniform thickness.
Preserve load-bearing flatness across sequences, avoiding abrupt steps that compromise finished floor performance.
Confirm the surface is evenly textured and ready for subsequent installation.
Address High and Low Spots
High spots must be flattened and low spots filled to create a uniformly flat substrate. You address deviations by planarizing the concrete, guaranteeing the surface remains within spec for hardwood installation. Achieving a true plane reduces edge lift, squeaks, and adhesive failures, and it supports consistent finish quality.
Consider color matching for patch materials and ensure your leveling compound accepts stains or sealers if visible. Plan for finish options early, so you select compatible patch products and primers.
1) Assess depth differences with a straightedge and rotate the planarity target across the floor.
2) Apply leveling compound in thin, directed passes, feathering edges to blend with surrounding concrete.
3) Cure fully, then test with a dampened, uniform light to verify flatness and prepare for final finish options.
Repair Cracks, Spalling, and Pitting

Cracks, spalling, and pitting undermine a concrete subfloor’s flatness and bonding surface, so address them promptly and correctly. You begin with an assessment to map crack patterns, spalling extents, and pit depths, then decide appropriate repair methods.
For fine cracks, use a polymer-modified concrete crack filler applied with a trowel or caulking gun, followed by a skim coat to restore planarity.
Spalling shoulders are addressed with bonding agents and patching compounds, pressed flush and feathered to disappear against the surrounding slab.
Pits receive cleaner-out and fill with a compatible repair mortar, then leveled to match the surrounding surface.
Confirm repairs are fully cured before surface preparation proceeds. Always verify flatness with a straightedge and ensure the repaired areas meet the required tolerance for surface preparation and crack repair.
Clean Thoroughly: Dust Control and Debris Removal
Dust control minimizes dust generation during grinding and prep, using containment, vacuums, and damp-wipe methods to keep the work area clean.
Debris removal should be systematic: sweep, dust, and collect with a HEPA-filtered system to prevent recontamination.
You’ll establish a clean, dust-free subfloor surface ready for moisture testing and adhesive bonding.
Dust Control Tactics
To control dust during subfloor prep, start by clearing the work area of loose debris and then seal off adjacent rooms to prevent airborne particles from migrating.
- Establish a negative pressure zone with a portable vacuum system equipped with a HEPA filter to trap fine dust at the source.
- Deploy air filtration units with high CADR ratings near the perimeter to capture suspended particles without re-entrainment.
- Use wet-cleanup methods and microfiber tools to minimize dust generation during any surface disturbance.
Maintain dust containment by sealing gaps around doors and vents, and use damp rags for quick touch-ups.
Regularly inspect filters and replace as needed to sustain effective air filtration and containment throughout the project.
Debris Removal Methods
After you’ve controlled dust, you’ll shift to removing debris thoroughly to guarantee a clean subfloor and ideal finish. Begin with a focused sweep to gather loose material, then vacuum the surface using a workflow that avoids recirculation of dust.
Use a high-efficiency filter and disposable bags to minimize airborne particles. Inspect for hidden debris lodged in joints or pores, and manually remove any protrusions that could impede adhesion.
Prioritize consistent cleanliness across the entire area; a single dusty patch can compromise bond strength. Apply surface sealing only after confirming a debris-free plane.
Implement debris disposal protocols that prevent cross-contamination to finished spaces. Maintain documentation of cleaning steps for quality control and schedule periodic rechecks as you progress.
Choose the Right Underlayment for Your Method
Choosing the right underlayment depends on your subfloor condition, the flooring type, and the method you’ll use to install the hardwood. You’ll evaluate rigidity, vapor needs, and sound expectations to select appropriate underlayment options.
Prioritize products that deliver moisture tolerance, impact protection, and compatibility with concrete. Your choice should align with the installation method—floating, glue-down, or nail-down—and with subfloor flatness and porosity.
Subtopic ideas: choosing underlayment, underlayment options.
- Visualize a seamless layer that locks with your boards, reducing squeaks and heat transfer while maintaining even height.
- Compare vapor barriers and cushion densities to balance moisture control with stability for your chosen method.
- Confirm edge-to-edge coverage, seam treatments, and compatibility notes for the concrete substrate you’re working with.
When and How to Use Moisture Barriers and Sealants
Moisture barriers and sealants are essential anytime you’re installing hardwood over a concrete subfloor. You determine moisture risk first with moisture testing, using a calibrated meter or substantial RH test per industry standards.
If readings exceed acceptable thresholds, apply a compatible moisture barrier system before fastener-ready substrate installation. Choose barrier types based on your hardwood and adhesive method; some systems require a vapor retarder, others a liquid-applied sealant.
Sealant application should create a continuous, pinhole-free layer, then cure as specified before laying underlayment or finishes. Document all readings, products, and cure times for quality control and future renovations.
Re-test after barrier cure to verify stability. Maintain proper surface cleanliness and dry conditions to prevent bond failures or blistering.
Remove Residual Contaminants and Old Sealers Safely
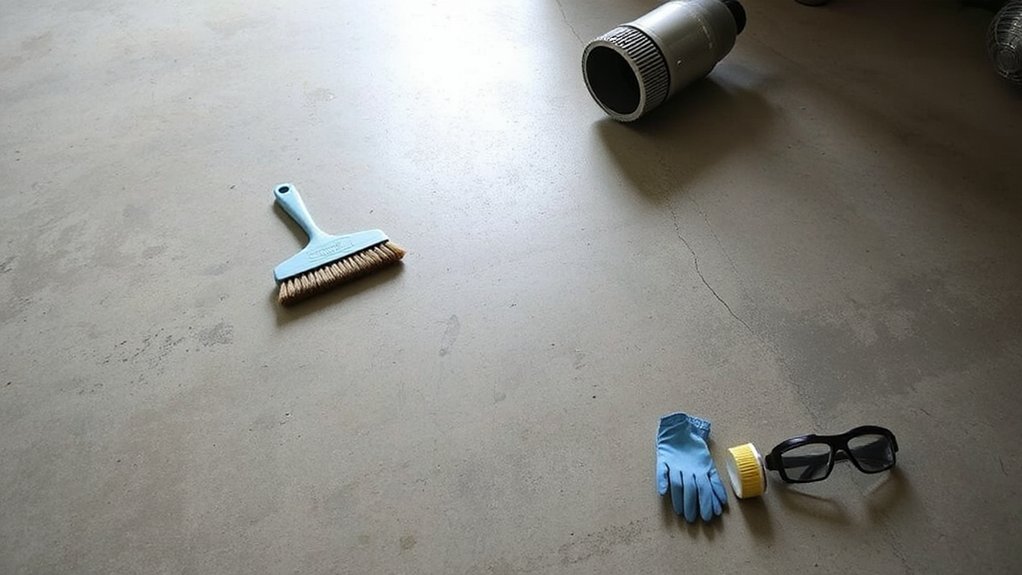
When removing residual contaminants and old sealers, you must establish a clean, sound substrate before any new barrier or underlayment is applied. You’ll perform targeted surface preparation to ensure adhesive compatibility and long-term stability.
- Use chemical removal where appropriate to dissolve coatings without gouging the concrete, monitoring ventilation and PPE.
- Employ mechanical cleaning to lift remaining residue with controlled brushing, grinding, or scarifying, avoiding excessive heat or dust.
- Inspect the substrate for remaining contaminants, moisture traps, or uneven zones, then address them before proceeding.
This approach minimizes bond failures, reduces odor risk, and preserves substrate integrity, creating a reliable base for subsequent waterproofing and underlayment steps.
Prime and Prepare Surfaces for Adhesive or Nail-Down Systems
Once you’ve achieved a clean, sound substrate, you’ll prime and prepare the surface for adhesive or nail-down systems to guarantee ideal bond strength and long-term performance. Use a compatible primer to seal porous concrete and reduce surface dust, then verify flatness with a straightedge and 80–120 grit screening if needed.
For adhesive systems, choose a curing-compatible primer that won’t interfere with epoxy, polyurethane, or latex mortars, and apply per manufacturer guidelines.
For nail-down installations, ensure the subfloor is dry, stable, and evenly moistened only if required by the product. Address any low areas with a patching compound and allow full cure.
Remember: concrete curing and structural reinforcement considerations influence adhesive performance and load-bearing capacity over time.
Final Inspection, Acclimation, and Temperature Tips
Final inspections should confirm the subfloor is clean, dry, and free of protrusions before acclimation begins. You’ll verify moisture readings align with adhesive or nail-down system specs, then document conditions for traceability.
Acclimation proceeds only after you’re confident the environment stabilizes to the project’s target range, typically within a narrow band of temperature and humidity to minimize dimensional shifts.
Color matching and aesthetic considerations come into play when selecting wood species and finish types, so plan for subtle tonal variations during acclimation.
Maintain consistent airflow and avoid sudden swings that could skew readings.
Temperature tips: avoid heat sources that cause rapid drying, and keep the space within the specified range during acclimation.
- Visualize uniform humidity wrapping the room like a glove.
- Picture boards resting flat, edges aligned, no warping.
- Envision final color harmony aligned with lighting and finish.
Frequently Asked Questions
How to Budget Subfloor Prep Costs?
You should start with budget planning and obtain precise cost estimation from suppliers and pros. You’ll factor materials, moisture tests, prep labor, grinding, leveling, and underlayment, then add a contingency. Compare quotes, document assumptions, and track your expenses.
Can Subfloor Moisture Vary Daily or Seasonally?
Yes, subfloor moisture can vary daily and seasonally. You’ll see spikes cause subfloor cracking and structural concerns; use proper moisture barriers and monitor RH consistently to maintain stable conditions and prevent adhesive failures or warping.
What Tools Speed up Planarization Effectively?
You should use planers and belt grinders for rapid planarization, and a high-velocity vacuum helps maintain a flat surface. Quick stat: 92% of flooring professionals rate surface leveling as critical. Tool recommendations emphasize dust control and consistent removal.
Is Epoxy That Prevents Moisture Suitable for Wood Floors?
An epoxy moisture barrier can be suitable, but you must verify Wood floor compatibility with the specific product and substrate. Confirm the epoxy adheres to concrete, seals moisture effectively, and is rated for hardwood installations before proceeding.
How Long to Wait After Prep Before Install?
Wait for 24–72 hours after prep before install. You should perform a subfloor diagnosis and moisture measurement, ensuring readings meet flooring spec. Don’t rush; allow primers or sealers to cure fully for ideal edge-to-edge adhesion.
Conclusion
You’ve laid the groundwork: a solid, clean stage for hardwood to perform. With the subfloor checked, leveled, and sealed, moisture tamed and contaminants banished, the surface becomes a reliable foundation you can trust. As you acclimate the wood and choose your method, you’re drafting a blueprint for enduring beauty. When you finish, your floor will stand like a precise instrument, resonating with harmony and resilience, ready to endure traffic, time, and transformation.