To install wooden blinds, start with precise planning: decide your style, budget, and whether you’ll mount inside or outside the frame. Measure carefully—take three width and height readings and use the smallest for fit, noting frame depth. Gather essentials like brackets, screws, level, and a drill. Mount brackets level, inside or outside the frame, then hang the carcass and align for a plumb headrail. Test operation, trim cords, and adjust for a smooth, professional finish—there’s more to optimize beyond basics.
Key Takeaways
- Measure the window width and height at multiple points (top, middle, bottom) and record the smallest values for accurate fitting.
- Decide between inside or outside mount early, considering aesthetics, light control, and frame depth.
- Gather necessary tools and pre-cut brackets, then mark and drill holes levelly to secure sturdy mounting.
- Install brackets, hang the blind carcass, and ensure headrail is plumb with even top/bottom alignment.
- Test lift operation, trim excess cord, and adjust for smooth, quiet movement and aligned, level fit.
Decide Your Wooden Blinds: Key Style, Budget, and Mount Criteria
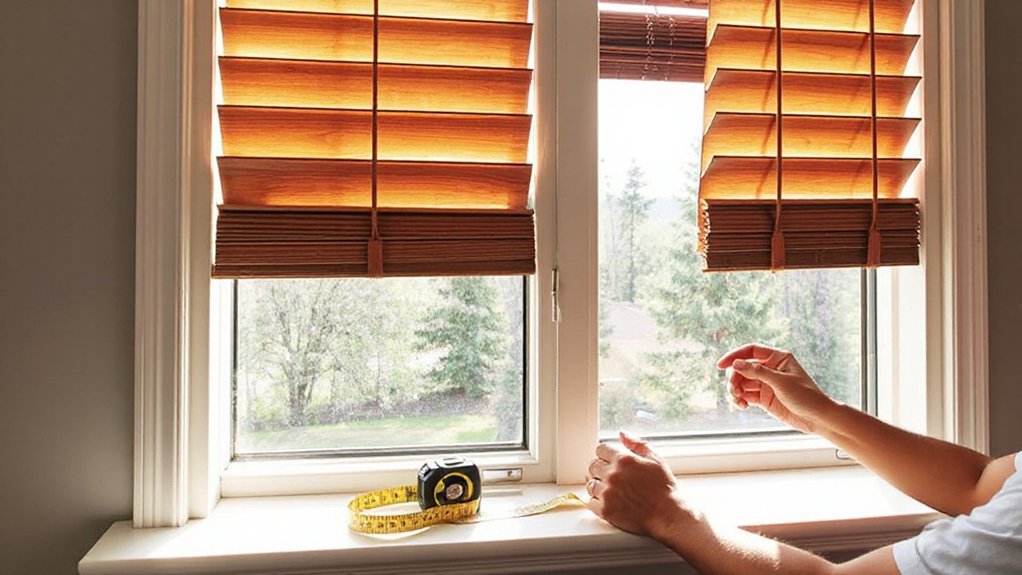
When deciding on wooden blinds, first define the style you want, your budget, and how you’ll mount them. You’ll match function to form by weighing material options, durability, and aesthetics, then set practical limits for each category.
Historical context informs design choices, revealing how finishes and profiles evolved and what remains timeless.
Material comparisons matter: solid wood, engineered wood, and composite options differ in price, strength, and resistance to humidity.
Consider slat width, grain, and stain variety to align with room character and light control.
Mount criteria should reflect wall type, window depth, and reach.
Budget-aware decisions streamline installation planning and long-term maintenance.
Document your final criteria to guide procurement, ensuring a cohesive look without overextending resources.
How to Measure Windows for a Precise Fit
To measure windows accurately for a precise fit, start with a clear plan: note whether you’re mounting inside or outside the window frame, then gather a steel tape, a pencil, a notepad, and a level.
Begin with width measurements at three points: top, middle, bottom. Record the smallest, to guarantee blinds don’t bind.
Do the same for height, measuring left, center, and right, then use the smallest value.
Verify square by checking diagonal lines between opposite corners.
Note frame depth and sill protrusions that might affect clearance.
Record each measurement in your notepad, labeling corresponding window sections.
Consider historical context when evaluating typical trim inconsistencies, and assess material durability of blinds against your window environment.
Double-check all numbers before ordering to prevent fit issues.
Mounting Options: Inside vs Outside Install
Inside mounts offer a clean frame and precise fit, but outside mounts can enhance aesthetics and cover imperfect gaps. Consider how an inside mount supports a tidy look with less visible hardware.
While an outside mount adds visual impact and may improve light control. Think about space constraints and balance the pros of Inside Mount Pros, Outside Mount Aesthetics, and Space Considerations to guide your choice.
Inside Mount Pros
If you’re choosing an inside mount, you’ll install the blinds entirely within the window frame, spending less wall space and keeping the clean, streamlined look you want. Inside mounts minimize profiles, reducing visibility of hardware and maximizing light control without protruding edges.
Measure precision is essential: confirm width at three points and height at three points, using the smallest width and longest height for a reliable fit. Use the included mounting brackets to secure headrail alignment, then level the slats before final tightening.
Color options influence room balance; select tones that complement trim and decor, not clash with existing finishes.
Wood types offer durability and texture, so choose species with stable performance in your climate. Properly stored slats prevent warping and ensure smooth operation over time.
Outside Mount Aesthetics
Even when you mount blinds outside the window frame, the goal remains clean lines and full light control. The outside mount emphasizes the window reveal and can visually enlarge the opening.
You’ll evaluate how visible hardware and edges affect room perception, then align with your décor. Choose mounting depth and reveal to balance shade coverage with frame definition.
Color options matter: lighter tones can brighten narrow walls, while darker hues add contrast and depth.
Material durability guides you toward finishes that resist sun exposure and daily use, preserving color and texture.
Profile choice influences shadow lines and maintenance: slim slats minimize bulk, thicker slats endure scrapes.
Secure mounting studs accurately, and test light gaps after installation.
Outside mounting offers versatility, but plan for consistent finish and long-term resilience.
Space Considerations
Choosing between inside and outside mounting hinges on space and light control: assess each option to match your window characteristics and room function.
Inside mount keeps the frame visible and preserves trim, but requires precise measurements and clearances for operation.
Outside mount covers frames and can add shade, yet may reduce glass exposure.
Evaluate wall depth, sill height, and surrounding obstructions to determine feasible options.
Consider light gaps: inside installs typically yield cleaner lines, while outside mounts offer greater light control and easier weather sealing.
Color options let you tailor finish to decor, and material durability matters for high-traffic zones or moisture exposure.
Plan for hardware visibility, bracket placement, and potential exceptions for handles or hardware.
Conclude with a measured choice that balances aesthetics, light management, and practical installation constraints.
Tools and Materials You’ll Need for Wooden Blinds
To install wooden blinds, you’ll need a specific set of tools and materials that guarantee a clean, secure fit. You’ll select components that match your window and style, focusing on reliability and accuracy. Consider color options and wood types to make certain a cohesive look with existing décor.
- Tape measure, level, and pencil for precise placement
- Drill/driver, wood screws, and mounting brackets for sturdy support
- Sabbath: no, ignore; actually, stud finder, spirit level, and shims to make sure flat install
- Blinds in your chosen wood type with compatible headrail and mounting hardware
Note: Keep two sets of screws and a small screwdriver for on-site adjustments. This foundation reduces tilt misalignment and ensures a clean finish.
Wooden Blind Slat Size and Lift System Options
You’ll choose from different slat sizes to balance light control and visibility, aiming for the room’s scale and your privacy needs.
Consider lift system options like corded, wand, or cordless mechanisms for safe, easy operation and child-friendliness.
We’ll compare how each size and system affects light, air flow, and overall view, so you can decide what fits your window best.
Slat Size Options
Slat size and lift system choices determine both the look and the function of wooden blinds.
- Smaller slats emphasize wood grain detail and a lighter, airier feel.
- Medium slats balance privacy, light control, and a classic appearance.
- Larger slats maximize view-through when opened and showcase prominent wood grain.
Slat durability improves with solid wood or high-grade composites, influencing long-term performance and cleaning ease.
Consider how you’ll raise and lower the blinds, since lift mechanics interact with slat weight.
For durability, choose slats with tight grain, uniform thickness, and minimal warping.
Remember that wood grain direction affects reflections and shadows across the window.
Select profiles that suit both room style and precise light control to avoid mismatches with adjacent trim.
Lift System Choices
When choosing a lift system, balance weight, ease of operation, and maintenance with slat size and material. You’ll select between corded, wand, or motorized options based on window span and daily use.
For larger slats, a corded or motorized lift reduces effort, while smaller slats suit wand control for quick tilting.
Consider finish and color consistency, since color options affect overall look as slats stack. Attachments, pulleys, and cord routes should be evaluated for safety and reliability, ensuring low-friction movement and durable hardware.
Motorized systems offer remote control and integration with smart home setups, but require periodic maintenance of gears and imported components.
Maintenance tips include checking cords for wear, keeping tracks clean, and testing tilt alignment monthly to preserve smooth operation.
Read the Manufacturer’s Instructions First
Before you do anything else, locate and read the manufacturer’s instructions to understand the specific hardware, measurements, and safety notes for your blinds.
- Identify mounting brackets, screws, and anchors recommended for your window type.
- Note exact blind dimensions, window depth, and headrail allowances.
- Check weight limits and cord safety guidelines to prevent hazards.
- Record color options and material durability details for your project choices.
Follow the instructions to confirm screw spacing, drill bit sizes, and any required preassembly steps.
Adhere to care and installation cautions, including safe lifting techniques and avoiding moisture near hardware.
The guidance helps you assess compatibility with your window and hardware, ensuring a secure fit.
Color options and material durability information will inform final selection and long-term performance.
This upfront step saves time and prevents missteps later.
Remove Old Blinds and Prepare the Window
Start by removing any window coverings that might obstruct access, then inspect the mounting area for debris, damage, or loose parts. You’ll want a clean work surface, good lighting, and a stable ladder or step stool.
Remove the old hardware carefully, noting screw sizes and brackets for reuse if possible. Check for hidden damage to the window frame, sill, or drywall; repair as needed before proceeding.
Measure the window width and height, recording exact measurements to avoid later trim issues.
Historical context informs your approach: if the previous blinds used nonstandard anchors, replace with standard brackets for a secure fit.
Consider decorative patterns in the trim or surrounding wall; verify the new blinds won’t clash visually.
Clear the area, organize screws, and prepare tools for the next step.
Install Inside-Mount Brackets: Step-by-Step

Inside-mount brackets sit flush with the window opening, so start by locating the marked inside-mount positions on the window frame and double-checking that they align with the top and sides of the pane.
- Measure twice, mark once, then confirm there’s a full contact line for the brackets.
- Choose the bracket depth based on your blinds’ thickness and the desired shade.
- Pre-drill pilot holes level to prevent skewing and ensure straight hangs.
- Attach brackets securely, test the fit by mounting a sample slat and verifying smooth operation.
Color options and material durability matter; select brackets that match the blind slats and resist warping over time.
Install Outside-Mount Brackets: Step-by-Step
To install outside-mount brackets, you’ll start by mounting them outside the window frame so the blinds clear the trim.
Measure and align each bracket carefully, then mark the screw holes precisely.
Use level lines to guarantee uniform height across brackets before drilling.
Mounting Brackets Outside
When mounting outside, you’ll position the brackets so the blinds sit flush with the window frame and clear the trim.
- Align brackets to maximize headroom, ensuring screws bite into solid framing.
- Use a level to keep all brackets perfectly plumb, preventing slanting slats.
- Select hardware that matches color options and blends with your trim.
- Tighten screws firmly, then test the blind’s travel for smooth operation.
Consider material durability when choosing brackets and screws; opt for corrosion-resistant steel or coated alloys for longevity.
Verify the outside mount provides enough clearance for the slats to fully open without rubbing.
Double-check the overall width to guarantee the blind covers the window completely.
After mounting, inspect for wobble and re-secure any loose fasteners.
Maintain by cleaning brackets and re-tightening periodically.
Measure And Align Brackets
Measure and align the outside-mount brackets by first verifying the window headroom and sill clearance from the previous step.
Next, place brackets level at each outer edge, ensuring the tops sit flush with the head casing. Use a spirit level and mark screw holes with a pencil.
Double-check that both brackets mirror each other and align with the rail height you planned.
Drill pilot holes, then drive screws firmly, but not over-tighten, to avoid wood split.
Slide the blind headrail into the brackets and test for smooth operation.
If color matching is a concern, adjust bracket color or position before final mounting.
Finally, inspect for consistent gaps, confirm a straight, level fit, and note any wood grain visible through finishes for a cohesive appearance.
Hang the Carcass and Check Alignment

Once you’ve prepared the window and positioned the headrail, lift the carcass into place and secure it to the side channels or brackets.
Then check alignment across the top and bottom edges, making micro-adjustments to guarantee the blind sits evenly in the frame.
Confirm the headrail is level with a spirit or laser line, and correct any tilt by loosening and re-securing mounting screws.
Ascertain the side channels glide smoothly and the carcass seats flush against the brackets.
Throughout, prioritize material durability and design matching so components flow with the room’s aesthetic and function.
- Carcass seated evenly, flush with brackets
- Level check across top and bottom
- Side channels glide without binding
- Screws snugged without over-tightening
Attach Lift Cords and Test Smooth Operation
To attach lift cords, start by threading each cord through its corresponding pulley and anchor point, then tie secure knots or use crimped beads as required by the hardware.
Once threaded, test tension by pulling each cord smoothly from the bottom rail to ensure even resistance. If cords bind, recheck pulley alignment and free any twists.
Secure the cords to their anchors firmly, then trim excess length without shortening too much.
Operate the blind through full range: raise, lower, and suspend at intermediate heights to confirm consistent lift. Note fabric patterns and color options in your blinds won’t affect function, but they influence cord routing where sleeves or channels exist.
Document any irregularities and adjust until operation remains quiet and steady, with cords parallel and unobstructed.
Level the Headrail for a Clean Fit
First, verify that the headrail is aligned with the window frame and mounted plumb. If it isn’t, adjust the mounting screws or shims until the rail sits level and evenly rests on the brackets.
Then double-check that the rail remains level across the width to guarantee smooth operation of the blinds.
Verify Mount Alignment
Begin by checking that the headrail sits perfectly level across the window opening; use a carpenter’s level and adjust shims behind the mounting brackets until the bubble sits centered.
- Confirm the headrail’s front edge aligns with the window frame for a clean silhouette.
- Use installation tools to test different shim placements without over-tightening.
- Recheck level after tightening screws to ensure no drift.
- Note fabric options and blade alignment to anticipate any minor misfit early.
With the headrail true, finalize bracket screws and test the blind’s operation.
If a slight tilt remains, small shims can fine-tune without altering the mounting. Remember, precise alignment prevents binding and guarantees smooth operation and ideal light control.
Adjust Rail Levelness
If the headrail isn’t perfectly level, small adjustments behind the brackets can restore a clean, even fit. Begin by checking both sides with a level, noting any tilt. Loosen the mounting screws just enough to shift the headrail without disengaging brackets.
Use a thin shim or the included adjustment plates to raise or lower the low side, then re-tighten while keeping steady pressure.
For slight lateral misalignment, slide the headrail along the brackets until the rail sits parallel to the window frame, then secure.
Perform a quick test by lowering and raising the blinds to verify smooth operation.
If you detect ongoing wobbles, re-check the bracket screws for snugness and confirm the window sill isn’t uneven.
Rail adjustment ensures levelness correction and a clean fit.
Trim Excess Slats Safely and Dispose
To trim excess slats safely, remove the blind from the window and lay it on a sturdy, flat surface. You’ll cut only the exposed slats to avoid damaging internal cords, then measure the exact length required. Use sharp, fine blades and steady sawing motions, not force, to prevent fraying.
After cutting, sand the edge lightly for a clean finish and reassemble with even spacing. If you’re matching Vintage finishes or Custom colors, test a scrap piece first before finalizing the cut. Dispose of offcuts responsibly—recycle where possible.
- Stabilize the blind on a flat workspace and mark the cut line precisely
- Use a sharp razor or fine saw, with slow, controlled passes
- Sand and clean the cut edge for a smooth transition
- Sort offcuts for recycling or curbside disposal
Add Valances and Decorative Pieces
Measure the width of the window frame, then select a valance that provides at least 1/2 inch of overlap on each side for a clean edge.
Install any required mounting brackets per the manufacturer’s instructions, ensuring level alignment.
Attach the valance or decorative piece firmly, using the provided screws or adhesive as directed.
Consider decorative accents like cord tassels, trim, or fabric accents that match your palette, but avoid overloading the pane.
Confirm smooth operation after installation, and adjust as needed for even hanging and an unobstructed view.
Valance styles and decorative accents enhance cohesion without hindrance.
Troubleshoot Common Blind Operation Issues
Common blind operation hiccups usually stem from simple setup or wear, so start by isolating the symptom and checking the basics first.
If cords stick or won’t raise, examine tension, track alignment, and any obstructions.
For stubborn slats, gently tilt to see if a misfeed is causing interference, then reset the mechanism to factory tension if safe.
When cords fray or slip, replace them promptly to restore control and reduce safety risks.
Regularly inspect brackets and pins for looseness and re-secure as needed.
If a component appears worn, plan for targeted maintenance or replacement.
Prioritize clean handling before deeper repairs.
- Inspect alignment and track obstructions
- Test tilt and raise with deliberate, steady motions
- Consider Blind cleaning to remove dust hindering movement
- Cord replacement if frayed or slipping
Clean and Maintain Wooden Blinds for Longevity
Dust regularly to prevent buildup on slats and cords. Then wipe with a damp cloth followed by a dry microfiber to avoid streaks.
Keep humidity in check—use a dehumidifier or AC to prevent warping and mold.
Establish simple routines for quick maintenance, like a 5-minute weekly dust and inspection to spot loose components early.
Regular Dusting Routines
Regular dusting is the simplest, most effective way to extend the life of wooden blinds. You’ll set a steady rhythm that minimizes buildup and simplifies maintenance.
Start with a quick dry wipe to trap loose dust, then target corners and slats with a gentle motion to prevent scratches.
Establish cleaning schedules that fit your room’s dust level and sunlight exposure, not a rigid timetable.
Use slow, deliberate strokes to avoid bending slats.
Dust removal is easiest when you work top to bottom, moving in one direction.
Keep a microfiber cloth handy for stubborn patches and a soft brush for crevices.
- Quick dry wipe across all slats
- Target corners and edges with even pressure
- Move top-to-bottom in a single pass
- Use microfiber for repeat, light dusting
Preventive Humidity Control
Humidity management should be consistent, especially in kitchens and bathrooms where moisture fluctuates most. Use moisture barriers behind blinds when feasible, such as vented panels or thermal curtains in humid rooms, to reduce rapid moisture exchange.
Wipe blinds with a lightly damp microfiber cloth after exposure to steam, then dry promptly. Avoid prolonged dampness, and store closed blinds in dry conditions to preserve finish, color, and structure. Regular checks minimize expansion, contraction, and warping.
Reassess Fit After Furniture Moves or Painting
After moving furniture or painting, recheck the window opening and blind placement to confirm a proper fit. When you re-evaluate, check clearances around the casing, sill, and headrail, since shifts can happen from wall repainting or new furniture arrangement.
Confirm that slats operate smoothly and cords aren’t tangled or snagging. Verify that the blinds align with adjacent trim and that light gaps are even on both sides.
If you notice binding, adjust the mounting brackets or reinsert the headrail correctly before final mounting. Remove any obstructions, then test opening and closing at multiple heights.
Make certain the result looks uniform with the room’s refreshed layout and colors.
- Furniture arrangement impact on clearance
- Wall repainting effect on trim alignment
- Headrail and cord path checks
- Adjustments before final securing
Budget Tips to Save on Materials and Tools
You can trim costs without sacrificing quality by planning ahead and using smart buying tactics. Start with a precise materials list, then compare prices from multiple suppliers, including local lumber yards and big-box retailers.
Look for off-the-shelf rod and hardware that fit your window dimensions rather than custom parts. Consider historical references for affordable, durable finishes that mimic premium looks without the premium price.
Reuse or repurpose tools when possible, and rent specialty equipment for large projects to avoid idle purchases.
Color coordination matters: match blinds to wall tones or trim to reduce the need for painting.
Buy in bulk only for items you’ll use across multiple windows, and keep receipts for potential warranties or returns.
Plan, compare, and buy strategically to save without compromising finish.
Safety Tips to Avoid Window-Damage Mistakes
When installing wooden blinds, safety should come first to protect both you and your windows. You’ll minimize risk by planning each step, verifying measurements, and using the right tools.
Stay aware of DIY hazards like pinched fingers, splinters, and damaged cords. Always wear eye protection, handle slats carefully, and keep pets and kids away during installation.
Use a sturdy ladder on a flat surface and test brackets before full mounting. Mark pilot holes accurately, then drill slowly to avoid cracking.
If something feels off, pause and reassess before continuing.
- Check measurements twice and use marked pilot holes
- Wear eye protection; keep cords organized to prevent tangles
- Stabilize ladders; work with a partner when lifting heavy components
- Inspect hardware for flaws and replace damaged parts promptly
Quick-Start Checklist for a Pro-Looking Install
Getting the setup right from the start speeds the job and yields a pro-looking result. Begin with a quick on-site assessment: measure each window, note frame depth, and confirm level for mounting brackets.
Select blind styles that complement the room and confirm wood grain matches your decor. Gather tools: screws, a drill, level, calculator, and a stud finder.
Pre-cut brackets if needed, then double-check that cords or beaded ladders won’t interfere with operation. Mark screw holes precisely, then install brackets level to ensure even shade and consistent light control.
Hang the blinds, test raise/lower action, and adjust for smooth travel. Verify clean, unobstructed clearance at window sash.
Document any warranty specifics and cleanup steps for a tidy finish.
Frequently Asked Questions
Can Wooden Blinds Be Installed on Vinyl Windows?
Yes, you can. Wooden blinds work with vinyl windows if you use proper mounting hardware and guarantee fit. Measure carefully, select the right blind material, and choose vinyl-compatible brackets to avoid damage to the window frame.
What Causes Slats to Bend or Bow After Install?
Slats bend or bow due to material warping and installation errors. You’ll notice uneven gaps and distorted angles; inspect for excess moisture, weight, and misaligned brackets. Recheck mounting, verify level, and swap warped slats to restore stability.
Can I Fix a Stuck Lift Cord Without Removing Blinds?
Yes, you can fix a stuck lift cord without removing blinds. First, unplug, lower slats, and inspect the mechanism. Then perform lift cord repair with careful tension checks, and test blind maintenance steps before reassembling.
Do Slat Sizes Affect Light Control and Privacy?
85% of people say light filtering matters most for mood. Yes, slat sizes affect light control and privacy: larger slats offer more light, but reduce privacy, while smaller slats increase privacy; balance with your preferred light filtering and privacy levels.
Is There a Weight Limit for Inside Mounts?
Yes, there is a weight limit for inside mounts. Check your blind’s specified load, then use proper mounting techniques and hardware. Material durability supports average weights; avoid overloading. Follow manufacturer instructions precisely for safe, stable installation.
Conclusion
You’ve got the steps, now put them to work. Start with a precise measurement, choose inside or outside mounting, then line up brackets and test lift systems before trimming slats. Always double-check clearances after painting or moving furniture. For instance, a homeowner saved time by documenting measurements and fixture positions, then installing progressively from window trim outward, ensuring even gaps. With the right tools and a patient approach, you’ll achieve a clean, pro-looking finish that lasts.