Recessed lighting in a living room should anchor furniture clusters with precise spacing and beam control. Start by mapping ceiling zones for even illumination, using tighter spacing on higher-contrast surfaces and wider spreads where you want ambient glow. Align fixture rows with ceiling planes, and keep grid or staggered patterns to avoid hotspots. Center lights around seating, dimmers in every zone, and use low-profile trims for clean lines. If you keep going, you’ll see how to optimize texture, color temp, and future-proofing.
Key Takeaways
- Plan fixture spacing to align with ceiling planes, beams, and architectural features for uniform rhythm and clean lines.
- Use a tight network of recessed lights along ceiling lines with selective focal fixtures for texture and depth.
- Balance ambient, task, and accent layers to prevent hotspots while highlighting artwork and focal points.
- Favor higher-quality units with adjustable optics and controlled glare for consistent color temperature and mood.
- Include smart zoning and dimmers to adapt spacing, intensity, and color tone for modern ceiling ideas and scenes.
What Recessed Lighting Accomplishes in a Living Room

Recessed lighting in a living room defines how the space feels and functions by delivering targeted, controllable illumination without visual clutter. You harness precise brightness, color rendering, and glare control to guide attention, emphasize textures, and create zones for activity.
By integrating low, medium, and high outputs, you achieve layered depth that supports conversation, TV viewing, and reading without shifting fixtures or adding visual clutter. Color blending matters: choose correlated color temperature to harmonize walls, upholstery, and artwork, ensuring a cohesive atmosphere from dawn to night.
Consider furniture placement early in the plan so fixtures illuminate focal points—sofas, coffee tables, and art—without creating hotspots. This deliberate setup yields balanced light, improved perception of scale, and a refined, uncluttered living space.
Mapping Ceiling Zones for Even Illumination
You’ll start by mapping ceiling zones to align with activity areas, using Zone Mapping Principles to target key focal points and avoid shadows.
Apply Uniform Illumination Techniques to balance brightness across walls, corners, and seating nooks. Then refine with Ceiling Layout Strategies that place fixtures for overlapping light pools without glare.
Keep the plan precise: document zone assignments, lumen targets, and mounting heights to guide consistent, design-driven execution.
Zone Mapping Principles
Zone mapping for ceiling lighting establishes distinct, overlapping zones to achieve even illumination across a living room. You’ll define primary, secondary, and tertiary cone widths, aligning each with seating areas, focal points, and traffic paths.
Begin by charting wall-wash zones to reduce shadows along progressions between alcoves and furnishings. Next, allocate task pockets near seating while preserving ambient wash to prevent hotspots. Maintain intentional overlaps so luminance graduates smoothly rather than abruptly.
Incorporate Lighting sensors to modulate output as daylight shifts, preserving consistent perceived brightness without excess energy draw. Favor discrete luminaire spacing that mirrors ceiling geometry, avoiding excessive clustering.
Prioritize energy efficiency by selecting high-CRI, dimmable LEDs and calibrating dimming curves for waking, relaxing, and entertaining scenes. Document zone radii, angles, and lumen targets for repeatable, scalable layouts.
Uniform Illumination Techniques
Uniform illumination hinges on thoughtful ceiling zoning, where overlapping cone widths are mapped to seating areas, focal points, and traffic paths to produce a seamless luminance gradient. You implement uniformity by assigning uniform beam angles and lumen outputs per zone, preventing hot spots and shadows.
Begin with a central living area as the reference plane, then tailor fixture spacing to maintain consistent foot-candle levels across zones. Use subtle dimming gradients to blend transitions between seating, media, and entry zones, avoiding abrupt brightness shifts.
Calibrate each recessed housing for near-field performance, ensuring vertical and horizontal illuminance remains within target tolerances. This approach supports lighting customization while reinforcing aesthetic enhancement, delivering a cohesive ambience that reads as intentional, precise, and visually balanced.
Ceiling Layout Strategies
Implement subtle color contrast by selecting trim, baffle, or housing finishes that differentiate zones without breaking seamless perception. Plan for Smart integration, coordinating dimming, scenes, and occupancy sensing to balance daylight with artificial light. Place fixtures to reinforce sightlines toward the focal point, preventing glare on screens.
Document measurements, verify with a light-meter, and adjust spacing iteratively for precise uniformity.
How Beam Angles Shape General Lighting
Beam angles determine how recessed lights distribute light across the room, shaping both visibility and mood. You’ll match beam angles to task zones, ambient glow, and architectural features, ensuring no harsh hotspots or dark corners.
Precision matters: narrower angles focus light for accents, while wider angles create even, soft diffusion that fills seating areas without glare. Consider ceiling height, ceiling plane, and surface finish—matte walls soften reflections, glossy ceilings amplify brightness.
For balance, design in layers: primary chandelier-like wash, supplemental spot beams, and indirect highlights from wall areas. Account for light diffusion patterns intrinsic to each luminaire, and anticipate how furniture placement alters perceived luminance.
Document the angular library of your fixtures to maintain consistent color, intensity, and tonal harmony throughout the living space.
Spacing Can Lights: Rules for Even Coverage
Careful spacing of can lights guarantees even coverage across your living room without hotspots or dim zones. Start with a grid that respects ceiling height and desired brightness: higher ceilings need closer spacing, lower ceilings can widen, but avoid gaps that produce shadowed edges.
Use symmetric rows and align fixtures with major architectural axes for cohesive light flow. Maintain equal lumen targets per fixture and factor beam angle into spacing so overlap provides uniform field rather than bright centers.
Consider color rendering and color contrast within the space; lighting should reveal true tones without creating yellowish halos. Fixture durability matters too—select rugged housings and heat-tolerant trims to maintain color accuracy over time.
Plan for wiring accessibility, thermal vents, and future dimming compatibility to sustain even performance.
Centering Fixtures Around Furniture Clusters
Measure from sofa edges to ceilings, ensuring fixtures sit halfway between seating and walls to minimize shadows on faces. Use a consistent grid around each cluster, allowing enough clearance for lamps, coffee tables, and ottomans.
Prioritize even light distribution within zones while avoiding direct downlight into eyes. Choose fixture color that complements wall tones and furniture finishes, maintaining a cohesive ceiling plane.
Creative accents appear as subtle variances in trim or placement, not as showpieces. Maintain uniform lumen output across clusters to preserve visual balance and perceived room scale.
Task, Ambient, and Accent: Balancing Lighting Roles
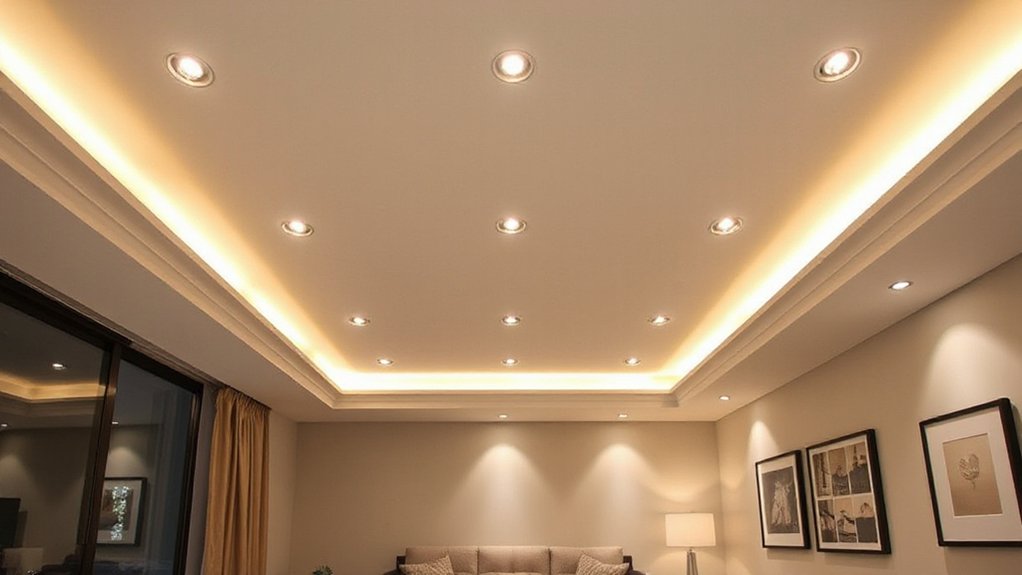
You’ll balance task, ambient, and accent roles by aligning fixture placement with your living room activities. Start with task lighting that targets work zones.
Then layer ambient glow to unify the space, and use accent light to highlight architectural features or art.
This approach emphasizes clarity, precision in brightness, and deliberate contrast to guide perception and mood.
Task Roles Balance
Balancing task, ambient, and accent lighting in a living room starts with purpose: identify where work, mood, and focal points live in the space. You assign clear roles to fixtures, then test how each layer supports daily actions and visuals.
Task roles must illuminate desks, reading nooks, and craft areas without glare, while preserving screen contrast and color accuracy.
Ambient layers establish uniform glow and perceived ceiling height, avoiding hotspots that sap depth.
Accent lighting highlights architectural features, artwork, and textures without overpowering the scene.
Watch for balance dynamics: guarantee dimmable control, seamless shifts, and consistent color temperature across layers.
Precision adjustments in spacing and intensity produce a cohesive grid, where function and mood align, and the room reads deliberate, refined, and inhabitable.
Ambient Lighting Principles
Ambient lighting acts as the canvas for the room, providing a steady base that supports all activities without drawing attention to itself. You’ll calibrate luminance levels to create a cohesive foundation across zones, ensuring even illumination that minimizes glare.
Prioritize a controlled glow over harsh spots, so task areas stay clearly defined without overpowering ambient softness. When selecting fixtures, favor diffusion and uniform spill with recessed options that blend into the ceiling, sustaining a quiet layer that complements accent elements.
Lighting aesthetics hinge on balance: neither too cool nor too warm, but consistently neutral to honor fixture finishes and wall treatments. Consider Color psychology by aligning brightness and temperature with mood goals, helping spaces feel inviting, calm, or energized according to use.
Precision planning yields enduring, refined ambience.
Accent Layer Strategy
How do you orchestrate the Accent Layer to support Task and Ambient lighting without competing with either? You calibrate accents to enhance focal points, not overpower them. Use recessed fixtures with narrow beam angles to highlight artwork, architectural details, or texture without creating glare.
Position lighting fixtures to avoid direct sightlines into seating zones, keeping the room cohesive. Choose color temperatures that harmonize with ambient and task temps, ensuring a seamless transition from wall wash to highlight. Balance intensity so accents read as depth rather than brightness.
Consider wall colors to maximize contrast or nuance; cool walls reflect cooler accents, warm walls embrace warmer highlights. Limit quantity to avoid clutter, and use dimmers to preserve atmosphere while maintaining visual hierarchy.
How Ceiling Height Affects Fixture Count
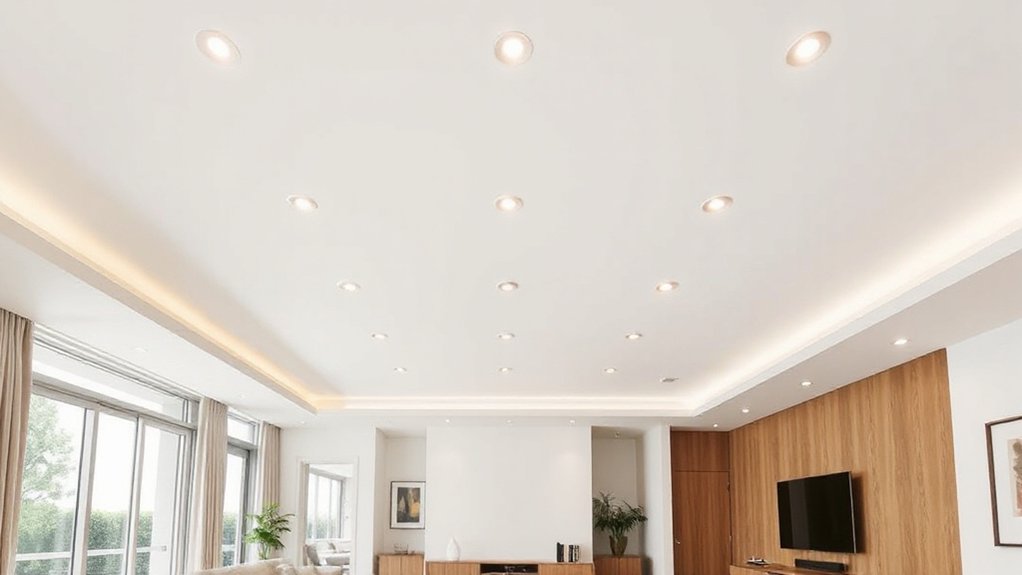
When ceiling height rises, fixture count typically decreases because tall rooms require fewer cans to achieve the same light density and color distribution.
Deeper spaces demand more lumen output per fixture. You’ll balance ceiling height with light layering, ensuring even dispersion from a practical distance above the plane.
In higher ceilings, use slightly higher wattage or lumen-per-fixture to maintain brightness without hot spots, focusing on glare control and color rendering.
For standard to moderate heights, spacing remains tighter to preserve uniformity, then relax as you approach loftier rooms by increasing trim size or using higher-efficiency lighting fixtures.
Always test with a quick photometric plan, verifying footcandles at seating zones to confirm consistent ambience and functional task lighting.
Layout Patterns: Grid, Stagger, and Radial Options
Grid, stagger, and radial layouts each offer distinct light distribution patterns for living rooms, affecting coverage, mood, and task performance. In grid patterns, you place fixtures on a consistent matrix to achieve uniform brightness across seating zones, reducing hotspots and shadows.
Staggered layouts break uniformity intentionally, aligning with furniture clusters to focus light where you read or entertain, while preserving ambient spill elsewhere.
Radial configurations center the dominant beam toward focal seating or art, generating a visual anchor and subtle gradation toward the room’s edges.
When selecting, consider Color contrast between surfaces and fixtures to optimize legibility and atmosphere. Use smart controls to refine timing, dimming, and scene-based presets, ensuring precision alignment with activity—reading, watching, and conversation—without overlit or underlit areas.
Wall Washing for Depth and Soft Shadows
Wall washing adds depth by grazing the wall with even, soft light, creating a subtle halo that elevates architectural texture without drawing attention to fixtures. You position a recessed washer at a slight angle, aimed to skim a vertical plane rather than flood it.
Maintain a narrow beam spread to avoid hotspots, and calibrate distance so the light travels a consistent width from ceiling to wall. The goal is shadow softening, not glare, so you keep lumen output modest and uniform across surfaces.
Use symmetric pairings on opposite walls to reinforce depth cues, modulating heights to emphasize trim details or molding. Monitor wall brightness in real time, adjusting proximity or tilt to preserve even perceived illumination.
Executed correctly, wall washing delivers refined contrast with restrained luminance.
Color Temperature and Brightness for Living Rooms
You’ll balance color temperature to align with room function, selecting cool whites for task areas and warmer tones for relaxing zones.
Consider brightness zoning by fixture, with higher output at seating and lower levels by entrances to prevent glare.
Aim for a cohesive spectrum and lumen levels that preserve color accuracy across the living space.
Color Temperature Ranges
For living spaces, aim for 2700–3000K as a warm, inviting baseline, moving toward 3500K if you want a more contemporary, neutral feel. If you perform tasks like reading, incorporate a higher end, around 4000K, but keep overall harmony by limiting exposure to higher temps to under separate task lamps.
Consider a layered approach: ambient general lighting at 3000K, accent lighting at 2700K, and a controllable dimmer system to modulate intensity without shifting color. This precision guarantees predictable color temperature outcomes and refined lighting ambiance throughout the room.
Brightness Zoning Tips
To design effective brightness zoning in living rooms, align both color temperature and light output with each zone’s function and viewer proximity. You’ll balance task areas with cooler temps and higher brightness, while relaxing zones use warmer tones and lower output.
Maintain color accuracy by avoiding extreme shifts between adjacent zones; aim for a gradual transition to preserve Color contrast and depth. Leverage natural light to reduce reliance on artificial brightness during the day, then supplement with calibrated LEDs that mimic daylight when needed.
Establish dimming rails that let you fine-tune scene ambiance without flicker. Consistent beam angles prevent hot spots and maintain visual harmony.
- Color temperature progression by zone for comfort
- Gradual brightness steps rather than abrupt changes
- Calibrated dimming for seamless scenes
- Hourly adjustments aligned with natural light
- Scene presets emphasizing natural light integration
Dimming and Controls for Flexible Evenings
Evening flexibility hinges on smart dimming and precise control. You’ll pair your recessed zones with dimming capabilities that respond to activity and time of day, not just on/off toggles.
Start with a layered approach: independent zone dimming for living and seating areas, plus a centralized scene controller for quick ambiance shifts. Choose adjustable CCT (color temperature) options to move from cool task lighting to warm, inviting glows as conversations lengthen.
Implement presets for movie nights, entertaining, and quiet reading, then sync them with a smart home hub for voice or app access.
Prioritize compatibility with smart controls, ensuring seamless updates and reliable performance.
Label each node clearly, test regularly, and document favorite mood settings for consistent, repeatable results.
Ceiling Finishes and Trims That Complement Lighting
Ceiling finishes and trims play a pivotal role in how recessed lighting reads in a living room, shaping glare, shade, and perceived brightness. You’ll align texture and molding details to control reflections, ensuring even illumination without hot spots.
Consider how ceiling textures interact with fixture trim to modulate light diffusion, while decorative moldings frame pockets of recessed beams for architectural depth. Choose finishes that reflect your design intent—matte ceilings soften brightness, glossy surfaces bounce light discreetly, and subtle textures hide minor imperfections.
Trim profiles should complement ceiling depth and wall color, preserving a cohesive, high-end feel.
- Ceiling textures and their impact on glare
- Decorative moldings that frame lighting
- Color coordination with wall finishes
- Material choices for durability
- Subtle shadow play for depth
Low-Profile Trims for Seamless Ceiling Integration
You’ll explore how low-profile trims reduce visual bulk while maintaining focused light quality. These trims enable seamless ceiling integration by nearly flush mounts and slim profiles that minimize halo effects.
This design-driven approach prioritizes precise gaps, uniform reflected brightness, and a cohesive ceiling line.
Low-Profile Trim Benefits
Are low-profile trims the simplest way to achieve a seamless ceiling line with recessed lighting? Yes—they minimize visual distractions, enabling your ceiling plane to read as uninterrupted. With tight flange dimensions, you gain cleaner shadows and a more intentional architectural feel.
The design payoff centers on consistent aperture alignment, reduced glare, and a refined edge that complements variable ceiling textures. You’ll notice improved concealment of housings, easing installation tolerances without sacrificing accessibility.
When selecting, prioritize low profile, trim benefits like flush mounting, powder-coated finishes, and compatibility with baffles. Dimensioning matters: ensure trim depth aligns with joist spacing and drywall thickness for uniform light wash. Precision here yields a lasting, professional aesthetic.
- Minimal protrusion for seamless ceilings
- Reduced glare and softer blends
- Flush mounting with varied finishes
- Tolerant to minor framing variances
- Clean, consistent edge definition
Seamless Ceiling Integration
Opt for trims with integral reflectors that minimize glare, preserving the ceiling’s flat plane. Align cut lines precisely to ceiling texture to avoid perceptible offsets; even slight gaps disrupt the seamless effect.
Plan for consistent spacing relative to architectural features to maintain visual cleanliness. Choose fixtures with variable beam control to modulate shadows without drawing attention.
Consider decorative fixtures and their contrast against the ceiling; restrained finishes keep the look cohesive. Maintain attention to detail, measure tolerance, and verify with a mock-up before final installation.
Wiring, Safety, and Professional Installation Tips
Wiring recessed lighting in living rooms demands careful planning, strict adherence to code, and professional-grade installation practices. You’ll design a safe circuit layout, verify box fill, and choose rated components for each fixture, junction, and splice.
Prioritize low-profile drivers, sealed housings, and proper external wiring protection to minimize heat buildup. Guarantee accessibility for future repairs, use dedicated circuits where needed, and document identifications for all run paths.
For convenience, plan for wireless controls and smart integration without compromising fan or appliance circuits. Use GFCI/AFCI protection where required and follow NEC spacing rules near joists and ceilings.
The result is reliable performance, scalable automation, and safer operation across lighting zones.
- Confirm wire gauge, breaker rating, and box fill
- Label cables at every junction
- Choose compliant connectors and rated insulation
- Plan for wireless controls and smart integration
- Schedule a professional inspection and documentation
Budgeting: Cost-Per-Fixture and Installation
Estimating budget for recessed living-room lighting starts with a precise per-fixture and installation breakdown, then tightens as you specify finish, controls, and access. You’ll quantify unit costs, labor hours, and permits, then add contingencies for unseen wiring or architectural tweaks.
Budget considerations include fixture durability, trim options, and driver efficiency, aligning with your design intent while guarding long-term maintenance. Compare LED modules with similar lumen output, noting warranty terms and heat management.
Account for ceiling thickness, housing assays, and insulation interaction, since each factor affects install time and material waste. Document delivery timelines, lead times, and potential subcontractor fees to prevent overruns.
Finalizing a line-item schedule that prioritizes durability, minimizes future replacements, and preserves your intended aesthetic without overspending is essential.
Ceiling Designs That Optimize Light Spread
You’ll shape light spread by selecting ceiling configurations that guide every recessed fixture toward complementary zones. Consider how ceiling shape influences shadow, glare, and uniformity.
Then place fixtures according to established rules for even coverage. By prioritizing light spread optimization, ceiling design, fixture placement, and practical constraints become a single, cohesive strategy.
Light Spread Optimization
Which ceiling design best promotes uniform light spread in living rooms, and how can you guarantee glare-free, even illumination across seating areas? You’ll optimize spread by choosing recessed fixtures with symmetric spacing, low glare finishes, and consistent beam angles.
Use decorative fixtures to add character without sacrificing light control, and apply subtle color accents to counterbalance shadows.
Position overlapping beams for seamless coverage, avoiding hot spots near seating zones. Favor ceiling treatments that reflect rather than absorb, ensuring brightness stays even as furniture shifts.
Integrate dimming and zoned controls to maintain balance during activities. Finally, test with a dimmer profile to verify glare-free performance from every seat.
- Symmetric spacing and consistent beam angles
- Low-glare finishes and reflective ceilings
- Decorative fixtures that don’t compromise light control
- Subtle color accents to balance shadows
- Dimming and zoned controls for evenness
Ceiling Shape Effects
Ceiling shape profoundly influences perceived brightness and evenness of light in living rooms. You’ll optimize glow by matching recessed layouts to the room’s geometry, aligning lumen distribution with architectural planes.
Smooth, continuous ceilings champion uniform spill, while stepped or vaulted profiles break glare and create perceived depth that enhances contrast without increasing fixtures. Use ceiling form to guide ambient + task layering: flatter planes favor broad, even coverage; shallow domes focus reflections toward seating zones.
Avoid abrupt changes that induce hot spots; instead, employ gradual curvature or subtle slope, ensuring ceiling-to-wall transitions support consistent luminance. Artistic profiles matter: decorative edges, coffers, or tray recesses can subtly modulate light diffusion without adding fixture density.
In all, design around structure, not against it, for precise, cohesive illumination.
Fixture Placement Rules
When designing fixture placement for ceiling-driven light spread, align recessed rows with architectural planes to maximize uniformity while minimizing hotspots. You’ll guarantee consistent illuminance by mirroring ceiling geometry and balancing spacing around focal areas.
Use shallow trims to reduce glare and preserve a clean ceiling line while maintaining the intended shadow contrast. Favor decorative fixtures in secondary rows to add texture without overpowering primary light.
Integrate smart technology to adjust intensity per zone, preserving color accuracy and scene mood. Maintain strict tolerances for row spacing, offsetting near rooms, and avoiding overlap with vents or beams.
The result is a calm, evenly lit space that feels purposeful and refined.
- Align rows with planes for uniformity
- Maintain fixed, precise spacing
- Use decorative fixtures as accents
- Leverage smart technology for zoning
- Avoid glare and overlighting
Common Layout Mistakes to Avoid
One common layout mistake is placing all recessed lights along the room’s perimeter without considering focal points, tasks, or furniture placement, which can create flat, uneven illumination. You should instead map luminance to zones: seating, focal art, and conversational nooks. Avoid over-lighting the edges at the expense of centers or task surfaces.
Balance ambient, task, and accent layers to prevent glare and shadows that disrupt depth. Confirm fixtures align with ceiling lines and architectural features for a cohesive rhythm. Use lighting automation to adjust scenes for activities, reducing energy waste during daytime use and value-laden evenings.
Prioritize energy efficiency by selecting fixtures with appropriate lumen output and dimming performance. Document your grid, re-check spacing, and refine with a living-room walkthrough.
Case Study: Small Living Room With an Optimized Layout
A small living room benefits from a deliberately staged lighting plan that highlights its strengths while concealing its constraints; the optimized layout centers on a clear focal point, integrated task surfaces, and intimate conversational zones.
Start by outlining a tight network of recessed fixtures that align with ceiling lines and architectural features, using fewer, higher-quality units to deliver even ambient light and controlled accent moments.
Color contrast and smart automation integrate seamlessly, enabling subtle scene changes without clutter.
You’ll pursue precise spacing around the focal point, with accent lights calibrated to avoid glare and to enhance textures.
The result is a calm, legible space where every zone supports conversation, reading, and display.
- Tight fixture network aligned to architectural cues
- Focal point illumination with controlled accents
- Integrated task surfaces for legibility
- Color contrast to delineate zones
- Smart automation for consistent scenes
Quick-Start Checklist for Your Install
Getting your recessed lighting plan off the ground starts with a concise, practical checklist that maps directly to your living room’s layout and goals.
Begin by cataloging existing elements: ceiling height, furniture positions, focal seating areas, and any architectural features.
List required brightness levels for tasks and ambiences, then prioritize zones for decorative fixtures and wall accents.
Specify spacing targets from walls, corners, and perpendicular fixtures to avoid glare and hot spots.
Mark electrical access points, dimmer compatibility, and ceiling type for install ease.
Verify color temperature and beam angles align with design goals—modern ceilings, clean lines, or vintage styles.
Finalize a budget, timeline, and permits if needed.
Double-check that the plan supports future tweaks without rework.
Maintenance and Future-Proofing Your Lighting Plan
How can you keep recessed lighting reliable and adaptable as your space evolves? You’ll design for serviceability, modular components, and scalable controls. Prioritize accessible housings, langlebige drivers, and standardized trims to simplify upgrades. Plan for future color temperatures and beam angles by selecting fixtures with adjustable optics and compatible dimmers. Label circuits clearly and document bulb types to support maintenance without guesswork. Align maintenance intervals with manufacturer guidelines to safeguard energy efficiency and bulb longevity as your floors change.
- Choose modular housings with tool-less access for quick bulb and driver changes
- Use compatible dimmers and smart controls that support future upgrades
- Document fixture types, wattages, and beam angles for easy replacements
- Select energy-efficient LEDs with long-l ife and reliable drivers
- Schedule periodic inspections to verify seals, vents, and heat management
Frequently Asked Questions
How to Avoid Glare With Recessed Lighting in Small Rooms?
To avoid glare in small rooms, position recessed lights to balance brightness, use dimmers, and rely on indirect layers. Consider natural light and ceiling height; diffuse with baffles, avoid direct line-of-sight, and aim for soft, even illumination.
Can Recessed LEDS Affect Room Acoustics and Sound Reflection?
An allegory paints you as a careful architect of quiet. Yes, recessed LEDs affect acoustics: they influence sound absorption and acoustic reflection, modestly altering room warmth while you design lighting to preserve clarity and minimize echo.
What’s the Best Practice for Switch Placement With Multiple Zones?
Here’s the best practice: you’ll use dedicated switches for each zone, labeled clearly, with centralized master control. Track wiring with reliable dimmers, guarantee quick access, and integrate smart Lighting control for seamless, precise, zone-by-zone adjustments. Switch zoning optimizes usability.
Are There Health Considerations for Lighting Color Temperatures?
Like clockwork, yes—lighting color temperature affects health effects. You should choose spectra around 2700–3000K for warm comfort, or 3500–4000K for tasks; avoid excessive blue at night to reduce sleep disruption. Your design stays precise and mindful.
How Often Should Recessed Lights Be Inspected or Replaced?
You should inspect your recessed lights annually and replace bulbs as needed, based on burn hours and performance. Lighting maintenance varies by fixture type, but plan replacements every 3–5 years; track Bulb lifespan to prevent outages and maintain ambience.
Conclusion
You’ve mapped zones, sized can lights, and trusted beam angles to balance task, ambient, and accent needs. With spacing rules tuned to room dimensions and furniture clusters, you’ll avoid hotspots and shadows, while ceiling ideas keep a modern, cohesive look. Treat this plan as a living gallery—adjust as furniture shifts. Your ceiling becomes a quiet orchestra, each fixture a precise note, guiding comfort and style without glare. Trust the data, design with intention, and illuminate with confidence.