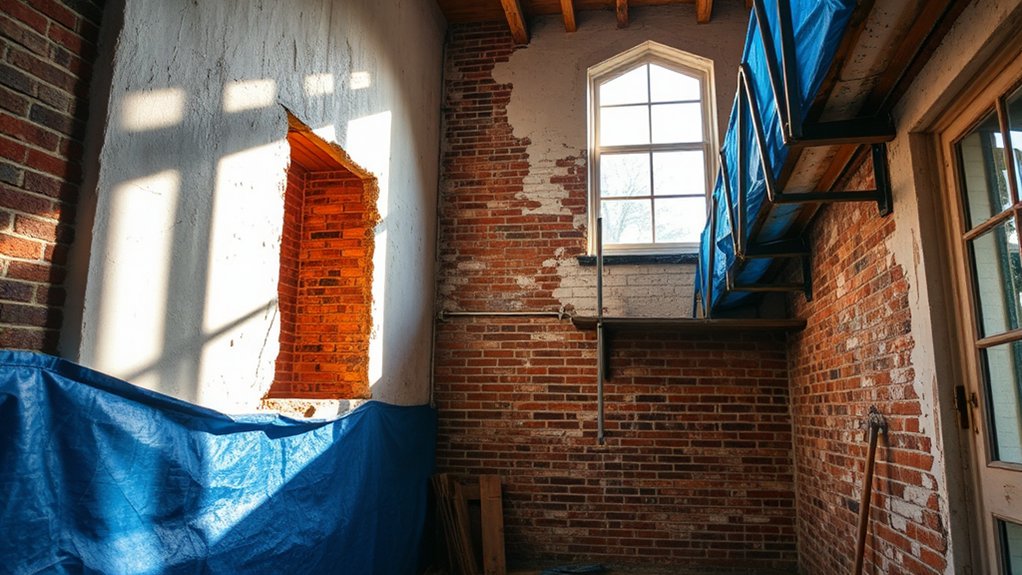

A terraced-house transformation often begins with a single strategic wall move that releases daylight, clarifies circulation, and redefines living zones without expanding the footprint. You assess structural feasibility by examining load paths, openings, and potential hidden defects, and document reinforcement ideas before cutting. Plan daylight carefully, aligning openings with key zones and using high-reflectance surfaces to maximize brightness. After the breakthrough, design open-plan zones, consider portable dividers, and guarantee permits and budgets align. There’s more to optimize beyond the first wall.
Key Takeaways
- A terraced-house transformation can begin by removing or altering a single wall to redefine flow between kitchen, dining, and living spaces without expanding the footprint.
- Structural feasibility should be assessed through load paths, hidden defects, and expert confirmation before cutting any wall.
- Opening a single wall can dramatically improve daylight, circulation, and sightlines when aligned with openings and high-reflectance finishes.
- Design relies on partial dividers, cohesive finishes, and built-ins to maintain historic context while creating flexible, connected zones.
- Practical planning covers permits, budget, and phased timelines to manage heritage concerns, party-wall requirements, and neighbor disruption.
Can One Wall Transform Your Terraced Home?

Could a single wall really transform a terraced home? Yes, with intent and precision. You’ll redefine flow by opening sightlines to multiple rooms, creating a sense of space without extending the footprint.
Begin with load-bearing considerations and plan a non-structural opening where practically possible; consult a professional before cutting. Once the boundary shifts, you’ll optimize functional zones through deliberate color and light.
Color palettes influence perceived scale—cool neutrals expand small rooms, while restrained accent tones define areas without clutter. For furniture arrangements, position key pieces to reinforce circulation paths and sightlines, avoiding bulky blocks that constrict movement.
Integrate built-ins to minimize furniture footprint and maximize storage. Prioritize crisp finishes, consistent materials, and deliberate lighting to maintain cohesion across the transformed interior.
How to Assess Structural Feasibility Without a Full Demo
Evaluating structural feasibility without a full demolition starts with a grounded, methodical approach. You’ll begin with a focused assessment of wall stability, prioritizing load paths and potential hidden defects.
Do a preliminary Structural analysis using door and window openings, floor joists, and ceiling joists as clues to capacity. Consider existing materials, masonry joints, and any signs of distress that may indicate lateral forces.
Document findings before any cutting begins, and verify with simple measurements and a dry run of reinforcement ideas. If uncertainty persists, pause and consult an engineer to validate assumptions.
Your goal is a safe, viable plan that preserves key elements while outlining measurable steps for progress.
- Check wall stability indicators and load paths
- Map structural components relevant to the wall
- Perform basic, noninvasive measurements and tests
- Seek expert confirmation for uncertain results
Letting Daylight Flow Through a Single Wall Cut
You’ll explore how a single wall cut can channel daylight along a bright path, transforming a dim corridor into a luminous space. By shaping the cut to align with key sightlines and openings, you maximize natural light without compromising structural integrity.
Consider practical details like finished edges, lintels, and thermal performance to keep daylight flow efficient and comfortable.
Letting Daylight Flow
- Align window openings with key zones to maximize natural light without glare.
- Use high-reflectance surfaces and a light color palette to bounce daylight deeper.
- Integrate garden elements through vistas or horizontal glazing for atmosphere.
- Employ smart technologies to dim or boost light levels based on time of day.
Garden integration informs proportion and framing, guiding you to reveal views without overexposing interiors. The approach remains practical: select glazing wisely, consider sill height, and calibrate shading to seasonal changes.
With intentional spacing and controlled brightness, you create a sense of openness that still respects compact terraced layouts. This method supports energy efficiency and comfort while maintaining architectural clarity.
One Wall, Bright Path
You orient glazing to maximize transmission while minimizing heat gain, using high-performance double or triple glazing and strategically placed operable panels for daylight control.
Position the wall to align with interior work zones, ensuring even distribution without hotspots, and select shading that reduces glare during peak sun hours.
You maintain garden privacy by careful distance from adjacent plots and thoughtful landscaping, so light breathes in without exposing private scenes.
Exterior aesthetics stay cohesive with brick, render, or cladding, preserving tone and texture while enhancing the home’s daylight signature.
Cut For Natural Light
Cutting a natural-light opening in the single exterior wall focuses daylight where it matters most, without compromising structure or privacy. You’ll plan the cut to align with load paths, avoiding critical studs or hidden services, so stability remains intact.
A precise, narrow opening can spark ventilation and warmth while keeping interior proportions honest. Consider glazing choices that balance glare control with brightness.
You’ll also assess the impact on interior greenery, selecting planters that thrive with the new light pattern. From a historical-preservation perspective, match detailing to original trim and materials where feasible.
The result is a daylight channel that respects the home’s legacy while improving daily living.
- Optimize placement for shade, glare, and views
- Choose low-maintenance interiors that suit the light
- Integrate interior greenery without crowding
- Document the change for historical preservation records
Designing Open-Plan Layouts After the Breakthrough

After the breakthrough, open-plan layouts should prioritize clear zoning and adaptable flow. You design spaces that support daily life while preserving character. Create distinct zones for cooking, dining, and lounging, but allow sightlines and easy circulation between them. Use partial dividers, shelves, or furniture placement to cue separation without walling off areas.
Consider historical context when choosing finishes and proportions to maintain authenticity while enhancing function. Prioritize material durability, selecting surfaces and fixtures that withstand wear and moisture common in terraced homes.
Plan for flexibility; include plug-and-mrowse for tech, adjustable lighting, and modular seating. Document a logical workflow from entry to main living areas, ensuring doorways align with traffic patterns.
Finally, balance light, acoustics, and warmth to sustain comfort across evolving layouts.
What Engineers Need to Confirm Before Demolition
Before any demolition begins, engineers must confirm structural integrity, utility routing, and load-bearing relationships to avoid unintended damage. You assess existing foundations, members, and connections, making sure they support planned removals and new loads.
You verify material compatibility across building interfaces to prevent reactions, failures, or deterioration. You document alignments, offsets, and hidden pathways to guide safe sequence steps and temporary support planning.
You verify foundation stability under staged loads and excavation pressures, establishing monitoring points for movements. You guarantee compliance with codes, standards, and site constraints, and you coordinate with specialists for hazardous materials or moisture risk.
Your focus remains practical, data-driven, and purpose-built for a controlled, predictable transformation.
- Check foundation stability and load paths
- Analyze material compatibility at interfaces
- Map utilities and temporary support needs
- Confirm regulatory and safety requirements
Creating Sightlines That Keep Spaces Connected
To preserve openness while preserving structure, you’ll prioritize sightline paths that link primary rooms and circulation routes without compromising load paths or safety. You’ll assess how existing partitions affect views from key seating areas and entry points, then refine alignments to maintain visual connectivity while containing functional zones.
Focus on horizontal lines and pillar placements that sustain coherence between kitchen, living, and dining spaces, enabling natural supervision and effortless circulation. Use vertical adjustments, like partial screens or low partitions, to separate zones without breaking sightlines.
Consider garden privacy when sightlines extend toward outdoor spaces, ensuring neighbors aren’t exposed to private areas. Thoughtful furniture arrangement reinforces flow, anchors focal points, and preserves openness across the plan.
Materials and Finishes for a Cohesive Look

Choose materials and finishes that read as a single, cohesive language across the plan. You’ll unite surfaces, textures, and tones so they reinforce function, flow, and perception of space.
Select a restrained color strategy that extends from room to room, reinforcing unity without flattening contrast.
Pair finishes with intention: matte walls, subtle gloss on cabinetry, and consistent hardware.
Prioritize durability in high-traffic zones, but don’t sacrifice tactility.
Plan color palettes and surface rhythms that guide furniture placement and sightlines, helping the eye travel through the home smoothly.
Test lighting against your chosen finishes to avoid mismatches.
- Color palettes that unify walls, cabinetry, and flooring
- Materials with complementary textures across areas
- Consistent hardware and details for rhythm
- Furniture placement that reinforces flow and cohesion
From Permits to Practicalities: Planning a One-Wall Breakthrough
You’ll map the permit pathways and potential pitfalls early, so your one-wall breakthrough stays on track.
As you set milestones, you’ll align approvals, utilities, and structural checks with practical build steps.
This clarity lets you anticipate challenges and keep the project moving smoothly.
Permit Pathways and Pitfalls
Securing the right permits is the critical first step in a one-wall breakthrough, yet the process isn’t a mystery. You’ll navigate zoning, building codes, and heritage constraints with a plan that minimizes delays and avoids rework.
Start by mapping required approvals, timelines, and responsible authorities, then align design choices to meet them. Design considerations guide scope, height, and party-wall implications, while material sourcing informs documentation and compliance.
- Confirm allowable alteration scope and party-wall requirements for your terrace
- Identify applicable heritage or conservation constraints early
- Align material choices with listed codes and fire-safety specs
- Build a realistic timetable that accounts for inspections, amendments, and approvals
Practical Build Milestones
From permits to practicalities, this phase translates approvals into a concrete schedule and tangible steps. You map milestones like demolition, structural assessment, and wall openings onto a calendar, then align tasks with permits, inspections, and material lead times.
You prioritize risk, sequencing, and dependencies, documenting each milestone with clear deliverables and success criteria. Historical context informs sequencing—older terraced rows may require phased utilities and party-wall considerations that affect timing and costs.
You budget for contingencies, detailing cost estimates, crew availability, and weather windows. You assess site logistics, access routes, and storage for materials to minimize disruption to neighbors, reinforcing the project’s Community impact.
You finalize a practical build timeline, progress-tracking protocol, and surrender points for approvals, ensuring steady momentum toward a safe, compliant breakthrough.
Real Terraced Transformations: Case Studies of One-Wall Breaks
One-wall breaks in terraced houses reveal how a single intervention can redefine space flow, light, and function without sacrificing exterior harmony. You’ll see that tight plans can open sightlines, connect rooms, and improve daily usability while preserving historic street character and massing.
- Historic preservation is enhanced by mindful detailing that harmonizes new openings with original reads.
- Community impact emerges as neighbors gain daylight and safer circulation without visual disruption.
- Structural integrity remains prioritized through precise framing and load transfer.
- Material choices bridge old and new, ensuring durable results that age gracefully with the terrace row.
Budgeting a One-Wall Break: Costs, Tradeoffs, and Value
Budgeting a one-wall break demands a tight, reality-grounded plan: know what you want to gain in light, flow, and usability, then map costs against value.
You’ll start with a clear scope, noting essential openings, finishes, and structural checks.
Do a rigorous cost analysis that spans materials, labor, permits, and contingency, then compare against the anticipated gains in usability and daylight.
Identify tradeoff considerations early: higher-end glazing versus mid-range alternatives, bulkhead versus routed ceiling access, and impact on resale value.
Prioritize options that deliver the most usable floor area per cost, and quantify maintenance implications.
Document your assumptions, build a phased budget if needed, and reserve a contingency of 10–15%.
This disciplined framing keeps you aligned with practical outcomes, not aspirational excess.
Balancing Light, Air, and Acoustics in Open Rooms

You balance Light Flow, ensuring daylight moves efficiently through openings while avoiding glare and heat buildup.
You optimize Air Circulation Tactics with smart zoning and ventilation that keep spaces comfortable without drafty hotspots.
You apply Acoustic Zoning Strategies to isolate noise while preserving openness, so light, air, and sound work together rather than against each other.
Light Flow Balance
Light flows through open rooms when you balance light, air, and acoustics with intention. You manage sightlines, reflections, and thresholds to prevent glare, echo, or dead zones, while preserving architectural character. Prioritize materials and finishes that honor Historical preservation without compromising function.
Consider window placement, shading, and glazing to modulate daylight while maintaining privacy and heat control. Acoustic rugs, subtle panels, and soft furnishings reduce noise transfer without cluttering sightlines.
Plan around core zones so daylight sweeps across surfaces evenly, enhancing perceived height and warmth while respecting original detailing. Address Privacy concerns by designing sight protection into layout changes and by selecting discreet, breathable light sources that enhance the space’s clarity and usability.
- Align daylight with room rhythm while honoring historical features
- Use tactful glazing and shading to control glare
- Employ quiet, flexible acoustics with minimal visual impact
- Prioritize privacy within open-plan zones without sacrificing brightness
Air Circulation Tactics
Air circulation in open rooms should be engineered as a core design driver, not an afterthought. You optimize flow by aligning light, air, and acoustic control with room geometry, not by adding fillers after fixes fail.
Use vertical ducts or ceiling plenums to move stale air upward and outward, while bringing fresh air in through strategically placed returns. Pair this with cross-ventilation paths that leverage existing apertures to avoid drafts yet maintain consistency of air exchange.
Incorporate indoor plants as low‑maintenance air quality allies, keeping species that tolerate lower light near entry zones to support micro-curtain effects without crowding space.
Select ventilation systems with adjustable speed, low noise, and easy filtration to sustain comfort across open-plan zones and seasonal shifts.
Acoustic Zoning Strategies
To balance light, air, and acoustics in open rooms, implement acoustic zoning that aligns with existing geometry and user needs. You design partitions, screens, and materials to create distinct zones without interrupting sightlines, while preserving daylight and ventilation.
Focus on sound insulation between areas prone to noise transfer, and plan privacy enhancement where conversations shouldn’t travel. Use absorptive surfaces near active zones and reflective finishes in quieter pockets to control reverberation.
Align corridor and doorway openings with acoustic breaks to minimize leakage.
- Define noise gradients with varied surface absorption
- Place screens or shelves to interrupt line-of-sight and sound paths
- Select materials that balance light reflectivity and sound control
- Integrate operable partitions to modulate openness as needed
Next Moves: Expanding the Concept Beyond the First Wall
Next moves involve expanding the concept beyond the first wall by rethinking flow, access, and connections across the entire terrace. You assess how stacking and sightlines link rooms from front to rear, ensuring daylight penetrates shared cores while maintaining structural clarity.
Prioritize a coherent corridor strategy that minimizes wasted space and supports flexible use, adapting to evolving family needs without compromising historic integrity. Plan interfaces between public and private zones to preserve intimate scales while enabling seamless circulation.
Consider interior aesthetics as a unifying thread—materials, textures, and color palettes that sustain architectural rhythm across extensions. For historical preservation, document alterations, respect original proportions, and use reversible interventions where possible, so future generations can reinterpret rather than erase lineage.
Frequently Asked Questions
How Long Does a One-Wall Break Typically Take?
A one-wall break typically takes a few days to a week, depending on load-bearing considerations and permits. You’ll coordinate with structural pros, verify proper shoring, and plan interior design changes while maximizing Home insulation during the process.
Will a Single Wall Change Affect Property Value?
A single wall change can affect value, but you’ll see the impact mainly through improved layout and appeal. Consider interior design and historical preservation factors; well-executed alterations respect historic features, enhancing marketability without compromising authenticity or compliance.
Can I DIY a One-Wall Transformation Safely?
You can DIY a one-wall transformation safely if you plan carefully and follow load, electrical, and support guidelines; use decorative accents thoughtfully and select color schemes that enhance space, lighting, and structural clarity, while consulting a pro for risky steps.
What Hidden Costs Might Surprise Me?
Ironically, yes, hidden expenses bite—the kind you overlook until invoices arrive. You’ll likely encounter Unexpected fees, permit surprises, and material waste costs; plan contingencies, compare quotes, and audit contractor invoices to stay financially sane and on track.
Do I Need a Structural Engineer’s Approval?
Yes, you likely need a structural engineer’s approval before proceeding. They assess safety, load paths, and compliance, ensuring design aesthetics align with building permits and local codes, preventing costly revisions later. Obtain permits, then document calculations and drawings.
Conclusion
You’ve seen how a single wall can redefine a terraced home, turning tight compartments into an airy, connected flow. The key stat: homes with a single structural alteration can boost natural light by up to 40% and lift perceived room sizes by a comparable margin, without a full rebuild. Plan carefully with a structural engineer, respect acoustics, and budget for phased trades. Start with the wall that releases the most daylight, then expand your open-plan potential.