You can fit big personality into a tiny apartment by zoning smartly, using floating and modular furniture, and hiding clutter with clever storage. Define areas with color, light, and reflective surfaces to expand perceived space. Choose low-profile, multi-task pieces and under-seat or wall storage to keep floors clear. Layer lighting for mood and function, then personalize with meaningful, curated accents. Ready to transform your space while keeping it calm and cohesive? More tips await as you explore further.
Key Takeaways
- Prioritize multi-functional, modular, and floating furniture to maximize small footprints while keeping surfaces uncluttered.
- Use color zoning and light neutrals with warm accents to create depth and personality without visual chaos.
- Layer lighting (ambient, task, accent) with dimmers to sculpt mood and perceived space.
- Incorporate reflective surfaces and mirrors to amplify natural light and space perception.
- Practice quarterly resets with concealed storage and labeled zones to maintain order and personal style.
How Tiny Apartments Should Be Designed: The Problem, The Plan
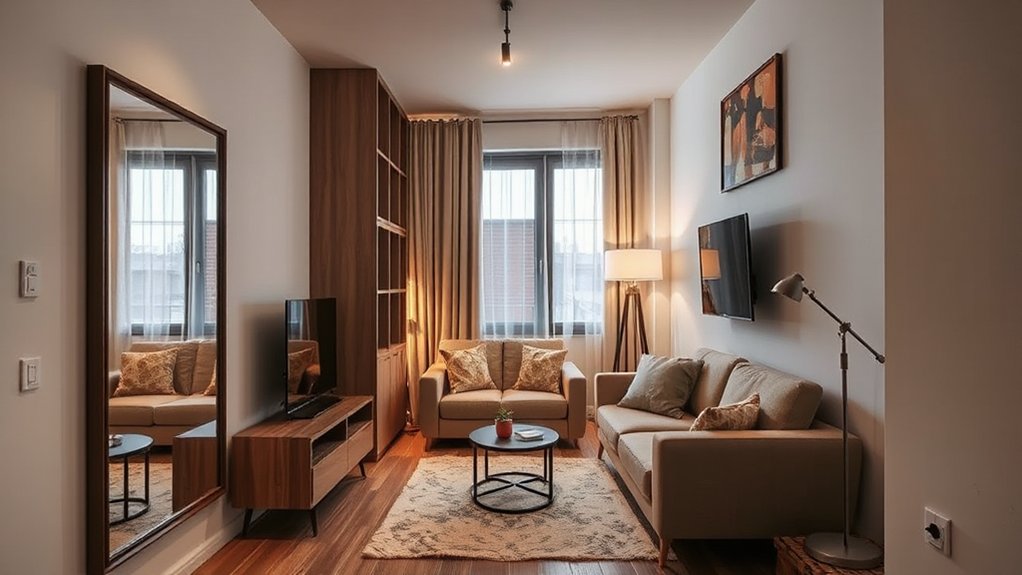
Tiny apartments pose a design challenge: how to maximize function without sacrificing livability. You identify core needs first: sleeping, cooking, storage, and work. Then you map zones that serve multiple tasks, avoiding wasteful separation.
Prioritize A/V compactness, fold-away surfaces, and modular furniture that can reconfigure in minutes. Use verticality to gain storage without footprints, and choose light hues with reflective surfaces to amplify space perception.
For aesthetics, integrate Vintage charm through period-inspired hardware, brass accents, and warm woods without overpowering scale. Plant integration adds life and air quality, but keep planters slim and grouped to minimize visual clutter.
Plan data-driven layouts, test traffic flow, and favor durable materials. If you design with flexibility, you’ll maintain personality without compromising livability.
Zone Smarter: Defining Areas With Color
Color zoning isn’t just about looks; it defines flow and function in a compact space. You’ll use targeted hues to carve distinct areas—kitchen, work nook, living zone—without walls, guiding movement and mood.
Start with a neutral base and layer strategic accents to emphasize purpose and keep rooms visually cohesive.
Color Zoning Techniques
Curious how color can define space in a compact layout? Color zoning techniques cue the eye and guide traffic without walls. You apply deliberate hues to mark functional zones—kitchen prep, work nooks, dining alcoves—while preserving an airy flow.
Use a restrained palette, then reinforce boundaries with variations in tone, saturation, or finish rather than bulky dividers. You’ll benefit from painting gradients: lighter walls adjacent to windows enlarge perception; deeper accents anchor seating or work zones.
Consider color psychology to trigger desired moods in each area, aligning energy with purpose. For durability, choose durable paints with easy-clean finishes for high-traffic surfaces; test color samples under natural and artificial light, noting how gloss shifts.
Paint durability matters as zones stay distinct through daily use.
Defining Spaces With Hue
Use light-to-dark progressions, not abrupt shifts, to preserve flow in a compact footprint. Color psychology guides your choices: calm blues for focus, warm ochres for sociability, greens for balance. Apply paint techniques judiciously—soft matte walls to reduce glare, subtle satin accents to delineate edges, and strategic color blocks in furniture-backed areas to cue function.
Keep fixtures and textiles aligned with the palette to avoid visual clutter. Precise application yields intentional, legible spaces that feel larger and thoughtfully organized.
Floating Furniture: Free Up Floor Space
Consider floating storage solutions, under-floor surfaces, and wall-mounted furniture to reclaim floor space without sacrificing function. You’ll gain access to storage and surfaces while keeping rooms airy and easy to navigate.
This approach centers on clean lines, sturdy mounting, and thoughtful placement to maximize every square inch.
Floating Storage Solutions
Opt for furniture that doubles as storage—benches, headboards, or coffee tables with hidden compartments—to maintain a clean top surface. Prioritize modular units that can reconfigure as needs shift, preserving flexibility.
When selecting materials, prefer light-toned veneers or matte laminates to reflect light and feel airy. Coordinate decorative accents and color palettes to unify the room without crowding it—keep a restrained, cohesive scheme across walls, textiles, and accessories.
Finally, install floating shelves at varied heights for visual interest and practical density.
Under-Floor Surfaces
Building on floating storage, under-floor surfaces extend the idea of goodbye to clutter by using space beneath your feet. You implement clean, functional planes that rise above mess while preserving square footage. Under floor surfaces optimize flow with purpose: define zones, improve access, and support built-in mechanisms without visual clutter.
Consider radiant heating for comfort and energy efficiency, smoothly integrated beneath a discreet finish. Subfloor ventilation keeps air moving, preventing moisture buildup that harms fixtures. Plan carefully, measure for utility, and coordinate with wiring and plumbing to avoid conflicts.
Use modular panels, removable sections, and concealed outlets to maintain a pristine look.
- Concealed panels for easy access
- Radiant heating zones aligned with living areas
- Ventilation pathways beneath high-moisture spots
- Flush hinges and minimal gaps
- Durable, slip-resistant finishes
Wall-Mounted Furniture
This approach prioritizes vertical storage, which makes every inch usable without crowding the floor. Plan around strong anchors, weight limits, and modular units that adapt to evolving needs.
Keep surfaces uncluttered; use slim profiles and hidden supports to maintain a sense of openness. Combine recessed lighting with mounted shelves to maintain brightness without bulk.
Pair with a floating desk or bed nook to sustain a continuous, breathable feel. Purposeful installation yields functional, visually calm spaces.
Mirrors and Sheen: Reflective Surfaces Expand Rooms
Mirrors and sheen aren’t just décor; they’re space multipliers. You’ll harness reflective surfaces to visually extend dimensions, bounce light, and sharpen contrast without adding bulk. Precision placement matters more than size: align with sightlines, avoid clutter, and choose finishes that complement your palette.
- Position a tall mirror opposite a window to double daylight.
- Use a single, large mirror to anchor a room’s focal point.
- Glass convectors blur transitions between indoors and outdoors.
- Opt for recessed, framed mirrors to reduce visual weight.
- Pair vintage accents with modern glass for deliberate contrast.
Notes: embrace outdoor integration through seamless reflections from exterior vistas, and balance reflective elements with anti-glare textures. This keeps rooms bright, coherent, and proportionally legible.
Hidden Storage That Hides in Plain Sight

You can open hidden storage by pairing clever cabinet faces with space-smart containers, keeping essentials out of sight yet within reach.
Start with discreet hardware and seamless paneling that conceal organizers, then mix modular bins and pull-out shelves to maximize every inch.
This approach sets the stage to discuss Hidden Storage Tricks, Clever Cabinet Faces, and Space-Smart Containers as practical, repeatable design moves.
Hidden Storage Tricks
Hidden storage that hides in plain sight leverages clever geometry and accessible edges to reclaim the tiniest spaces. You’ll transform voids into value by thinking vertically and leveraging everyday surfaces.
- Hidden compartments beneath seating
- Concealed drawers in stairs and risers
- Creative cubbies built into window sills
- Recessed wall niches with slim fronts
- Fold-away panels disguising shelves
This approach delivers instant order without clutter. You locate tools, linens, or cables in dedicated zones, so everyday tasks stay efficient. Prioritize clean lines, consistent hardware, and predictable grab points to avoid friction.
Hidden compartments and Creative cubbies maximize capacity while preserving aesthetics. Maintain a short, cohesive palette to emphasize function over ornament. Plan around high-use items first, then fill gaps with slim storage.
The result is calm, efficient spaces that read as intentional design rather than storage hacks.
Clever Cabinet Faces
In clever cabinetry, the goal is to blend utility with aesthetics, so you don’t announce storage—you reveal it only when needed. Pick concealed magnetic pulls or push-to-open mechanisms to maintain clean lines. Light-toned interiors reflect space, while matte finishes minimize reflections that draw attention to edges.
For tight corners, consider corner-lift or swing-out shelves that remain recessed when shut. Guarantee doors align precisely; misalignment screams clutter. With intentional cabinet faces, you gain expanded storage, improved flow, and an uncluttered, polished atmosphere in a compact footprint.
Space-Smart Containers
- Under-seat drawers that reveal space when you sit
- Lidded ottomans doubling as coffee tables
- Hollow coffee table cores for magazines and cords
- Wall-mounted shelves with shallow baskets
- Kitchen islands with recessed bins for produce or tools
Apply consistently, label where needed, and rotate seasonal items to maintain order and quick access.
Scaling Your Pieces for Tiny Rooms
Scaling your furniture to fit tiny rooms starts with choosing pieces that complement the space rather than overwhelm it. You’ll prioritize proportion, low-profile silhouettes, and modular options that can reposition as needs shift. Measure clearance paths first, then select compact, functional furniture that preserves airflow and sightlines.
Use furniture scaling to maintain balance between zones, avoiding oversized anchors that crowd walls or ceilings. Opt for multi-task items—sofas with built-in storage, nesting tables, and wall-mounted desks—to maximize capabilities without overbuilding.
Finish with a restrained palette; color zoning guides emphasis without bulk, using lighter tones to expand perimeters and richer accents to define key areas. Keep traffic clear, align legs to floors, and ensure grip-and-dump surfaces don’t interrupt movement or safety.
Light Up Lofts: Natural and Artificial Illumination
You’ll maximize natural light by choosing window placements and reflective surfaces, so daylight fills every corner.
Layered artificial illumination lets you adjust intensity and mood without clutter, from task to ambient glow.
Together, these strategies create a bright, versatile loft that shifts with your day and your style.
Natural Light Maximized
Natural light floods compact lofts through carefully placed windows and reflective surfaces, making small spaces feel expansive without relying on artificial brightness.
- Orient windows to maximize sun exposure and minimize glare
- Use light, glossy finishes to bounce daylight deeper
- Choose sheer window treatments that preserve sightlines
- Integrate outdoor views with balconies or green walls
- Pair vintage accents with natural illumination for character
You optimize layout by avoiding obstructive furniture silhouettes and anchoring mirrors opposite light sources.
Keep color schemes neutral with warm undertones to enhance daylight warmth.
Consider skylights if feasible to increase height perception and reduce shade zones.
Outdoor integration, such as a compact courtyard or balcony, extends the perception of space and supports seasonal light variation.
This approach remains precise, actionable, and visually informed, with a focus on practical steps to amplify daylight without heavy lighting reliance.
Layered Artificial Illumination
To illuminate loft living, layer artificial light with intent: ambient, task, and accent layers work together to compensate for compact footprints and variable daylight.
You’ll balance sources to avoid glare and deep shadows, creating a cohesive glow that reads as natural, not artificial. Ambient lighting establishes the base tone with wide, soft pools from recessed, track, or ceiling fixtures.
Task lighting targets specific work zones—over desks, counters, and reading nooks—using directional, adjustable fixtures.
Accent lighting highlights architectural features, art, and textiles, adding depth and personality.
Choose dimmable options and color temperatures near 2700–3000K for warmth without yellow cast.
This approach cultivates artificial ambiance while maintaining efficiency; it’s essential light layering for functional, inviting loft interiors.
Mood Through Glow
Ambient and artificial light must work in concert to sculpt mood in loft spaces. You shape atmospheres by mastering tone, temperature, and layer depth, not just brightness. Natural glow reveals textures; artificial accents define zones with intention. Your choices reference artistic expressions and cultural influences, translating them into concrete ambience.
- Choose daylight-correct LEDs for accuracy and warmth
- Layer task, ambient, and accent lighting to sculpt space
- Dim strategically to reveal sculptural details and fabrics
- Use color temperature shifts to cue different activities
- Align fixtures with cultural motifs for cohesive aesthetics
This precise approach keeps a small footprint expansive, letting mood breathe without clutter. You’ll achieve a gallery-like clarity where every corner communicates purpose, depth, and personality through glow.
Bigger-Looking Color Schemes for Small Spaces
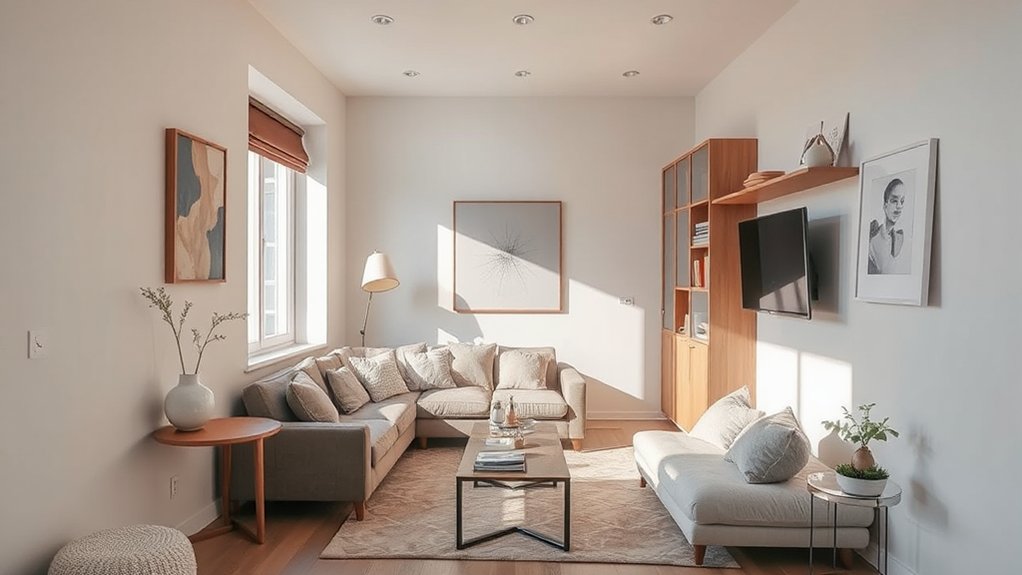
Color can make a small space feel bigger if you choose the right palette. You’ll apply a deliberate scheme that reads as seamless, not fragmented, using value shifts rather than stark contrasts. Light, cool neutrals on walls expand boundaries; introduce slightly warmer accents through textiles and furniture to avoid sterile impressions.
Implement color psychology by mapping zones: softer tones in primary living areas, deeper notes only where you need focus. Use paint finishes strategically—matte on walls to reduce glare, satin or eggshell on trim for definition, and a glossy accent door or cabinet to catch eye without overwhelming.
Limit color variety to three to five cohesive hues, plus one unifying primer. Test swatches in natural and artificial light, then commit with confidence.
Texture Without Clutter: Depth That Feels Calm
Texture can create depth without adding clutter, so you’ll layer tactile elements thoughtfully that invite calm rather than chaos. You’ll seek textural contrast to anchor spaces without multiplying surfaces, and you’ll prioritize a calming ambiance over busy detail.
- Subtle weave fabrics paired with smooth finishes for balance
- Natural materials: wood, stone, linen to add tactility
- Matte surfaces to reduce glare and visual noise
- Layered textures at eye level for in-room depth
- Minimal accessories with purposeful rhythm and spacing
Keep a restrained palette that lets textures speak, and let negative space breathe between elements. Combine soft textiles with crisp edges to avoid heaviness, ensuring every touchpoint serves function and mood.
You’ll notice how measured texture elevates calm, making compact rooms feel larger yet intimate. Textural contrast guides the eye, not the clutter.
Smart Storage Hacks You’ll Actually Use
Smart storage can transform a tiny apartment from cluttered to calm, without sacrificing style. You’ll optimize vertical space with wall-mounted units and floating shelves, keeping floor area open for movement.
Choose multi-function furniture: a storage ottoman, bed with drawers, or a desk that folds into a console. Prioritize hidden compartments and labeled bins so daily items stay organized without visual noise.
Integrate storage into Design aesthetics, selecting finishes that echo your palette to maintain cohesion. Opt for slim profiles, shallow depth racks, and modular components you can reconfigure as needs shift.
Use clear containers for quick access and soft-close mechanisms for quiet efficiency. Track items you actually use, and purge periodically to sustain practical Smart storage results.
Zoning With Rugs and Dividers: Practical, Not Pushed Apart

Rugs and dividers aren’t just decor; they’re tools that define zones without walling you off. You’ll create practical zone separation by letting texture, color, and scale cue function, not walls. Treat borders as subtle signals that one area ends and another begins, while preserving flow and light.
- Use varying rug sizes to anchor distinct functions
- Choose rugs as dividers in complementary tones
- Layer mats indoors to soften transitions
- Allow sightlines through semi-transparent dividers
- Align furniture groups with rug edges for clarity
This approach keeps space cohesive, functional, and visually quiet. You’ll gain dedicated corners without sacrificing openness, so traffic remains fluid and rooms feel larger. Prioritize low-pile textures for easy cleaning and quick changes, and balance bold patterns with solid neutrals. Your apartment will read as intentional, not fragmented.
Compact Kitchen, Big Flavor: Efficient Layouts
Can a compact kitchen deliver big flavor without sacrificing flow? Yes, with deliberate layout and smart zoning.
Start by anchoring the work triangle near your primary prep zone, stove, and sink to minimize steps.
Choose compact appliances that fit your footprint without compromising performance, freeing counter space for prep and plating.
Use wall-mounted storage and vertical shelving to keep counters clear, and integrate pull-out boards or cutting surfaces for instant extra workspace.
Group related tasks—chopping, sautéing, finishing—in a single sequence to sustain efficient workflows.
Optimize lighting and ventilation to enhance usability during peak cooking moments.
Implement consistent, durable finishes to simplify maintenance and keep the space visually cohesive.
This approach yields a kitchen that feels roomy, responsive, and capable.
Personalization Without Piling On Clutter
When you’ve balanced efficiency in a small kitchen, the real differentiator becomes personalization that doesn’t clutter. You’ll tailor spaces through deliberate choices rather than excess, keeping function primary while adding character.
Focus on intentional displays, multifunctional décor, and a restrained color palate that reflects you without shouting.
- Personalization tips: curate a few meaningful objects, rotate seasonal accents, and use wall space for memories.
- Opt for compact, high-quality essentials that spark joy yet stay organized.
- Use closed storage to hide clutter while revealing only curated personality.
- Incorporate adaptable accents that shift with your routines.
- Maintain clutter management by scheduling quarterly resets and labeling zones for quick tidying.
Layered Lighting for Mood and Space

Layered lighting is essential in a tiny apartment because it shapes mood, defines zones, and makes every square foot feel more expansive. You’ll combine ambient, task, and accent layers to control depth and function without clutter.
Begin with an ambient glow from a ceiling or wall wash to create even, low-intensity illumination that reduces shadows. Add task lighting near work areas—a slim desk lamp or under-cabinet strip—so you see clearly without glare.
Introduce soft accents with decorative lamps or warm-toned bulbs to add personality and warmth. Use dimmers to shift from bright focus to cozy evenings, and align color temperatures for cohesion.
Keep fixtures proportional to spaces, avoiding overbearing scale, and let the lighting layout guide perceived space, not constrain it.
Real-Life Makeovers: 3 Tiny Apartments, Bold Personalities
Three tiny apartments prove you don’t need space to make a bold statement: smart layout, standout finishes, and personalized details transform compact rooms into expressive homes. In Real-Life Makeovers, you’ll see how three personalities maximize impact with precise choices, balancing aesthetics and function. Each project demonstrates intentional scale, multi-use zones, and durable materials that endure daily life.
- Outdoor gardens integrate greenery without crowding
- Petite kitchens with hidden prep zones and smart appliances
- Platform beds and hidden storage for clutter control
- Pet friendly design: scratch-worthy finishes, easy-clean surfaces
- Statement walls paired with cohesive accessories
These makeovers prove bold color, texture, and function can coexist, delivering memorable spaces you can live in confidently.
Frequently Asked Questions
How Can Tiny Spaces Feel Bigger Without Losing Coziness?
Mirrored furniture visually expands rooms, and vertical storage keeps surfaces clear, boosting perceived space without sacrificing coziness. You reflect light, create depth, and maintain warmth, using mirrored surfaces strategically while stacking shelves upward for efficient, breathable organization.
What Budget Tricks Maximize Impact per Square Foot?
Lighting techniques and smart storage solutions maximize impact per square foot on a budget. You’ll brighten shadows, carve zones, and conceal clutter; choose multi-purpose furniture, reflectors, and vertical storage to create the illusion of space without sacrificing coziness.
Which Colors Boost Perceived Room Height Most?
Blue and white ceilings or light neutrals boost perceived spaciousness; cool hues expand walls, warm accents keep balance. Color psychology shows high-contrast trim can heighten perceived height, especially with vertical lines. Use light tones for ceilings, shelves, and walls.
How to Choose Multi-Functional Furniture Effectively?
Choose multi-functional furniture by prioritizing transformative storage and ergonomic layouts, then test pieces that hide clutter while preserving flow; you’ll uncover space-saving tricks, seamless shifts, and stylish efficiency, keeping your room calm, organized, and surprisingly expansive.
What Common Mistakes Sabotage Small-Space Design Success?
Common mistakes sabotage small-space design: cluttering surfaces, overmatching styles, ignoring lighting layers, and sacrificing flow. You’ll fail without artistic accents and decorative lighting, which anchor personality while keeping scale calm, functional, and visually expansive. Prioritize restraint and purposeful details.
Conclusion
You optimize, you simplify, you personalize with restraint. You zone smartly, you separate spaces with color, you float furniture to breathe, you mirror to magnify light, you hide storage in plain sight, you streamline the kitchen, you curb clutter, you layer lighting, you reflect your personality. You create calm, you curate boldness, you balance function with flair, you design for scale, you design for life, you design for you. You master tiny rooms, you master big living.