



Floating shelves clear small-space clutter by using vertical walls, freeing floor space and keeping essentials within reach. Pick a style that fits your layout, lighting, and daily use, with sturdy mounting and balanced color. Choose durable materials—solid wood or veneer for longevity, metal in humid spots—and set heights and spacing for easy access. Budget wisely, consider quick-install options for renters, and plan placement to avoid visual chaos. If you want more, you’ll discover practical setup tips next.
Key Takeaways
- Floating shelves maximize vertical space, freeing floor area and reducing clutter in small rooms.
- Choose durable materials (solid wood or plywood with veneer) for longevity and load support.
- Plan placement at eye level with consistent spacing for a balanced, unobtrusive look.
- Securely mount into studs or appropriate anchors to prevent sagging and ensure safety.
- Style shelves by grouping colors, varying heights, and adding plants or meaningful objects for cohesion.
Why Floating Shelves Clear Small-Space Clutter
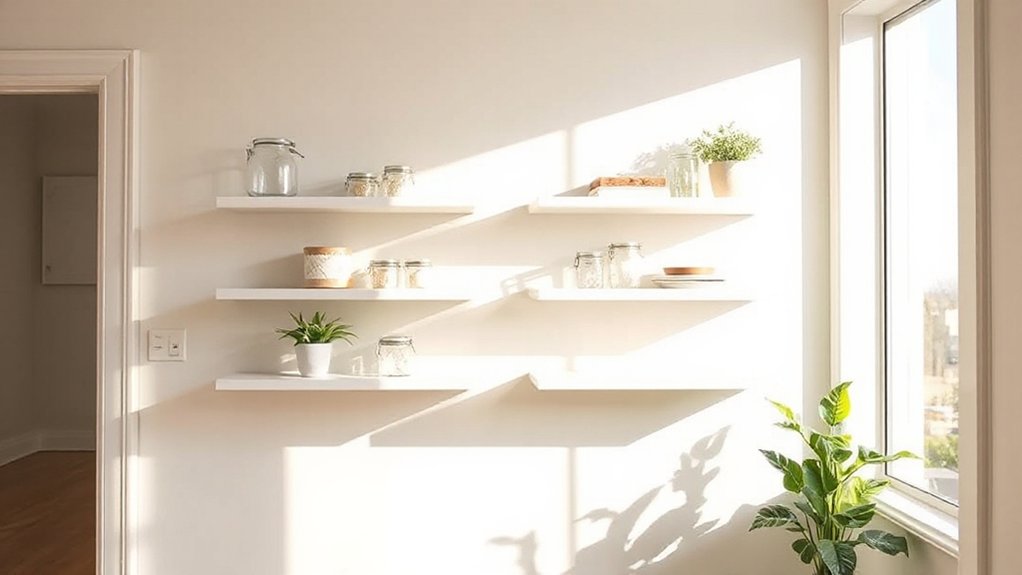
Floating shelves clear small-space clutter by making every inch count. When you install them, you free floor space and gain organization without bulk. You’ll place your essentials on a sleek plane, letting walls carry the weight of decorative accents, not furniture.
This approach reduces visual chaos and creates a calm, ordered feel. With no bulky cabinets, you can keep frequently used items within reach, boosting daily efficiency.
The shelves act as discreet storage that draws attention to what matters, rather than to cluttered surfaces. You’ll notice space maximization in action: vertical surfaces become usable storage, corners stop collecting dust, and you preserve open pathways.
The result is a cleaner, more functional room that remains polished and practical.
How to Pick the Right Floating Shelf Style
Choosing the right floating shelf style starts with your space, not just the look you want. You’ll pick a style that fits your layout, lighting, and daily use, then refine it with color coordination to keep everything cohesive.
Prioritize shelf durability in the design—weight capacity and sturdy wall mounting matter as much as appearance.
- Align the shelf with wall color and room vibe to feel intentional.
- Favor clean lines for small spaces to prevent visual clutter.
- Match weight needs to the items you’ll display for lasting performance.
- Choose a style that balances functionality with the room’s mood.
Floating-Shelf Materials That Last
When you’re selecting floating shelves, material quality matters as much as design. You’ll want materials with strong load-bearing capabilities, resistance to humidity, and minimal warping over time.
Solid wood offers durability and a classic look, but pick a species with stable grains to reduce movement. MDF or plywood with a solid veneer can be budget-friendly options if finished well, yet watch for edge chipping and weight limits.
Metal shelves provide stiffness and a modern vibe, yet guarantee corrosion resistance in humid spaces.
For versatility, consider a plywood core with a durable veneer; it balances aesthetic appeal and resilience.
Remember to evaluate finish quality, moisture exposure, and construction joinery. Material durability and aesthetic appeal guide lasting performance beyond initial impressions.
Set the Right Shelf Height and Spacing
Think about shelf height, spacing, and where you’ll actually use the items you keep handy.
Consider Shelf Height Guidelines for eye level placement, Proper Spacing Tips to prevent crowding, and Mounting Position Considerations to avoid obstructions.
With these factors in mind, you’ll set shelves that look balanced and stay practical.
Shelf Height Guidelines
Shelf height matters: place shelves so the most-used items are at eye level or within easy reach, leaving higher shelves for less-frequently accessed pieces. You’ll benefit from a practical approach that respects design trends and color schemes, keeping the look cohesive with your decor.
1) Position key items at reach for daily use, reducing strain and clutter.
2) Separate tall and short objects to balance weight and accessibility.
3) Use consistent spacing to create a clean, unified silhouette.
4) Align shelves with wall features or architectural lines for a polished finish.
Proper Spacing Tips
A solid spacing plan keeps your floating shelves both functional and visually balanced. To set the right height, reference eye level and furniture lines, then keep similar shelves aligned for consistency. Measure from floor to shelf and note comfortable reach among frequent items, avoiding clutter in high-traffic zones.
Space between shelves should accommodate typical objects—books, decor, or baskets—without crowding. Aim for an 8 to 12 inch gap for small collections, and 12 to 15 inches for taller stacks, adjusting based on room scale.
Consider Color coordination to unify the display, and Shelf styling to create rhythm with varying heights and densities. Reassess periodically, removing dated pieces and shifting items to maintain a clean, cohesive look.
Mounting Position Considerations
Positioning your shelves properly starts with how high you mount them and how far apart they sit. For maximum use, consider eye level for daily items and higher placements for display pieces. Also account for wall type and existing furniture to guarantee stability and color flow.
Color coordination guides the overall look, while material durability handles daily use without sagging. Plan spacing to balance clutter and accessibility, especially in small rooms.
- Choose heights that create a natural reading line for your eyes and grab-and-go access.
- Align shelves with key furniture edges to avoid visual chaos.
- Vary the spacing for mixed items, keeping heavier pieces lower.
- Test by loading light items first to ensure sturdiness and calm aesthetics.
Safe Load: How Much Weight Can Floating Shelves Hold?
Wondering how much weight your floating shelves can safely bear? The answer depends on the mounting method, wall material, and shelf rod or bracket design. Start with manufacturer specs for load ratings, and don’t exceed them.
In drywall, use appropriate studs or high-quality anchors; in masonry, opt for concrete screws and epoxy if needed. Distribute weight evenly to prevent sagging, and avoid concentrated loads on one end.
Typical shelves hold around 25–50 pounds when properly installed, but lighter for thinner materials or hollow cores. Always test gradually before loading with decor.
For daily use, plan for decorative accents and practical items rather than heavy, dense objects. This approach supports shelf styling while preserving structural integrity and safety.
Tools and Hardware for a Quick, Clean Install

When you’re teeing up a quick, clean install, the right tools and hardware save time and protect your shelves. To keep things tidy, pick components that match your color scheme and are easy to handle. Color coordination helps you spot mismatches at a glance, while shelf labels stay with the project for future tweaks.
- Carpenter’s level and square for precise alignment
- Drill with sharp bits and a stud finder for solid anchors
- Finish screws and anchors that blend with your wall color
- Label-ready tape or markers to track locations and weights
With the right setup, you’ll mark placements once, drill cleanly, and secure confidently. Your install stays neat, quick, and professional.
Hidden Brackets vs. Surface-Mounted Brackets: Which Is Best?
Hidden brackets hide the hardware and keep the shelf line clean, but surface-mounted brackets offer easier installation and solid strength, especially for uneven walls.
In a bracket comparison, you weigh appearance against practicality: hidden brackets deliver a seamless look, yet surface-mounted options simplify leveling and load distribution.
You’ll notice that hidden systems rely on recessed supports, which can complicate mounting and require precise framing. Surface-mounted brackets, by contrast, present a straightforward installation technique, with visible supports that reinforce weight capacity and adjust to wall irregularities.
Consider wall material, desired aesthetic, and you’ll choose confidently. For most closets and living spaces, surface-mounted brackets strike a balanced blend of reliability and ease.
Keep these points in mind as you review installation techniques and determine the best fit for your project.
Step-by-Step Install: Mark, Level, and Secure
First, you’ll mark for alignment to guarantee the shelf sits straight.
Then you’ll level for stability so weight stays evenly supported.
Finally, you’ll secure with fasteners to lock in that precise position.
Marking Alignment Accuracy
To guarantee a precise install, start by marking the exact spots for your shelves. You’ll ensure decorative accents sit aligned and visually balanced, aiding color coordination throughout the space. Precision here prevents drift later and keeps the overall look intentional.
- Tape guides along the intended line to confirm straight alignment and symmetry.
- Measure equal spacing from adjacent walls or fixtures to maintain balance.
- Mark level reference points so screws land evenly, not skewed.
- Double-check marks from several angles to catch any misreads before drilling.
Leveling For Stability
Proceed methodically, as even a minor misalignment affects load distribution and aesthetics. Once level, mark any necessary secondary supports or brackets to maintain alignment during securing. Keep a steady hand and avoid over-tightening, which can stress the wall or warp the shelf.
Consider design trends when choosing placements and heights to create a balanced display. Color coordination matters, so confirm shelf color and wall tone complement surrounding decor.
Finish by rechecking level after mounting to confirm stability.
Securing With Fasteners
Ready to lock it in? Securing with fasteners completes the install, letting your shelves bear weight confidently. You’ll align marks, verify level, and anchor firmly to studs or appropriate anchors.
Use the chosen screws and wall anchors that match your wall type, avoiding over-tightening that could strip holes or crack drywall. Maintain color coordination with fasteners if visible, selecting finishes that blend with brackets and shelf edges.
For a polished look, consider decorative accents like washers or caps that hide screws while reinforcing support. Double-check clearance and load limits before loading items.
If you notice wobble, recheck stud location and re-seat fasteners. A secure mount makes every display feel intentional and sturdy, protecting belongings and elevating your space.
1) Prepare and mark accurately
2) Level with precision
3) Choose appropriate fasteners
4) Conceal or decorate for impact
Common DIY Mistakes to Avoid With Floating Shelves
Even small mistakes can derail a floating shelf project, so start by double-checking your plan and materials before you drill. You’ll avoid mismeasuring, misdrilling, and missed studs by confirming weight limits and chosen brackets upfront.
Don’t rush the mounting sequence: level once, then install anchors, screws, and brackets in the correct order. Select sturdy boards and compatible hardware; mismatched components invite sagging and wobble.
When you cut, space, or drill, keep clean measurements and a waste line to prevent errors. Plan around Design trends and color schemes you actually use, so you won’t have to redo later.
Measure wall space for clearance above and below, and confirm load distribution for objects you intend to display. Finally, don’t overlook shelf depth versus item depth to avoid protrusion.
Styling 101: Books, Decor, and Plants on Floating Shelves
Strategically layering books, decor, and plants on floating shelves transforms a wall into a functional gallery. You’ll balance color, texture, and height to create a cohesive look that stays practical.
Color coordination guides choices, while shelf styling keeps items accessible and displayed with intention.
- Group items by color family to unify the display and reduce visual noise.
- Vary heights and depths to add interest without clutter.
- Place meaningful objects near books to tell a story and evoke emotion.
- Include a live or cut plant for movement and freshness, updating seasonal pieces as needed.
High-Impact Nook Ideas: Entryway, Kitchen, and Home Office

Think about how you can transform entryways, kitchens, and home offices with smart shelf placement that frees up real space.
In the entry, prioritize easy-access storage for keys, mail, and daily essentials.
In the kitchen, plan shelves for utensils, mugs, and spices to reduce clutter.
For the home office, use shelves for organizing supplies and reference materials, pairing them with simple labeling for quick finds.
Entryway Storage Potential
Is your entryway begging for organized, space-saving storage that doesn’t clutter the vibe? You can transform the nook with targeted shelves and smart accents that welcome guests and everyday items alike. Focus on clean lines, practical spacing, and a cohesive color story to prevent visual chaos.
- Separate zones for keys, mail, and everyday items to reduce clutter quickly.
- Add a slim shelf above a console for decorative accents without crowding the floor.
- Choose a color-coordinated palette that ties furniture, wall, and decor into one calm rhythm.
- Install hooks or a small cubby unit beneath for quick-access essentials and seasonal decor.
This approach keeps entryway storage functional, stylish, and inviting.
Kitchen Space Optimization
Spruce up your kitchen with high-impact nooks that maximize storage without stealing counter space. You’ll install slim floating shelves at eye level to keep daily essentials accessible and visible. Choose brackets and finishes that blend with your cabinets for a cohesive look, then group like items to reduce clutter.
Use the upper shelves for decorative touches—garden decor can pair with practical jars and spices to create a curated display. Install a few staggered lengths to break monotony while preserving vertical space for cookbooks or small appliances without crowding counters.
If you have a breakfast nook or pass-through, extend shelving to frame the area and encourage organized meal prep. Integrate outdoor-inspired accents, such as potted herbs and outdoor furniture-inspired trinkets, to spark freshness.
Home Office Organization Tools
Maximize productivity by carving out a focused home office nook that also doubles as a storage hub. You’ll blend function with flair, turning clutter into clarity while keeping artistic expression and culinary arts sensibilities nearby for quick mental resets.
Use vertical shelves, labeled bins, and a small whiteboard to map tasks, deadlines, and menus if you cook during breaks. Your setup should feel calm, not crowded, with natural light and a minimalist color palette to sharpen focus.
- Prioritize reachable storage to minimize friction during work sessions.
- Create a dedicated space for creative prompts tied to artistic expression.
- Integrate a compact filing system that doubles as a recipe or idea vault for Culinary arts inspiration.
- Add a sleek desk extension that doubles as a surface for quick meal prep notes.
Floating Shelves in Kids’ Spaces: Safety First
Floating shelves can be a smart storage solution in kids’ spaces, but safety must come first. You choose sturdy brackets and wall anchors appropriate for your wall type, then level each shelf before mounting.
Keep items low enough for kids to reach without stretching, and place heavier items on lower shelves to reduce tipping.
Use closed-front boxes or bins to discourage grabbing, and avoid placing delicate or small items within reach.
Align shelves away from doors, heat sources, and cords, and consider future growth when planning height.
Safety tips include securing the entire unit to studs and checking regularly for loosened hardware.
For little ones, toddler proofing means covering edges and removing loose accessories that could be pulled down.
Regular checks prevent accidents.
Maintenance Hacks to Keep Shelves Fresh
Keeping shelves fresh starts with simple cleaning tips for the surfaces and corners that collect dust. Implement a light dust-prep routine, schedule quick wipe-downs, and use microfiber tools to cut buildup without harsh cleaners.
Build a routine maintenance plan that covers cleaning tips for shelves, dust prevention methods, and a realistic schedule for upkeep.
Cleaning Tips For Shelves
Cleaning shelves isn’t hard when you break the task into quick steps: wipe down surfaces to remove dust, then tackle stains with a mild solution and a soft cloth. You’ll restore brightness fast, then strengthen habits that keep your shelves tidy.
- Focus on Cleaning routines you’ll perform weekly to prevent buildup.
- Group items by use and purpose for better shelf organization and ease.
- Wipe corners first to catch hidden grime, then finish with a buff.
- Schedule quick checks to refile, wipe, and seal any spills before they set.
Keep tools ready, stay consistent, and reward yourself after the session. Your shelves stay fresh, organized, and easy to navigate.
Dust Prevention Methods
Dust tends to settle fastest on open shelves, so tackle prevention with simple, proactive steps you can do weekly.
Start with a quick wipe of surfaces using a microfiber cloth to trap dust without spreading it.
Keep decorative accents minimal and deliberate to reduce visible buildup; rotate pieces to avoid flat, dusty surfaces.
Use a soft brush attachment on a handheld vacuum for corners and gaps, then straighten items to maintain color coordination and tidy lines.
Implement a light, indirect cleaning routine—dust before you rearrange—so you don’t re-distribute particles.
Seal gaps where possible and avoid exposing fabrics to open air.
Store items in closed containers when not in use, and place frequently touched items toward the front for easy maintenance.
Routine Maintenance Schedule
To keep shelves fresh, set a simple, repeatable routine you actually stick to. A steady maintenance schedule keeps your storage solutions looking intentional and your space uncluttered, preserving aesthetic enhancements with minimal effort.
- Wipe surfaces weekly with a microfiber cloth to prevent dust buildup and keep finishes gleaming.
- Check weight and adjust brackets monthly, ensuring stability and longevity.
- Rotate items quarterly to balance wear and reveal unused storage solutions.
- Inspect corners for mold or moisture, addressing spills immediately to protect materials and ambiance.
Budgeting for Floating Shelves: Cheap Finds vs. Custom Options
When budgeting for floating shelves, you’ll weigh cheap finds against custom options to balance cost, quality, and fit. You’ll start by identifying needed span, load, and finish, then map these to price bands.
Budget shopping can yield solid particleboard or MDF options with sturdy brackets, but beware hidden costs like anchors and doorsills. Compare prefinished versus unfinished pieces; finishing yourself saves money, yet adds time.
If you prioritize longevity and bespoke fit, consider custom craftsmanship, which delivers precise dimensions and tailored hardware, though it carries higher upfront cost.
Factor installation as a line item, not an afterthought. Balance aesthetics with practicality: choose styles and materials that align with your room’s purpose, maintenance routine, and budget threshold.
Quick-Install Options for Renters
1) Command-strip shelves—clean, versatile, and easy to remove without damage.
2) Tension-wall shelves—no anchors, suitable for light loads and adjustable heights.
3) Freestanding ladder units—free-standing, expands storage without wall alterations.
4) Adhesive-metal brackets with plywood shelves—strong, low-profile, and reusable.
Real-Life Before-and-After Floating-Shelf Transformations
You’ll see real-life results come to life when floating shelves move from concept to finished looks, with smart placements, measured spacing, and simple fixes that fit everyday spaces.
In real rooms, you’ll notice how a shelf becomes an art installation, balancing color, texture, and negative space. Versatile pairings—glass, wood, or metal—frame collections without crowding, while staggered heights create visual flow and easy access.
A vintage decor vignette can feel fresh with carefully chosen odds and ends, keeping provenance and patina intact.
Practical tweaks—leveling, anchoring, and hiding cords—keep surfaces tidy and safe.
Before-and-after photos prove the impact: clutter reduces, surfaces breathe, and your space reads intentional, not accidental.
You’ll gain confidence to experiment, refine, and enjoy the transformed, functional display.
How to Measure Success: Upgrading Your Space With Shelves
To measure success when upgrading with shelves, start by defining what you want the space to do for you—then track tangible changes in function, organization, and mood. You’ll learn what’s working, what’s not, and where to refine color schemes and decorating ideas for impact.
- You’ll feel clearance and order as items stay put, not piled up.
- You’ll notice faster access to essentials, saving minutes daily.
- You’ll enjoy a cohesive look that reflects your color schemes and taste.
- You’ll gain confidence to expand storage without overcrowding, guiding future decorating ideas.
Frequently Asked Questions
How Do I Choose Thickness for My Shelf Depth?
Thickness should match shelf material and weight capacity; deeper shelves often need thicker stock. For typical wood, use at least 3/4″ to 1″ for moderate loads, and adjust to keep deflection minimal while accommodating desired depth.
Can Shelves Be Mounted on Plaster Walls Safely?
Yes, you can mount on plaster walls if you locate studs and use proper anchors for weight capacity. Wall material matters; follow weight ratings, use toggle or masonry anchors, and verify screw depth to prevent sag or failure.
Do Shelves Require Drilled Studs Every Time?
You don’t need drilled studs every time. Shelf material and mounting hardware affect security; lighter loads tolerate anchors without studs, while heavier shelves require anchored studs for safety. Always assess weight, wall type, and manufacturer guidelines before mounting.
How to Disguise Visible Fasteners on Floating Shelves?
You conceal fasteners by using decorative brackets underneath or behind the shelf, plus concealed screws, then finish with paint touch up to blend gaps. Choose sturdy brackets, align carefully, and test load before declaring the repair complete.
What Resale Value Do Floating Shelves Add?
Floating shelves can boost resale value modestly, especially when you highlight decorative accents and sturdy builds. You’ll notice that material durability matters more, since buyers value long-lasting, versatile storage that complements existing decor and saves space.
Conclusion
You’ve explored how floating shelves clear tiny-space clutter and stretch your storage without crowding rooms. But does the theory hold that well‑placed shelves always equal calmer spaces? Not if you overload them or misjudge height. Tested tips—choose the right style, materials, spacing, and load—prove practical truth: thoughtful placement beats impulsive decorating. When you measure, budget, and install smartly, shelves transform function and feel, turning every inch into usable, organized space you actually enjoy using.



