

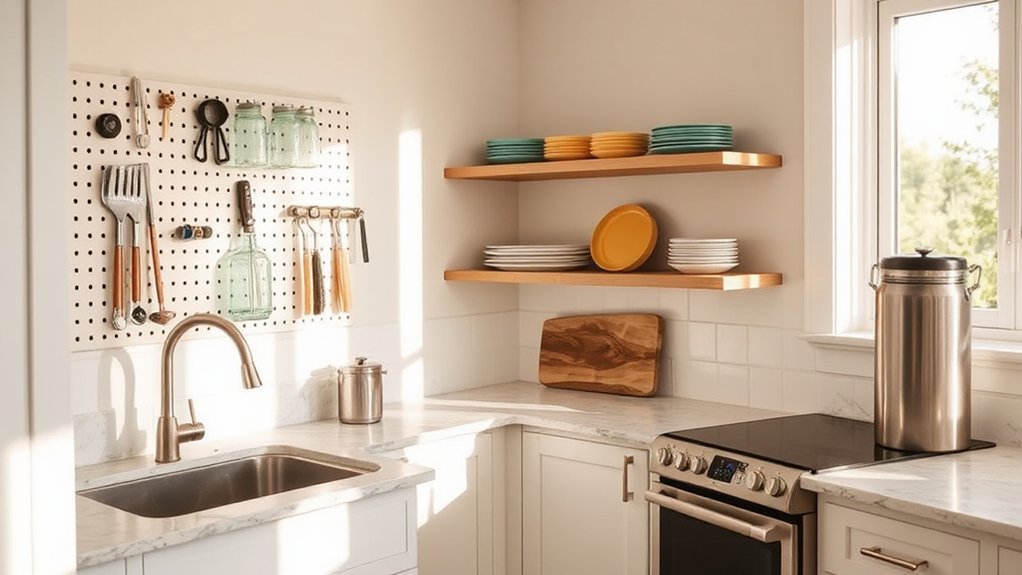

You can modernize your kitchen on a tight budget by planning first: set a firm, realistic budget and prioritize updates with high impact and low cost. Start with hardware swaps for instant freshness, then refresh walls, cabinets, and ceilings with quality primer and durable finishes. Add a budget-friendly backsplash, declutter to open space, and tackle DIY detailing like molding and trim. Hire pros only for electrical or structural work. Stay tuned for a practical, real-world case study that shows it all in action.
Key Takeaways
- Set a firm, prioritized budget and tackle high-impact, low-cost updates first to modernize efficiently.
- Refresh hardware and apply cohesive repainting (walls, cabinets, ceilings) for an instant modern feel.
- Declutter and optimize space with smart storage, keeping only daily-use items and organizing excess out of sight.
- Layer lighting with dimmable ambient, task, and accent fixtures, plus under-cabinet LEDs for practical glow.
- Use cost-efficient materials (laminate, vinyl, quartz alternatives) and DIY-friendly finishes to achieve a polished look on a budget.
Plan a Budget-First Modern Kitchen Makeover
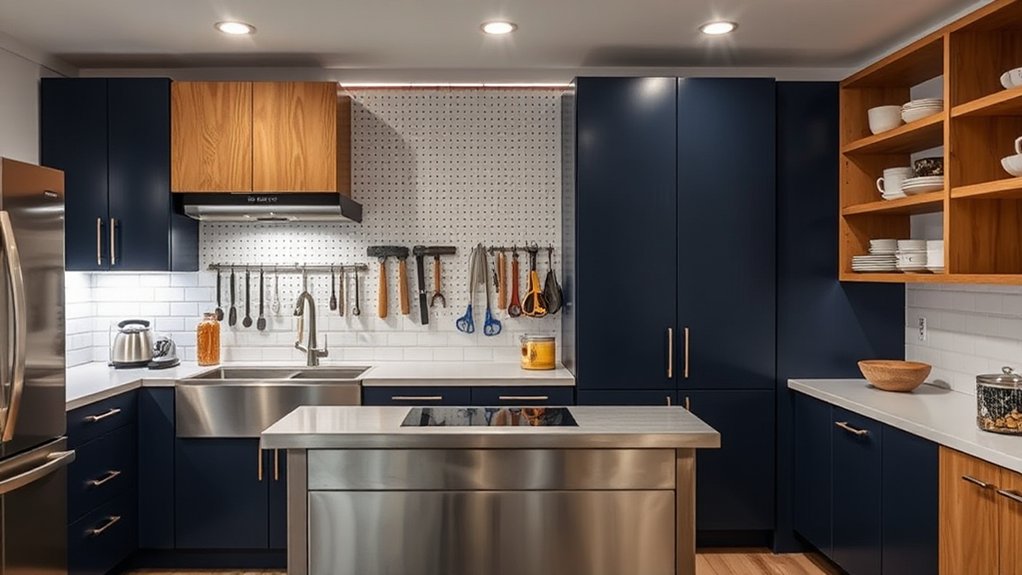
Start by defining your priorities and setting a firm, realistic budget. You’ll map what matters most—layout, durability, and impact—then allocate a ceiling you won’t exceed.
Begin with core costs: cabinets or refacing, countertops, and essential fixtures. Prioritize changes that yield big returns with minimal expense, like repainting, new hardware, and smart lighting.
Plan careful appliance placement to optimize workflow; you can swap one or two dated pieces later instead of replacing everything.
Track costs in a simple spreadsheet, updating as you confirm quotes. Seek midrange options that balance quality and price, avoiding premium-upgrade temptations.
Decide on color combinations early to guide purchases and avoid mismatches.
Maintain flexibility to adapt as you shop, ensuring your plan stays practical, affordable, and actionable.
Set a Realistic Budget and Prioritize Updates
Set a realistic budget before you buy a single cabinet or countertop, and list updates by impact and cost. You’ll map every change to value: start with high-impact, low-cost moves and reserve larger investments for later.
Define a cap for each category—cosmetic tweaks, cabinet refresh, and surface upgrades—to keep spending in check. Use budget planning to compare options, estimate installation fees, and anticipate hidden costs like transport or disposal.
Prioritize updates that transform daily use—lighting, layout tweaks, and durable surfaces—over purely cosmetic changes.
Source materials with care: request samples, compare suppliers, and avoid premium add-ons you don’t need.
Track progress, adjust as prices shift, and document decisions. Material sourcing matters as much as the plan itself, ensuring feasible, affordable modernization.
Update Hardware for Immediate Modernity
Swap cabinet knobs to refresh the look fast, and choose finishes that pair with your existing hardware. Matching finishes across faucets, pulls, and hinges creates an instantly cohesive vibe.
Keep it practical: pick durable, easy-to-clean options and install them yourself for immediate impact.
Swap Cabinet Knobs
Upgrading cabinet hardware is one of the quickest, most impactful updates you can make. Swap cabinet knobs to change the room’s feel without a full remodel. Choose handles that align with your kitchen’s lines—sleek bar pulls for modern, round knobs for classic, or a mixed-metal set for subtle drama.
Install is simple: remove old screws, align new hardware, tighten, and test. Pay attention to hole spacing, as mismatches hinder a clean look. If you’re aiming for vintage accents, look for brass or patina finishes that patina nicely over time.
For eclectic styles, mix shapes and finishes intentionally to create a curated, gallery-like effect. Prioritize a cohesive pairings strategy to prevent a cluttered appearance and preserve visual flow.
Match Finishes Easily
Matching finishes is the fastest way to modernize your kitchen. To achieve cohesion, start by choosing a unifying metal tone—brass, satin nickel, or matte black—that complements your cabinet style and countertops.
Replace mismatched hardware with uniform pulls or knobs, and keep spacing consistent for a clean look. If you already have mixed metals, select one dominant finish and tie others in with small accents, like a faucet or lighting.
Pair hardware with complementary textures; vintage charm can coexist with modern lines when surfaces echo the same warmth. For warmth and character, introduce rustic accents through subtle wood grain handles or patina-coated finishes.
The result is immediate cohesion, updated appeal, and a kitchen that feels intentional rather than patched.
Refresh Paint on Walls, Cabinets, and Ceilings
Revitalizing paint on walls, cabinets, and ceilings can dramatically lift your kitchen without a full remodel. You’ll choose cohesive hues, prep surfaces properly, and apply durable finishes for a clean, lasting update.
Start with a small area, test color choices, and plan a practical sequence to minimize disruption.
Freshen Wall Hues
A fresh coat on walls, cabinets, and ceilings can dramatically lift a space, so start with a clear plan: pick a cohesive color palette, test samples in multiple lighting conditions, and prepare surfaces properly.
You’ll choose colors with purpose: warm tones for inviting dining moments, cool tones for a calm kitchen workflow, and neutrals for versatility. Consider color psychology when pairing wall hues with accents to influence mood and perceived space.
Evaluate wall texture—textured surfaces can absorb paint differently, so lean toward finishes that highlight or smooth imperfections as needed.
Use quality primer on patchy areas and multiple thin coats for durability.
Label swatches, document lighting changes, and reassess after a week of use to confirm your final selection.
Cabinet and Ceiling Revamp
To refresh your kitchen quickly and cohesively, tackle walls, cabinets, and ceilings in a coordinated paint plan, starting with high-traffic areas first and using a quality primer.
Start with cabinet doors: remove, sand lightly, and apply a durable rather than glossy finish to hide fingerprints. Choose a neutral or soft shade to brighten the room; replace or repaint hinges for a polished look.
On ceilings, use flat paint to disguise imperfections and reduce glare, then touch up nearby walls as needed.
Walls get a washable eggshell finish for easy maintenance.
Integrate lighting fixtures strategically to brighten corners and highlight details, and optimize storage solutions with open shelves or labeled bins to reduce clutter.
Finish with clean hardware and keep costs low.
Budget-Friendly Backsplash Ideas That Sparkle
Backsplash upgrades don’t have to drain your budget; you can sparkle with affordable, high-impact options. You’ll get immediate personality without costly renovations by choosing peel-and-stick tiles in bold patterns or solid, durable sheets that wipe clean.
Focus on color psychology: cool blues and greens calm a busy kitchen, while warm tones energize mornings. Use glass or ceramic for a bright, reflective surface that lightens the room.
If you prefer a sustainable approach, select materials like recycled glass, metal, or porcelain that resist stains and last longer.
Install a slim, easy-to-clean spacer system to keep gaps tight and DIY-friendly.
Consider a single accent strip or a complementary border to unify cabinets and countertops without overwhelming the space.
Lighting Layering for a Sleek Kitchen
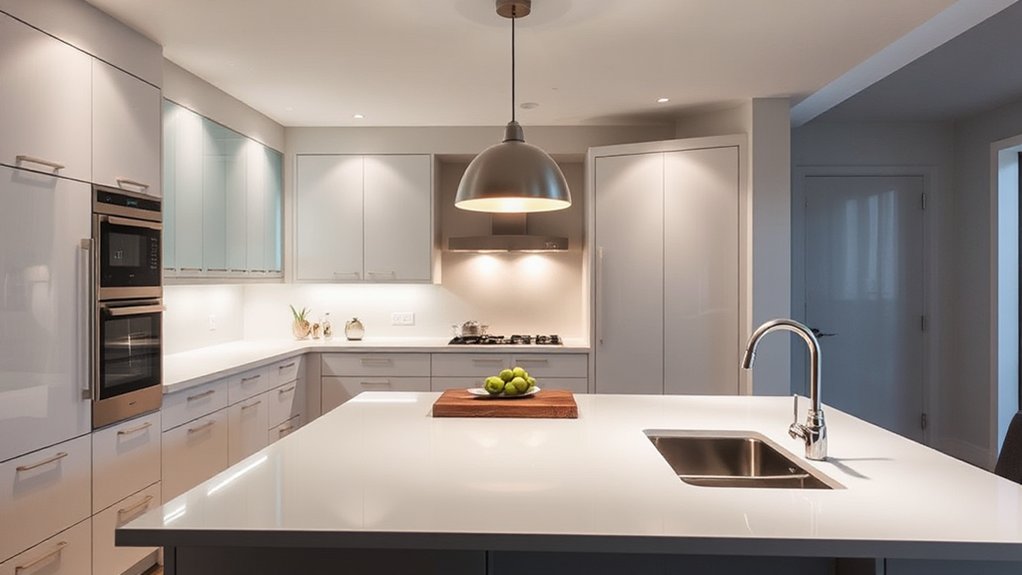
Layering lighting transforms a kitchen from functional to studio-level sleek. You’ll create a balanced, capable space by combining three layers: ambient, task, and accent.
Start with ambient illumination—soft, even light that reduces shadows and fatigue. Use dimmable ceiling fixtures or a lighted rail to adjust mood quickly.
Add task lighting directly over counters, islands, and the sink so you aren’t squinting at prep work. Under-cabinet LEDs are cost-effective and keep surfaces glare-free for chopping and measuring.
Introduce accent lighting to highlight architectural features or glassware, but keep it subtle to avoid clutter. Opt for consistent color temperature across layers to maintain a cohesive feel.
This approach, Layered lighting, delivers practical, affordable, and visually polished outcomes.
Affordable Appliance Upgrades That Save Energy
Upgrading to energy-efficient appliances starts with smart picks that fit your needs and budget. Look for ENERGY STAR models and simple swaps, like efficient refrigerators, dishwashers, and heat pumps, to cut running costs.
We’ll explore practical, budget-friendly tips to maximize savings without sacrificing performance.
Energy-Efficient Upgrades
Smart, energy-efficient upgrades in the kitchen start with affordable appliance choices that cut bills without sacrificing function. You can begin with a compact fridge or a high-efficiency dishwasher that carries an Energy Star rating, then pair them with an efficient induction cooktop.
Prioritize appliances with clear energy labels and standby power controls to maximize energy savings. Replace old compressors or pumps only where cost-effective, as upgrades should balance price and performance.
Consider models with precise temperature management, bake frequency sensors, and efficient heat recovery or insulation. When shopping, compare annual energy consumption and warranty terms to ensure long-term savings.
Focus on overall appliance efficiency, not just individual components, to reduce operating costs and environmental impact.
Budget-Friendly Appliance Tips
Even on a tight budget, you can cut energy use with practical appliance choices that pay for themselves over time. You’ll gain efficiency by choosing compact, ENERGY STAR models and calibrating usage to off-peak hours, reducing bills and heat output.
Prioritize appliances that fit your space to avoid energy waste, and consider smart features that monitor standby power. Proper appliance placement matters: keep fridge away from heat sources, ensure good ventilation, and allow air to circulate around the dryer and oven.
Energy conservation comes from smarter cycles, proper maintenance, and load optimization.
- Appliance placement optimizes airflow and cooling efficiency
- ENERGY STAR models deliver meaningful savings
- Smart timers cut phantom loads
- Maintain seals, coils, and filters for peak performance
- Use appropriate sizes to prevent overuse
Smart Storage Hacks to Free Up Counter Space
Maximize your counter space by prioritizing smart storage that keeps essentials within reach while tucking away what you don’t use daily. Start with vertical solutions: wall-mounted racks, magnetic strips, and pegboards keep frequently used items accessible without stealing countertop real estate.
Choose stackable, clear containers for dry goods to reduce clutter and make inventory quick to assess. Implement drawer dividers and labeled bins to categorize utensils, lids, and small gadgets, so you always know where everything lives.
Opt for under-cabinet roll-out trays for bulky appliances you only use occasionally, and install pull-out spice racks to keep seasonings visible. Regularly purge duplicates and expired items.
Prioritize compact, modular Storage solutions that scale with your needs, reinforcing Kitchen organization without compromising workflow.
Open Shelving: Pros, Cons, and Styling Tips
Open shelving can transform a kitchen by combining visibility with accessibility, but it requires thoughtful styling to avoid a chaotic look. You’ll gain airiness and easier access, yet clutter shows fast, so curate what’s displayed and group by height and color. Balanced spacing, uniform containers, and predictable shelf heights keep lines clean. Use surface-maced pieces to create cohesion, and mix in Vintage accents for character without overpowering.
Open shelving works with modern and traditional vibes when you control weight and texture. Avoid overloading corners and guarantee sturdy brackets. Pair with closed storage for daily necessities to maintain order and style.
- Curate a tight display of everyday items
- Stick to a cohesive color and material palette
- Use uniform jars and lids for harmony
- Include a few Vintage accents sparingly
- Balance shelves with closed storage nearby
Cost-Effective Flooring Options That Last
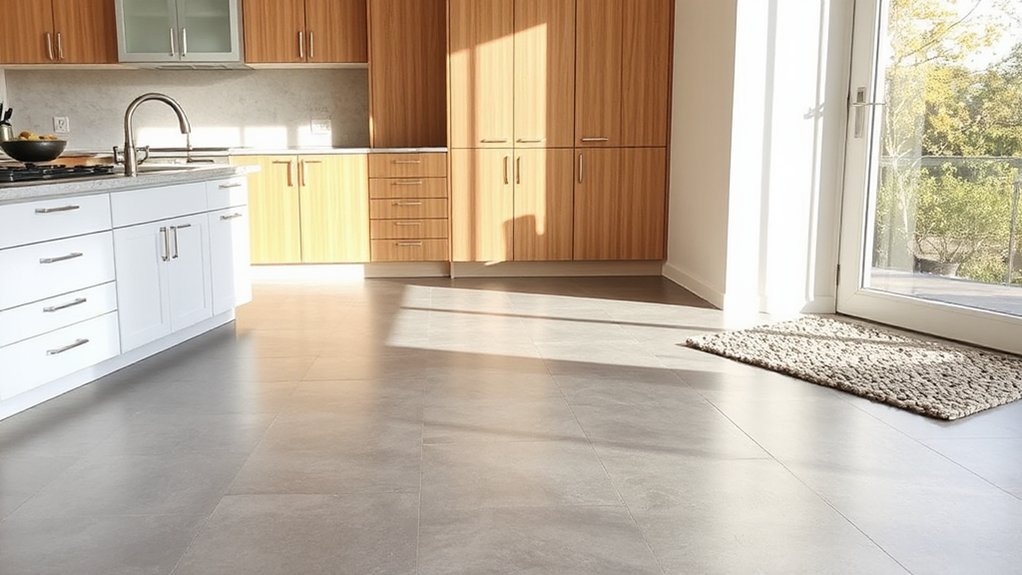
If you’ve just finished weighing open shelving options, you know good design must pair looks with performance. When choosing flooring, prioritize durability and ease of maintenance to keep costs down over time.
Laminate and vinyl composites offer credible visuals and quick installation at low prices, with moisture resistance that suits kitchens. If you want something closer to real wood, look for engineered varieties with proper wear layers and water protection, but mind the price-per-year durability.
Eco friendly options exist, such as cork or bamboo, yet confirm finish longevity and maintenance needs before committing.
Consider underlayment quality, panel alignment, and seamless progressions to avoid costly gaps.
Finally, factor spill resistance, cleaning practicality, and resale value to maximize overall kitchen resilience.
Countertop Alternatives That Look Premium
If you want premium looks without the premium price, consider quartz alternatives, luxe-looking laminates, and solid-surface imitators. These options deliver durable, seamless aesthetics while keeping costs down and installation simple.
We’ll compare texture, durability, and care to help you pick the right mix for your kitchen.
Quartz Alternative Surfaces
When you’re choosing a countertop, quartz alternatives offer the look of premium stone without the price tag or frequent sealing. You’ll explore durable options that resemble real quartz but cost less and require less maintenance. These surface materials balance aesthetics with practicality, giving you a high-end feel without overspending.
Choose among engineered composites, solid surface substitutes, and tough laminates designed to mimic stone textures. Consider heat resistance, scratch tolerance, and ease of cleaning to match real-life use. Prioritize consistent patterns and seams that blend with cabinetry.
Opt for lighter tones to brighten small kitchens. Remember, surface materials deliver longevity when installed correctly and cared for properly.
- Engineered composites
- Solid surface substitutes
- High-pressure laminates
- Porcelain slabs
- Acrylic blends
Laminate That Looks Luxe
Laminate can look luxe without the hefty price tag, delivering premium stone aesthetics with practical durability. You’ll achieve a high-end feel by choosing Luxe laminate patterns that mimic natural veining and subtle textures, then pairing them with clean edges and cohesive backsplines.
Modern laminate remains remarkably resistant to heat, staining, and scratches when you opt for higher-density cores and proper sealants. Prioritize edge profiles that resemble stone slabs and avoid overly glossy finishes, which can read budget.
For best results, coordinate countertops with coordinating cabinetry and hardware in matte or brushed-metal tones. Confirm surface prep is solid and install with a precise seam layout to minimize interruptions.
With thoughtful selection and professional fitting, you’ll enjoy a premium look without a premium price.
Solid Surface Imitations
- Quartz-inspired laminates that mimic veining and depth
- Solid-color acrylic sheets with antimicrobial coating
- High-pressure laminate resembling polished stone
- Tile alternatives with seamless edge details
- Composite resins designed for consistent texture and tone
These Solid surface alternatives are practical for busy kitchens, offering durable surface, consistent color, and easy cleaning.
Choose based on tone, durability, and your budget, ensuring a cohesive look that reads premium while staying affordable.
Minimalist Decluttering for a Modern Feel
To achieve a modern feel, start with a minimalist decluttering approach that removes nonessential items and creates clear, open surfaces. You’ll gain visual calm and easier maintenance by grouping items into functional zones and limiting countertop clutter.
Begin with a swift audit: keep only daily-use appliances, transfers of essential tools, and a single decorative element per surface. Store everything else out of sight, preferably in labeled yet accessible cabinets.
As you reduce, consider Kitchen feng shui principles: balance, lighting, and airflow influence perceived space. Choose minimalist accessories that serve a purpose and unify the color palette.
Maintain consistency by rotating a small selection of cookware or tools, avoiding duplicates.
Establish a routine to revisit and refresh quarterly, preventing reaccumulation and preserving the modern, airy feel you’re aiming for.
DIY Detailing: Molding, Trim, and Finishing Touches
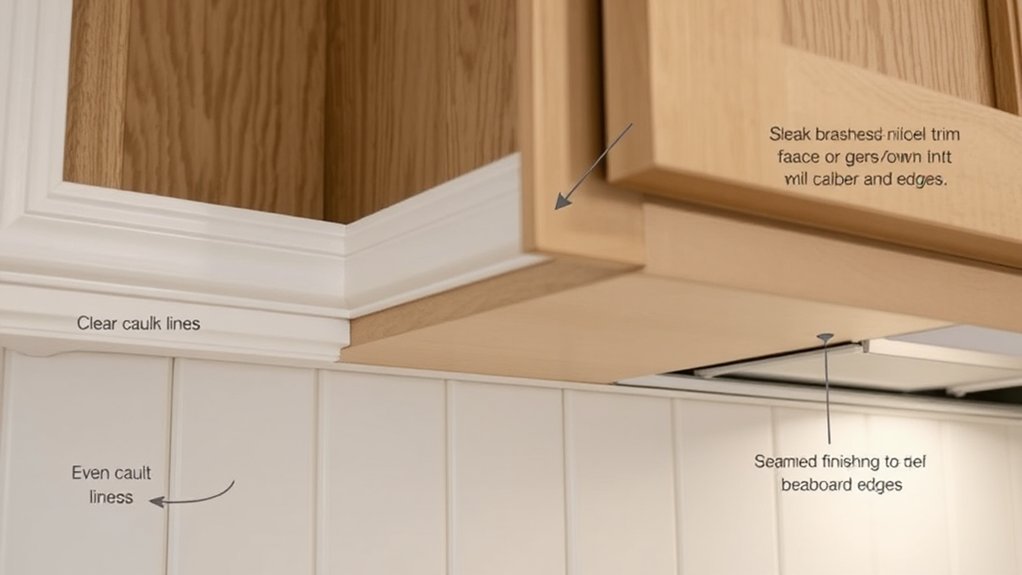
When you add molding, trim, and finishing touches, you transform the space with precision and purpose. You’ll enhance lines, conceal seams, and create a cohesive look that feels deliberate and affordable. Focus on clean profiles, tight joints, and consistent reveals. Use proven molding techniques to ensure strength and proper alignment, then finish with a compatible sealant or paint for durability.
Trim installation should prioritize square corners, level placement, and minimal gaps. Don’t overestimate complexity—plan, measure twice, cut once, and use a sharp blade. For a polished kitchen, pair trim with existing cabinetry and fixtures for a seamless transition.
- Measure twice, cut once for every piece
- Choose profiles that match your style
- Sand joints to feather seams
- Seal edges before painting
- Verify gaps and alignments across walls
When to Hire Pros vs. DIY
Balancing DIY effort with professional help hinges on scope, safety, and budget. You’ll know when to hire pros versus DIY by weighing complexity, tools, and potential risk.
For simple cosmetic updates, like replacing cabinet knobs or painting, DIY can save money if you’re confident and follow instructions.
When projects involve electrical, plumbing, gas lines, or structural changes, you should opt for a Professional assessment to avoid hazards and code violations.
Even with skilled DIY, some tasks mask hidden challenges, so scrutinize the expected payoff and timeline. Be honest about your limits and consider contractor input for timelines and guarantees.
Recognize DIY pitfalls early, and don’t press ahead if your plan relies on imperfect measurements or unfamiliar materials.
Real-Life Budget Modernisation: Before and After Case Study
Before and after footage from budget-conscious kitchen updates proves you don’t need a Hollywood budget to achieve real impact. You’ll see how small changes yield big, lasting results, from layout tweaks to smart finishes.
Real-life cases show you don’t have to overpay for style; you’ll gain function with thoughtful choices and DIY-friendly upgrades. Vintage charm remains timeless when you reuse pieces, paint cabinets, and replace pulls for a fresh vibe.
Creative lighting anchors the transformation, turning corners into focal points and enhancing mood without a costly overhaul. You’ll learn to prioritize durable materials, measure twice, and keep a tight budget, so every dollar adds value.
- Plan a phased approach with clear milestones
- Refinish, don’t replace, where possible
- Choose high-impact, low-cost hardware
- Balance storage gains with open sightlines
- Use lighting to create zones and personality
Frequently Asked Questions
How Can I Maximize Impact on a Tiny Budget?
You can maximize impact on a tiny budget by prioritizing appliance upgrades and lighting enhancements, choosing compact, energy-efficient models, and adding layered lighting. Invest in smart, space-saving appliances, under-cabinet LEDs, and dimmable fixtures for dramatic, affordable upgrades.
Which Finishes Look Premium on a Budget?
Yes—opt for luxury fixtures and high end appliances to visually elevate your space; choose matte finishes, simple lines, and cohesive metals, then pair with quality neutrals to preserve a premium look on a tight budget.
What Hidden Costs Should I Anticipate?
Anticipate extra costs like delivery, installation, and permits. You’ll face hidden fees for appliance upgrades and lighting enhancements, plus potential waste disposal. Budget for unexpected repairs, measurement mismatches, and upgrade-related electrical or plumbing adjustments. Stay vigilant, plan thoughtfully.
How Long Does a Budget Makeover Typically Take?
Typically, a budget makeover takes 1–3 weeks, depending on scope. You’ll tackle planning, appliance upgrades, and lighting choices in stages, coordinating trades efficiently. Expect quick wins first, then finalize finishes, ensuring minimal disruption and steady progress.
Do Lenders Fund Kitchen Modernization Projects?
Yes, lenders fund kitchen modernization if you present a solid plan and value. You should compare loan types, and include kitchen lighting and appliance upgrades as key improvements to boost approval and appraisal accuracy.
Conclusion
You can modernize on a budget without sacrificing impact. Prioritize what changes the look and feel most: fresh hardware, a clean coat of paint, and a simple backsplash. Declutter to boost space, add subtle trim for polish, and DIY where you’re confident. Save for bigger upgrades, or hire pros only for tasks that require precision. Real-world results prove small, thoughtful updates deliver big returns. Anachronism: embrace a retro toaster as a nod to timeless utility.



