

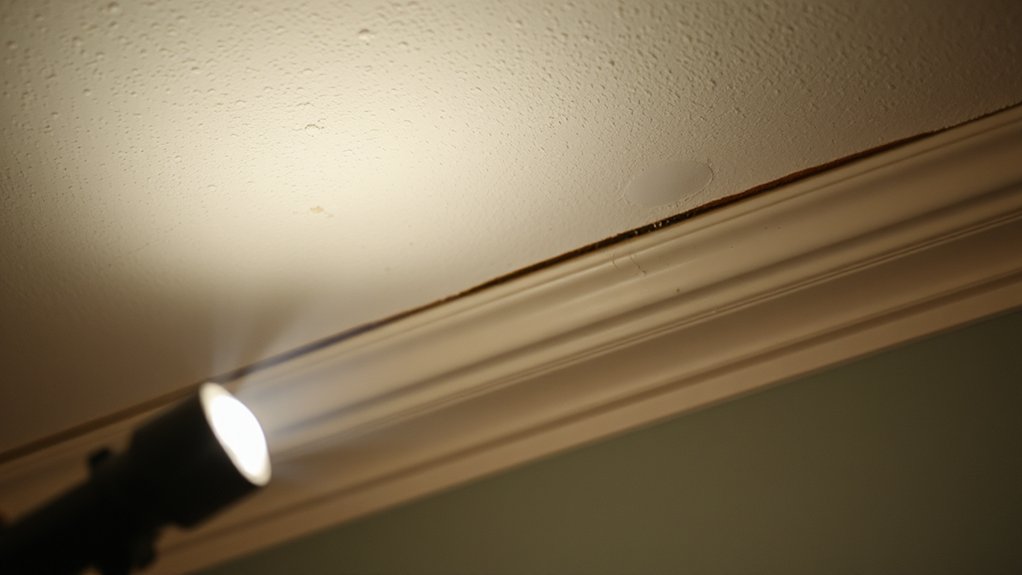

Hidden water damage often hides in plain sight. Look for subtle dampness on walls or ceilings, soft spots, bubbling paint, or warped panels. Notice stains that deepen, musty odors, and increased condensation after rain. Inspect baseboards for damp edges and pay attention to ceilings and cabinets near plumbing. Use a moisture meter or infrared camera to confirm hidden moisture, and act fast with drying and waterproofing. If you keep going, you’ll learn how pros detect and prevent recurrence.
Key Takeaways
- Use a moisture meter and infrared camera to detect hidden moisture behind walls or ceilings before symptoms appear.
- Inspect baseboards, ceilings, and under sinks for soft spots, stains, or musty odors that indicate concealed water damage.
- Look for recurring discoloration, bubbling paint, or warped panels in less-visible areas like crawl spaces or behind appliances.
- Check flashing, seals, and gutters for leaks and water pooling that can indicate hidden damage spreading inward.
- Track water bills and moisture readings over time to catch slow leaks before they escalate.
What Hidden Water Damage Feels Like at Home
Hidden water damage often starts subtly, so don’t ignore small changes you notice in walls, ceilings, or floors. You’ll feel it as a tangible dampness in air or insulation, and you may notice a musty smell that won’t fade.
Water intrusion shows up as soft spots, peeling paint, or warped panels, signaling hidden moisture behind surfaces. You might see increased condensation on windows or persistent damp patches after rain, even with a functioning roof.
Track patterns: spots that grow over days or weeks indicate active moisture. Moisture accumulation feeds mold and wood rot, so address it promptly.
If you suspect interference, test for humidity spikes and inspect seals around fixtures. Address root causes quickly to prevent structural damage and ongoing health risks.
Spotting Discoloration: Your First Clues
Color changes show up first, so keep an eye out for unexpected browns, yellows, or bluish tints on walls, ceilings, and floors.
Texture shifts, like bubbling paint or peeling wallpaper, signal moisture beneath the surface.
Stains hint at past leaks.
When you spot any of these, note the area, then investigate the underlying cause and duration of the moisture.
Spotting Color Changes Early
Color changes are often the first telltale sign of water intrusion, so start inspecting walls, ceilings, and joints with a keen eye. You’ll notice color changes where moisture lingers, especially near roofs, pipes, and windows. Look for uneven tints, darker patches, or pale blotches that don’t match surrounding areas.
Water discoloration can appear as amber, gray, or brown stains that deepen over time, sometimes without obvious texture changes. Trace any irregular spot back to its source by checking adjacent rooms, ceilings, and fixtures. Document when you see new hues and how rapidly they spread.
If you detect persistent changes after drying cycles, treat it as evidence of ongoing intrusion and investigate hidden leaks, condensation, or plumbing faults before costs escalate.
Texture Shifts And Stains
Texture shifts often accompany staining, and they’re a practical first clue you shouldn’t ignore. When you spot color drift or dark blotches, treat it as a warning signal, not a cosmetic quirk.
Texture shifts indicate moisture has moved through walls or floors, loosening finishes or causing warping. Look for uneven patches, soft spots, or sheen changes that don’t match the surrounding area.
Stain discoloration can occur from minerals or mold byproducts, and it often travels beyond the visible stain itself. Don’t assume it’s drying on its own; investigate underlying causes, including leaks, roof failures, or plumbing issues.
Document dates, take photos, and monitor for progression. Address the source promptly to prevent escalating damage and costly repairs.
Watch for Musty Odors That Persist
Persistent musty odors are your first alert to hidden moisture. If the smell lingers after cleaning, that odor persistence clues you into unseen dampness behind walls or under flooring.
Use this cue to inspect these areas and verify via moisture readings or professional evaluation.
Persistent Musty Odors
When odors linger, you’re likely dealing with persistent dampness that standard cleaning won’t fix. Start by locating the source with a moisture meter or infrared camera, then address leaks, condensation, and HVAC drainage.
Improve ventilation and run dehumidifiers to drive humidity below 50%. Keep surfaces dry and fix alcove or cabinet leaks that trap moisture.
Regularly inspect hidden spaces, since mold can flourish without obvious staining. Prioritize mold prevention to protect your family’s health and your property’s value.
Strong air quality hinges on consistent moisture control and proactive maintenance.
Odor Persistence Clues
If you notice musty odors lingering despite cleaning, don’t dismiss them as a nuisance—treat them as a warning sign. Persistent smells often indicate hidden moisture that invites mold growth. Track odor hotspots to identify likely source areas, such as basements, laundry rooms, or kitchens with poor drainage.
Prioritize rapid containment: fix leaks, dry wet materials, and remove compromised items promptly. Enhancing air flow helps prevent reoccurrence, so open doors during repairs and run fans to improve circulation.
For long-term control, implement mold prevention strategies: seal gaps, insulate, and maintain a consistent indoor humidity around 30–50%. Regular inspections and cleaning routines support odor management and protect your structure.
Ventilation improvement reduces odor persistence and supports healthier indoor air.
Hidden Moisture Indicators
Look for warped baseboards, peeling paint, or wallpaper that bubbles without an obvious cause. Use a moisture meter in suspected areas to confirm elevated readings, then address the source promptly.
Prioritize water conservation and humidity control: fix leaks, improve ventilation, and run dehumidifiers in humid spaces. Regular inspections help prevent mold, rot, and costly repairs.
Stay proactive, document findings, and act fast to protect your home’s structure and your health.
Detect Warped Floors and Warped Panels
Warps in floors and panels are telltale signs of hidden water damage, and you’ll notice them most where the material spans soft, damp substrates. When you spot bending or cupping, look for subtle raised edges along joints, seams, and fasteners.
Promptly verify with a moisture meter or hydrometer to quantify elevated moisture levels beyond normal ranges. If warped sections are present, don’t delay addressing the source; water intrusion will worsen and compromise structure.
Use Water resistant flooring in high‑risk zones to slow progression, and install Moisture barriers under new installations to reduce future absorption.
Document warped areas with photos and notes for repairs, then prioritize professional assessment for remediation, drying, and restoration to prevent ongoing damage and cost.
Check Baseboard Edges for Damp Stains

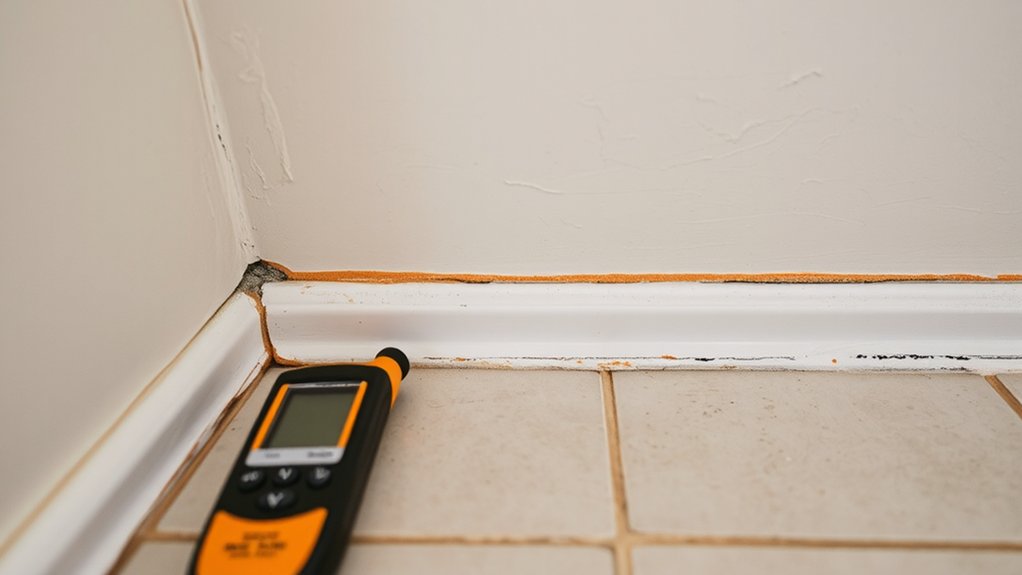
After spotting warped floors or panels, turn your attention to baseboard edges for signs of moisture. Inspect for damp stains along the joint where wall meets floor, especially near plumbing runs or exterior walls. Shine a flashlight along the baseboard and look for darkened, discolored patches or slight swelling that indicates moisture intrusion.
If you detect damp stains, press nearby drywall gently and note any softness or crumbling edges. Check for peeling paint or wallpaper along the base, which often accompanies hidden seepage. Track any musty odor that lingers near baseboard areas.
Mark suspected spots with painter’s tape for later inspection, and monitor changes over 24 to 48 hours. Address moisture sources promptly to prevent further damage and costly repairs.
Look for Ceiling Water Spots and Sagging
Look for ceiling water spots as early warning signs of intrusion, especially around joints and corners where moisture tends to collect.
A sagging ceiling grip is a louder signal that hidden damage may be progressing, so note any soft spots or slow bowing.
Treat these cues as concrete clues—ceiling stains and sagging point to potential leaks that deserve prompt inspection and action.
Ceiling Stain Clues
Ceiling stains are clues you can’t ignore. You notice discoloration, ring shapes, or blotches that tell you water has moved through the materials. These ceiling stains often form near plumbing lines, bathrooms, or roofs, so map their location to potential sources.
Look for a pattern: small spots that spread over time, or a blotchy trail leading to a leak. Act quickly: even a minor stain can signal ongoing water intrusion and hidden rot behind drywall.
Track changes after rain or fixtures are used; if stains darken or enlarge, you’re dealing with active water leaks. Don’t assume cosmetic fixes solve the problem—investigate the source, then repair structural and insulation damage before it worsens.
Sagging Signal Signs
Sagging ceilings are a clear red flag: if you see water spots paired with sagging, don’t delay. When ceiling panels pull away or show a bulge, you’re feeling a Sagging signal signs that water damage is progressing. That “water damage feels” label isn’t just drama—it’s a practical cue to inspect plumbing, roof leaks, or HVAC condensate lines before stains worsen. Addressing early saves money and safety.
- Check for additional spotting around the area and upstairs plumbing access
- Note temperature or musty odors that accompany the sag
- Plan a quick professional assessment to confirm moisture levels and damage extent
Inspect Cabinets and Under-Sink Edges for Moisture
Under sinks and along cabinet edges, moisture often hides in plain sight. You inspect with purpose: look for shimmering, mineral stains, dark spots, or powdery residue along seams, caulk, and drawer bottoms. Run your hand along pipes for feel of dampness, and check the underside of shelves for rust or mold.
Don’t ignore drip trails that don’t drip loudly—tiny leaks can creep behind drywall or cabinetry. Open access panels, wipe surfaces, and measure relative humidity if you have a meter. Note areas near kitchen appliances or where hoses connect, as fittings loosen over time.
Also assess basement insulation around plumbing lines to catch hidden pockets. Document findings with photos and mark suspicious spots for prompt repair.
Simple Moisture Checks to Probe Hidden Leaks
Start with basic moisture testing to confirm suspect spots and establish a baseline you can compare against over time.
Look for hidden leak indicators like repeating damp patches, musty odors, or sudden changes in humidity.
Then use simple tools to verify moisture levels. Equip yourself with a moisture meter or spot-check with a portable sensor.
Choose techniques that match the area you’re inspecting.
Moisture Testing Basics
Could hidden leaks be lurking behind your walls? You’ll start with simple checks that don’t require high-tech gear. Use a moisture meter on suspect areas, focusing near seams, corners, and joints where water intrusion often begins. Look for dampness along baseboards, under sinks, and behind appliances, then compare readings to known dry spots to spot anomalies.
Track changes after rain or irrigation cycles to confirm leaks, not just humidity. Make certain your home’s waterproof barriers and moisture barriers stay intact; damaged barriers let steam and moisture travel unseen. Document readings over several days to establish patterns and prioritize fixes.
- Use a calibrated moisture meter on wood, drywall, and concrete
- Check relative humidity vs. ambient temperature in problem rooms
- Inspect flashing, seals, and vent penetrations for gaps
Hidden Leak Indicators
Feel for soft spots or warmth that signals moisture behind surfaces. Check for hidden puddles under sinks, behind appliances, and along baseboards after showers.
Listen for faint drips or muffled damp sounds in walls, especially near plumbing runs. Track changes in water bills or meter readings, which point to unseen leaks despite normal use.
Inspect toilet flushes for running or phantom refills. Use towels to reveal dampness under cabinets after rain or heavy humidity.
These practices support water conservation and leak prevention by catching issues early.
Tools And Techniques
To spot hidden leaks, you can start with simple moisture checks that don’t require fancy gear. You’ll use a meter or even your finger to identify damp spots, then trace toward likely sources. Focus on walls, ceilings, and around fixtures, since concealed moisture often travels before showing.
Look for staining, peeling paint, or musty odor as cues to test further. When in doubt, apply waterproofing logic: test with controlled exposure, dry out areas, then reassess.
Consider practical improvements like drainage solutions to direct water away from structures and waterproof paints to seal vulnerable surfaces. These steps keep you proactive, reducing guesswork and cost.
- Use a moisture meter on suspected zones to prioritize testing
- Seal with waterproof paints after confirming leaks
- Implement drainage solutions to divert water away from foundations
Use Your Water Bill to Catch Leaks Early
If you want to spot leaks early, start with your water bill. Watch for unexplained spikes beyond typical usage, seasonal shifts, or billing cycles that don’t match your actual activities. Compare month-to-month consumption and note any sudden increases without a clear cause.
Track per-occupant or general household patterns to establish a baseline, then flag anomalies as potential leak detection signals. Look for consistent higher usage during periods you know you’re not using water.
If you see double-digit percent jumps, investigate fixtures, irrigation, or hidden lines. Keep an eye on meter activity overnight—nocturnal movement can indicate a leak.
Record readings, then test suspected areas by turning off valves. Early attention minimizes damage, saves water, and reduces repair costs.
Humidity and Condensation Clues You May Be Missing
You’ll spot humidity clues when you notice rooms staying damp or walls feeling damp to the touch.
Look for condensation patterns on windows, pipes, or墙 surfaces that form irregular halos or streaks. These clues point to hidden moisture behind walls or under floors and should prompt a closer inspection.
Humidity Clue Signals
Even small swings in humidity can reveal hidden water trouble, so don’t overlook moisture patterns that don’t match the season or reported leaks. When you read humidity clues, note persistent damp spots, musty odors, and mold in rooms with no obvious cause.
Moisture signals show up as warped paint, swollen wood, and tacky surfaces after cleaning. Track fluctuations across rooms rather than isolated incidents to reveal hidden leaks behind walls or under floors.
- Persistent musty smells even after cleaning
- Warped or swollen panels where no water was expected
- Elevated humidity readings in spaces with minimal activity
Condensation Patterns Hiding
Condensation patterns can reveal hidden water trouble that humidity readings alone miss. You’ll spot signs quickly when you look for moisture accumulation behind walls, under cabinets, and along ceilings.
Condensation patterns often precede visible damage, signaling interior leaks and potential water seepage before it worsens. Track damp patches that travel along studs or into corners; these are early indicators of hidden water and possible mold development.
Notice staining on paint, wallpaper, or drywall—this stain identification can pinpoint the source of moisture and guide leak detection efforts. Address condensation promptly to prevent structural weakening and costly repairs.
Exterior Drainage: Gutters, Downspouts, and Overflow
Gutters, downspouts, and overflow play a critical role in directing rainwater away from your home’s foundation. When any part is misaligned, clogged, or damaged, water can seep into walls and crawl spaces.
A functioning rain gutter and drainage system prevents pooling near the foundation. Inspect for loose hangers, sagging sections, and leaks at joints. Guarantee downspouts extend away from the foundation and discharge above grade, not onto walkways or basement windows.
Check for overflowing gutters during heavy rain, which signals blockages or capacity issues. Keep debris cleared and gutters pitched correctly to promote flow. Regular cleaning and timely repairs save thousands by stopping infiltration at the source.
- Common clog culprits and removal tips
- Alignment and slope benchmarks for gutters
- Downspout extensions and overflow management
Mold Growth: Where It Shows Up and Why
Mold isn’t picky about where it grows—it takes root where moisture lingers. You’ll commonly spot it in damp spaces that stay wet or humid, especially behind walls, under sinks, and in basements. Look for fuzzy or powdery growth, discoloration, and a musty odor that won’t quit.
Mold spores hitch rides on dust and air, so even small leaks can seed a bigger problem over time. Areas with poor airflow—closets, crawl spaces, crawl-space vents—are prime. Pay attention to damp insulation, warped panels, staining, or peeling wallpaper, which signal lingering moisture.
Regularly inspect around plumbing joints, window frames, and appliance hookups. If you see visible growth or persistent moisture, treat the source and clean promptly to prevent spread. Seek professional testing if infestation seems widespread.
Test for Hidden Water Damage Behind Walls

Hidden water damage behind walls often hides from plain sight, but its signs don’t lie. You’ll test for hidden water damage by checking moisture levels, listening for hollow sounds, and noting discoloration or bubbling paint that isn’t explained by weather.
Use a moisture meter to compare readings against normal ranges and perform a targeted plumbing inspection to identify potential leaks behind panels. Slow, persistent infiltration can mimic ordinary wear, so document trends over days rather than one-off observations.
Timely tests help you catch issues before they escalate, saving costs and mess.
- Water infiltration patterns you can quantify with a meter
- Quick checks you can do during a plumbing inspection
- Indicators that warrant professional confirmation and further inspection
Assess Plumbing Fixtures: Drips and Seepage
Even a small drip or seepage can waste water and foreshadow bigger problems, so start by inspecting all fixtures up close. Focus on plumbing fixtures like sinks, toilets, and faucets, as they are common leak sources. Look for mineral buildup, corrosion, or glossy runs that indicate ongoing seepage.
Check under sinks for damp cabinets, and run taps to listen for steady trickles rather than quiet drips. Examine shower heads and hoses for dripping after shutoff, and test toilet tanks for slow refills or continuous running.
Use leak detection methods such as paper towels at connections, dye tests in toilets, and scrutinizing supply lines during pressure changes. Address signs promptly to prevent water damage, mold, and escalating repair costs.
Outdoors Alert: Soggy Foundations and Puddling
Water pooling around the foundation is a red flag you shouldn’t ignore. Outdoors, soggy foundations signal groundwater or poor drainage that can erode soil and invite cracks. You’ll notice puddles forming after rain or during seasonal flooding, even away from the house, which indicates water is collecting near the base. Address it before it undermines footing or invites mold.
Improve grading so water runs away from walls, install a functional swale, and make certain downspouts discharge well beyond the foundation. Inspect outdoor landscaping for low spots that trap water and create dry, bare basements-friendly barriers. Regularly maintain gutters and catch basins to prevent overflow.
- Check grading and drainage paths around the foundation
- Redirect downspouts and clean exterior drainage systems
- Rework landscape beds to avoid low spots and water collection
DIY Tools vs. When to Call a Pro

When you’re weighing DIY tools vs. calling a pro, the key is knowing what you can safely handle and where professional expertise makes a difference.
For minor, visible moisture or cosmetic fixes, you can use basic tools and waterproof paint around affected areas to slow spread. But if you’re dealing with suspected structural damage, widespread staining, or persistent odors, call a pro to assess hidden risks and prevent mold growth.
Flood sensors can provide early warnings, yet they don’t replace trained inspection or remediation. Use simple checks—bubble, crack, or soft spots—as a cue to escalate.
Keep safety top of mind: turn off power, ventilate, and avoid over-saturating materials. When in doubt, professional evaluation saves time, money, and health.
How Professionals Detect Hidden Damage
Professionals start with a careful, methodical approach to detect hidden damage. You’ll follow a clear sequence: inspect visible surfaces, note moisture indicators, and map affected zones before any probing.
Then you rely on specialized tools and proven techniques to confirm findings without needless disruption.
- Use moisture meters and infrared cameras to locate hidden wetness behind walls or under floors.
- Assess plumbing maintenance history and filtration performance to identify recurring sources and slow leaks.
- Conduct targeted core tests or non-invasive scans to verify moisture levels, then document precise locations for remediation.
This approach prioritizes accuracy and minimizes guesswork. By tracing moisture to its source, pros stop further damage, protect structure, and guide efficient repairs.
Water filtration and plumbing maintenance remain central to preventing hidden damage from reappearing.
Quick Tactics to Contain Damage Now
If you spot a leak or see unexpected moisture, act immediately to limit damage and keep costs down. First, shut off the water supply if the source is identifiable, then power down affected electrical circuits to prevent shock or further harm.
Move standing water with towels or a wet/dry vacuum, prioritizing strong, rapid extraction. Ventilate the area with fans and open windows to speed drying, aiming for a dry, mold-free surface within 24 to 48 hours.
Apply waterproof paint to exposed concrete or wood once surfaces are dry to seal minor leaks and deter absorption. Use mold resistant materials for repairs and replacements to reduce future risk.
Document damage for insurance and future remediation planning.
Building a Prevention Plan to Stop Recurrence
Preventing repeat water damage starts with a clear plan and accountable steps. You build this plan by identifying failure points, assigning owners, and scheduling checks.
Prioritize waterproofing techniques that seal vulnerable joints and basements, then couple them with ongoing plumbing maintenance to catch leaks early.
Document every action, from inspections to repairs, so you can measure results and adjust quickly. Train occupants to report unusual moisture promptly, and keep a simple log for trends over time.
Establish a rapid response protocol to minimize costs, should incidents occur. Your plan should be revisited quarterly to stay effective and aligned with upgrades in materials or code.
- Identify risks, assign owners, and set timelines
- Implement waterproofing techniques and regular plumbing maintenance
- Track results and revise procedures periodically
Frequently Asked Questions
How Can I Tell Hidden Water Damage Without Visible Stains?
Look for subtle clues: check for mold growth and linger odor detection, especially behind walls or under floors. Use a moisture meter, feel texture changes, and listen for settling sounds; trust your senses and act quickly to prevent damage.
What Small Leaks Around Fixtures Indicate Bigger Problems?
Like a ticking clock, you should act now: small leaks around fixtures often signal pipe corrosion and mold growth, indicating bigger problems. Inspect, shut off water, call a pro, and fix promptly to prevent costly damage.
Can High Humidity Hide Leaks in Ceilings or Walls?
Yes, high humidity can conceal leaks in ceilings or walls. It promotes mold growth and accelerates structural weakening, so you should inspect for musty odors, staining, blistered paint, and elevated moisture using hygrometers and moisture meters.
Are Seasonal Shifts Causing Hidden Water Damage?
Seasonal shifts can cause hidden water damage you can’t see yet. You’ll notice fluctuating humidity andMusty odors as moisture infiltration increases. Inspect ceilings, walls, and basements after seasonal changes, look for stains, warped surfaces, and peeling paint, and address leaks promptly.
What Safety Steps Before Entering a Damp Area?
Irony aside, you don’t ignore danger: you wear safety gear, test for fumes, and secure a dry exit. Before entering a damp area, follow ventilation precautions, monitor moisture, and stay mindful of slips and hidden hazards.
Conclusion
Hidden water damage is a quiet intruder, slipping in where you least expect. You’ve learned to read the signs—discoloration, musty smells, warped surfaces, damp baseboards—and you know when DIY tips stop keeping you safe. Think of it like a crossroads in a myth: you can pretend it isn’t there, or you can seek the vigilant help of pros who’ll trace the leak and seal the fate of further trouble. Act now, protect tomorrow, and prepare to prevent.



