



Installing landscape lighting elevates safety, curb appeal, and usability. Start by defining clear goals—where to illuminate, the mood you want, and focal points like entryways or features. Choose a system type (low-voltage for smaller spaces, line-voltage for bigger areas, or solar off-grid options), then select durable fixtures and warm LEDs for inviting texture. Map zones, plan paths, and emphasize focal elements with layered lighting. For a professional touch and lasting results, see how the plan comes together.
Key Takeaways
- Define lighting goals and map target areas (entrances, features, pathways) to guide fixture placement and mood.
- Choose system type (low-voltage, line-voltage, or solar) based on space size, output needs, and practicality.
- Select fixtures and bulbs (LED, 2700–3000K for warmth; 3500–4000K for modern looks) with glare control and durability.
- Plan placement for safe pathways and accent points, using hierarchy and contrast to guide sightlines.
- Ensure electrical safety and maintenance: GFCI protection, weatherproofing, code compliance, and professional help when needed.
Why Landscape Lighting Is Worth It
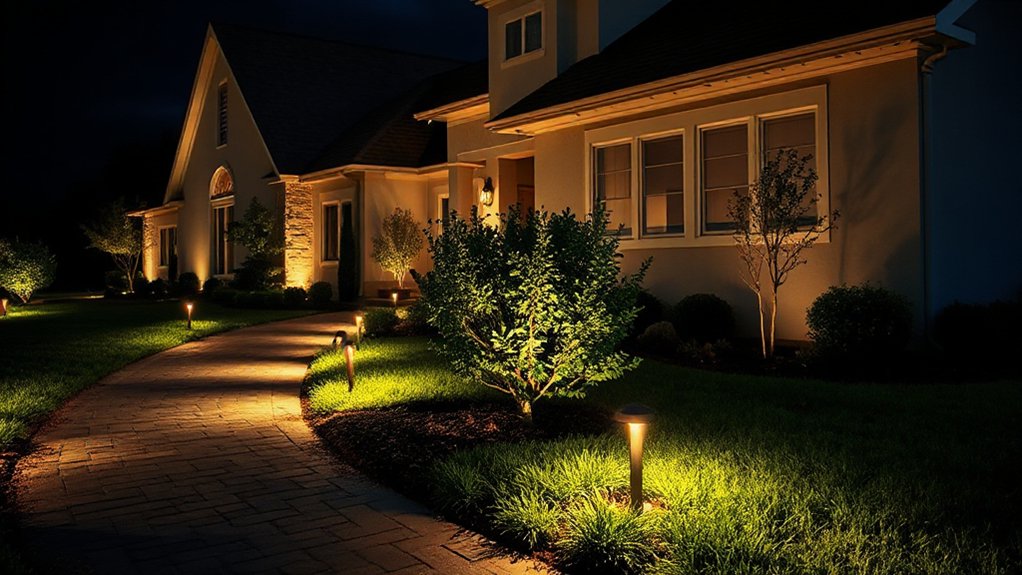
Landscape lighting isn’t just about exterior aesthetics—it’s about everyday safety, security, and property value. When you invest in thoughtfully placed lighting, you illuminate pathways, reduce trip hazards, and deter unwanted activity after dark.
The right setup creates a welcoming ambiance that enhances curb appeal while guiding guests to entrances with confidence. You’ll appreciate the precision of lighting fixtures that highlight architectural features, landscape accents, and focal trees without overpowering the night.
Thoughtful design also supports energy efficiency and long-term maintenance. Choose reliable power sources that suit your property and climate, ensuring consistent performance year after year.
With these elements in place, you gain practical security and elevated value, empowering you to enjoy your outdoor spaces well beyond sunset. Your investment pays dividends in safety, beauty, and peace of mind.
Start Here: Define Your Lighting Goals
Start by defining your lighting goals to shape every decision you make. Identify the areas you want to illuminate and the mood you want to create.
Then, map those target areas to guarantee coverage and balance. This clear plan keeps your design focused and your results precisely aligned with your vision.
Define Lighting Goals
When you’re planning landscape lighting, the first step is defining clear goals: what do you want to highlight, why it matters, and how you’ll measure success? You’ll articulate targeted outcomes—improved safety, enhanced curb appeal, or nighttime usability—so your design stays focused.
Identify focal points like architectural features, specimen trees, or pathways, then specify how lighting will complement shadows and texture, not overpower them.
Establish measurable criteria, such as even light distribution, glare reduction, and a minimum Color temperature that suits the mood you seek.
Consider fixture materials and their longevity, maintenance needs, and compatibility with the overall aesthetic.
Align goals with budget, timeline, and a maintenance plan to guarantee consistent performance and enduring impact.
Map Target Areas
To map target areas effectively, begin by translating your lighting goals into concrete zones: entrances, architectural features, specimen plants, pathways, and seating or gathering spots. You’ll create a clear framework that guides placement, intensity, and tone, improving safety and curb appeal while preserving garden aesthetics.
Use lighting technology to tailor fixtures for each zone, balancing brightness and shadow to enhance textures and form.
- Prioritize zones that define entry and traffic flow.
- Align fixtures with architectural lines and plant structure.
- Highlight focal specimens and seasonal interest points.
- Guarantee even, layered illumination for paths and seating areas.
Design Goals to Boost Curb Appeal
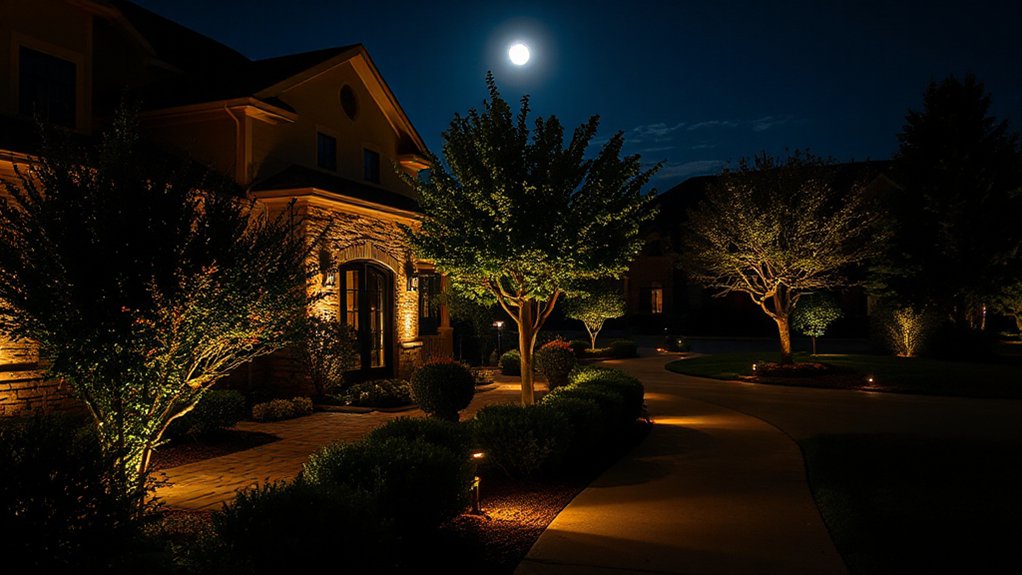
You’ll boost curb appeal by layering light to shape your home’s silhouette and invite guests to pause at the entry. Use lighting to highlight architectural features, from gables to columns, so the house reads as intentional and welcoming after dark.
Make certain safe, inviting pathways with well-placed illumination that guides guests without glare.
Enhance Curb Appeal
Have you ever driven up to a home and immediately felt drawn in by its curb appeal? When you enhance curb appeal with lighting, you elevate first impressions and set the tone for the entire property. Focus on balance, depth, and cleanliness, so the scene feels inviting at dusk and beyond.
Use these guiding steps:
- Emphasize color contrast to highlight architecture and landscaping.
- Prioritize plant selection that thrives in your climate and under lighting.
- Layer light levels to create drama without glare.
- Spotlight key focal points while maintaining subtle pathways.
With precise aiming and warm temperature hues, you’ll create a cohesive, aspirational façade that strengthens property value and curb presence.
Highlight Architectural Features
Highlighting architectural features adds definition to your façade and makes strong first impressions even stronger. You elevate your home’s profile by selecting lighting that emphasizes lines, textures, and massing without overpowering the architecture.
Use a combination of grazing, wall wash, and accent techniques to sculpt depth and reveal form after sundown. Thoughtful placement, aiming at focal corners and distinctive cornices, guides the eye toward architectural rhythms rather than clutter.
Keep color temperature consistent to preserve true materials, enhancing garden aesthetics while avoiding harsh contrasts. Integrate subtle garden lighting around plantings to complement the structure without competing with it.
Emphasize textures with discreet fixtures and allow plant spotlighting to support the architectural narrative, creating a cohesive, inviting exterior that resonates with refined taste.
Create Safe Pathways
- Plan confident sightlines from multiple angles
- Select lighting levels that avoid harsh shadows
- Integrate edging and low-growing plantings
- Schedule seasonal soil maintenance and planting techniques
Low-Voltage vs Line-Voltage: What Works Where

Low-voltage and line-voltage systems each have a distinct role in landscape lighting, and choosing between them hinges on safety, complexity, and the scale of your project. You’ll find low voltage ideal for smaller, intimate spaces where you want quick setup and straightforward maintenance. It’s safer to install, with less risk around turf and edges, and it pairs well with longer-run runs and simple fixtures.
Line voltage suits larger, more feature-rich designs where you demand high output, durable fixtures, and extended reach with fewer transformers. Consider your power needs, wiring cost, and future expansion. Solar options can augment your plan for off-grid angles, while fixture types guide placement and mood.
Aim for cohesive balance, ensuring progressions between zones feel intentional and bright enough to reveal textures.
Map Your Nighttime Zones and Focal Points
Start by mapping your Nighttime Zones to guarantee every area gets purpose-driven illumination, from entryways to gathering spots.
Identify your Focal Points—the features you want to showcase and the paths you want to guide—so lighting reinforces mood and safety.
With clear zones and focal points, you’ll plan fixtures, timing, and intensity like a pro, achieving a cohesive nightscape from the first light.
Nighttime Zone Mapping
Ready to map the night? You’ll chart your outdoor lighting with precision, aligning zones to your property’s rhythms. Nighttime Zone Mapping focuses your energy where it matters most, boosting safety, atmosphere, and efficiency.
- Identify primary focal zones by function, not just aesthetics.
- Mark timer and sensor boundaries to minimize spillover.
- Align solar panels, if used, with prevailing sun exposure for reliability.
- Test color rendering to ensure landscapes, textures, and plantings shine authentically.
As you map, visualize pathways, entryways, and conversation areas bathed in balanced glow. You’ll feel confident choosing fixtures that blend with architecture while preserving dark skies.
Clear metrics—coverage, uniformity, and contrast—guide decisions. When you commit to a detailed map, you set the stage for lasting impact, reduce waste, and elevate nighttime curb appeal with intent and purpose, not guesswork.
Focal Point Planning
Next, assess Plant placement to determine where lighting will enhance form, texture, and color without glare. Create a hierarchy: bright accents for key features, softer washes for backgrounds, and discreet uplights to reveal structure. Use contrast thoughtfully to guide the eye and extend the space’s perceived depth.
Document angles, distances, and mounting heights so your lighting remains intentional during seasonal changes. This deliberate approach yields a cohesive, inviting nighttime landscape.
Choosing Fixtures for Landscape Lighting
When selecting fixtures for landscape lighting, you’ve got to prioritize both form and function to create a cohesive, inviting exterior. From the curb appeal to walkways, the right fixtures set tone, rescue dark spots, and reinforce architectural lines.
Focus on color choices and fixture styles that harmonize with your home and landscape, not compete with them. Keep scale appropriate and installation angles intentional for safety and drama.
Consider durability and weather resistance as essential, not afterthoughts.
- Align fixture styles with architectural features
- Choose color choices that complement surroundings
- Prioritize glare control and low-profile silhouettes
- Plan for placement that guides foot traffic and highlights focal elements
Bulbs and Color Temperature: What to Use
Choosing the right bulbs and color temperature is essential to set the mood, guarantee safety, and highlight architectural details without overpowering the landscape. You’ll choose bulbs that balance brightness with efficiency, favoring LED options for long life and consistent color.
Consider color temperature selection to match the scene: warm tones (around 2700–3000K) for cozy facades and entryways, or cooler tones (3500–4000K) for modern landscapes and stonework. Avoid excessive contrast that strains the eye or washes away textures.
Pay attention to beam angles and lumens to assure even coverage without glare. Bulb longevity matters, so opt for high-quality LEDs rated for outdoor use and compatible drivers.
Document replacements and maintenance intervals to sustain performance and curb costs over time.
Placing Lights: Pathways, Entries, and Elevation
You’ll start by shaping pathway illumination to guide touchpoints and foot traffic with even, low-glare lighting.
Elevation considerations demand careful placement to avoid glare and guarantee safe shifts, from entryways to pathways.
Together, these principles set a clear, aspirational foundation for a cohesive, welcoming landscape lit with purpose.
Pathway Illumination Basics
How should you position lights along paths, entries, and elevation to create a safe, inviting glow? You’ll balance density and spacing, guiding movement without glare, while highlighting key features.
Position fixtures to create a continuous line of illumination, with brighter accents near entry decisions and softer washes along longer stretches. You’ll blend practicality with mood, ensuring even coverage and avoiding dark patches.
Use fixture heights that align with pedestrian scale, and consider subtle shadows that add depth to garden art and wildlife attraction.
- Place lights at regular intervals for consistent visibility.
- Use warm color temperatures to enhance natural textures.
- Aim fixtures to illuminate tread edges, not eyes.
- Gateways get a focal glow to welcome visitors.
Elevation Considerations for Lighting
Elevation changes the way light shapes spaces, so plan fixtures to follow the contours of pathways and entry points rather than sit flat above them. When you place luminaires on slopes or steps, aim for layered gradients that reveal texture and direction without glare. Coordinate mounting heights with walkway elevations to emphasize safe navigation while preserving atmosphere.
Position lights to silhouette garden furniture and stonework, creating inviting pockets along progressions. Use adjustable fixtures to fine‑tune beam angles as terrain shifts, preventing hot spots.
Soil preparation matters: clear debris, guarantee stable bases, and compact around mounted anchors to minimize vibration. For entries, choose low‑contrast washes that welcome guests without overpowering architectural details.
Regularly review spacing, and adapt as landscaping evolves.
Safe Wiring and Outdoor Electrical Basics
- Use GFCI protection and weatherproof enclosures for all connections.
- Select low-voltage transformers and verify compatible bulbs, cable gauge, and maximum run lengths.
- Ground fault testing and regular inspections keep systems safe over time.
- For sustainability, coordinate with solar panels where appropriate without compromising code compliance.
Remember: respect electrical codes and design coherently with landscape goals, ensuring reliability, safety, and enduring beauty.
Energy Efficiency and Smart Control Options
Are you getting the most from your landscape lighting with energy-efficient choices and smart control options? You optimize performance by selecting high-efficiency LEDs, dimming features, and precise timing.
Pair sensors with timers to minimize idle use and extend lamp life, while occupancy or ambient-light sensing reduces waste. Integrate smart controllers that learn your patterns, adjusting brightness for security and ambiance without overspending.
Adopt recycling strategies for components and disposables, prioritizing reusable housings and recyclable packaging. Consider solar or low-voltage systems where appropriate, reducing energy draw and infrastructure needs.
Emphasize energy conservation through deliberate zoning, scene-setting, and annual reviews of consumption. The result is a clearer nightscape, lower bills, and a responsible footprint that supports sustainable curb appeal.
Weather, Climate, and Durability For Your Climate
Weather and climate shape every landscape lighting decision, so you plan with your local conditions in mind to guarantee reliability year-round. Your setup should anticipate seasonal stresses and maximize durability without compromising beauty or efficiency.
You’ll tailor components to endure sun, wind, and moisture while preserving solar efficiency and performance.
- Assess exposure and select corrosion‑resistant fixtures
- Choose weather‑resilient drivers and IP ratings suitable for your climate
- Prioritize moisture protection, drainage, and cabling safeguards
- Optimize height, spacing, and shading to reduce wear and energy waste
With thoughtful material choices and proactive maintenance, you achieve enduring illumination that stays bright, efficient, and timeless through every season.
Your landscape lighting becomes a dependable, aspirational feature you trust year after year.
DIY Installation: Step-by-Step Guide
Getting started with DIY landscape lighting is faster and more rewarding when you map a clear path: plan your layout, gather the right components, and follow a structured sequence. Begin with a simple schematic of paths, focal points, and progressions, then select fixtures that align with your vision.
Install low-voltage wiring first, keeping runs tight and accessible. Then mount fixtures at eye level for balanced illumination. Test each circuit during setup, adjusting for even coverage and glare control.
Consider color schemes to unify architecture and garden features, choosing warm tones for inviting patios and cooler accents for modern foundations.
Pay attention to Plant placement, ensuring casts won’t overheat foliage or obscure fixtures as growth resumes.
Finish with a durable canopy of protection, label connections, and document your layout for future tweaks.
When to Hire a Pro and What to Expect
If you’ve followed a DIY approach so far, you’ve built a solid foundation for landscape lighting, but some scenarios call for professional help. A pro brings safety, precision, and design cohesion, ensuring lasting results. Here’s when to hire and what to expect:
1) Complex electrical work or integrated systems,
2) uneven terrain or trees obstructing lines,
3) garden pests and wildlife interfering with fixtures or wiring,
4) meticulous soil preparation and drainage planning beyond DIY scope.
What to expect: a detailed assessment, code-compliant installation, and a polished design plan. You’ll receive a project timeline, written guarantees, and maintenance guidance.
Expect minimal disruption, professional cleanup, and a scalable solution that grows with your landscape aspirations while preserving energy efficiency and curb appeal. Consider this step a strategic investment in performance and peace of mind.
Budgeting Your Landscape Lighting Project
When planning your landscape lighting budget, start with a clear map of priorities and constraints to prevent scope creep. Define must-haves first—pathway safety, focal points, and energy efficiency—and assign them budget weights.
Next, estimate hardware, fixtures, transformers, cable, and control costs, then add installation fees and contingency.
Consider how a garden sculpture or Water feature elevates the design, and budget for lighting that enhances their impact without overpowering them.
Plan for scalability by selecting modular fixtures and standardized components that simplify future upgrades.
Account for maintenance implications, shade patterns, and seasonal needs to avoid costly revisions.
Track expenses in a simple, transparent spreadsheet, monitor deviations, and adjust promptly.
A disciplined approach yields lasting impact, reduced waste, and confident decisions.
Maintenance and Troubleshooting Made Simple
A well-maintained landscape lighting system stays reliable and striking, so establish a simple routine that combines proactive checks with rapid fixes. You’ll keep glow consistent by prioritizing solar power efficiency and outdoor timers, ensuring energy is used exactly when needed.
- Inspect fixtures monthly for corrosion or loose connections and tighten as needed.
- Clean lenses and replace any burnt-out bulbs promptly to maintain uniform brightness.
- Test outdoor timers weekly, confirming schedules align with dusk and your desired ambience.
- Reassess power input seasonally, upgrading wiring or solar cells to maximize performance.
Tips you’ll value: keep a spare fuse kit, seal IP-rated junctions, and document changes. With disciplined maintenance, your yard stays inviting, safe, and brilliantly lit year-round.
Real-World Examples to Inspire Your Design
From real yards to ambitious estates, these design-minded examples demonstrate how thoughtful lighting elevates architecture, landscape features, and outdoor living spaces. You’ll notice how cohesive color schemes guide mood, balance, and emphasis across façades, trees, and hardscapes.
In one scenario, subtle downlighting on columns highlights architecture while pathway accents create safe circulation, inviting evening gatherings. A second example uses warm temp LEDs to render brick tones and lush greenery without glare, enhancing plant selection choices and seasonal color.
Another installation centers a sculptural focal point with a precise beam angle, drawing the eye to water features or statuary. Overall, these case studies illustrate disciplined layering, daylight-inspired contrasts, and intentional placement that translates into your own yard’s harmony and lasting curb appeal.
Frequently Asked Questions
How Long Does a Typical Landscape Lighting Project Take?
Typically, a landscape lighting project takes a few days to a couple weeks, depending on scope. You’ll refine Lighting design, select power sources, install fixtures, and test systems, ensuring durability, efficiency, and timeless elegance throughout your outdoor space.
Can I Reuse Standard Outdoor Outlets for Lighting?
Yes, you can, but verify outdoor outlet compatibility and electrical code compliance first. You’ll assess weatherproofing, proper grounding, and GFCI protection, ensuring compatibility with lighting circuits while avoiding fragile adapters that fragilely threaten safety and reliability.
What Is the Lifespan of Common Landscape Bulbs?
Bulb longevity varies, but common landscape bulbs typically last 15,000 to 25,000 hours, and LEDs exceed 25,000 hours. You’ll notice a clear lifespan comparison favoring LEDs, offering superior efficiency, durability, and consistent brightness over time.
Are Solar Lights Reliable for All Environments?
Solar lights aren’t reliable for all environments; in extreme cold or heat, performance drops. You should consider solar power’s variability, and weigh environmental impact before committing, aiming for resilient options that suit your climate and daily routines.
How Much Maintenance Do Low-Voltage Systems Require?
Low-voltage systems require minimal maintenance if you keep cables clear and inspect connections annually. You’ll boost energy efficiency with clean, secure wiring, and follow installation tips to preserve longevity, reliability, and graceful illumination.
Conclusion
You’ve mapped zones, chosen fixtures, and decided between low- and line-voltage with confidence. With a focused plan, your landscape will glow like a carefully staged masterpiece—night after night. Trust the process, embrace smart budgeting, and maintain your system to keep curb appeal timeless. When done right, your outdoor space becomes a magnet for admiration, a living work of art that turns every dusk into a new chapter. Your yard isn’t just lit; it transcends, spark-magnet dramatic.



