


Integrating smart tech into UK DIY projects means planning around local wiring, standards, and energy goals from the start. Start with a five-step retrofit: assess, design, source reliable components, install with careful testing, then refine routines. Prioritize a durable UK-compatible platform, consider wired vs wireless based on your home, and bundle hubs, sensors, and security for cost efficiency. Build with practical maintenance in mind, and tailor lighting, heating, and security to your home’s habits. You’ll uncover practical guidance as you progress.
What Smart Home Tech Means for UK DIYers
Smart home technology isn’t a future dream for UK DIYers—it’s a practical toolkit you can start using today. You’re balancing cost, compatibility, and safety, so focus on core wins that fit your home and budget.
Smart security gives you around‑the‑clock visibility, alerts, and remote access, letting you verify doors and cameras from anywhere. You’ll also reduce waste and energy use by monitoring devices and routines.
Automation routines simplify daily tasks: lights, climate, and power can respond to occupancy, routines, or schedules, creating comfort without hands‑on fiddling.
Start with a hub that supports your preferred ecosystem, then add trusted sensors and plugs. Keep security updates current, and document wiring and placements.
With a deliberate, scalable approach, you’ll build reliability and tangible everyday benefits.
Map Your Plan: The Five-Step Approach to a UK Smart Retrofit
Mapping your plan starts with a clear, five-step path you can follow today: assess, design, source, install, and refine. You’ll first assess your space, noting where you rely on lighting, power, and climate comfort. Identify goals for efficiency, security, and convenience, then map how each room will use Smart lighting and energy sensors to meet those aims.
In design, choose a practical backbone—compatibility across devices, wiring constraints, and future expandability—so you won’t backtrack later. Source components with clear guarantees and local support, favoring common standards for smoother upgrades.
Install with care, testing each connection, and documenting settings as you go. Finally, refine through real-world use, adjusting schedules, scenes, and sensor thresholds to optimize daily routines.
Set Your Budget: What to Spend and Where to Save
Set your budget by identifying where to allocate and where to save, starting with a clear plan for essential versus optional items. You’ll prioritize core smart tech that delivers value—routers, hubs, sensors, and smart controllers—while trimming non-essentials without sacrificing safety or usability.
As you map costs, look for savings across areas like installation, sourcing, and future-proofing to keep your retrofit practical and scalable.
Budget Planning Basics
Ever wondered how to get the most value from your budget when adding smart tech to UK DIY projects? Start with a clear cap on total spend, then segment by room and function. Prioritize core comforts—lighting, climate, security—before optional niceties.
Use budget tricks like bundling devices from the same ecosystem to reduce setup time and compatibility risks, and look for seasonal sales or refurbished options to stretch funds. Map out ongoing costs, including subscription fees and firmware updates, so you don’t get sticker shock later.
Compare energy-saving potential against purchase price to justify investments. Keep a realistic timeline and track actual spend vs plan weekly. Savings tips hinge on purchasing smart hubs with broad compatibility, avoiding redundant devices, and reusing existing tech where feasible.
Essential vs Optional
Do you know where to draw the line between essential comforts and optional niceties when budgeting for smart home upgrades? You’ll focus on essential features first, then evaluate optional add ons, ensuring you don’t overreach your budget. Prioritize reliability, security, and core automation that saves time and energy.
- Essential features: core hubs, secure connectivity, voice control, and basic sensing.
- Budget safeguard: allocate funds for installation, not just devices.
- Optional add ons: ambient lighting scenes, premium integrations, and advanced dashboards.
- Return-on-value: measure long-term savings, maintenance, and future-proofing.
Keep returns clear: spend on what drives daily convenience now, and defer flair until you’ve secured fundamentals. This approach keeps your plan practical, authoritative, and ready for expansion.
Saving Across Areas
You’ve mapped out the essential features, so now it’s time to allocate smartly across the budget. Saving across areas isn’t about cutting corners; it’s about prioritising impact.
Start with core systems that deliver daily value: a reliable hub or controller, smart lighting, and gateways for future expansion. Target energy savings where you’ll notice results fast, like heating, cooling, and standby power.
If you want a Smart garden, invest in programmable irrigation and weather-aware controllers rather than fanciful add-ons. Look for modular kits that let you scale gradually, reducing upfront risk. Reuse existing wiring where possible, and consider smart sockets to optimise unused devices.
Compare energy returns over time, not just upfront costs, and choose devices with clear energy dashboards to guide ongoing savings. Focus, measure, and evolve.
Pick a Platform That Fits UK Homes and Habits
Choosing a platform that fits UK homes means prioritising compatibility, local ecosystems, and reliable support.
You’ll want a system that works with common UK devices and services, aligns with local habits, and offers a clear path for expansion.
Look for longevity and strong UK-based assistance so your investment pays off for years.
Platform Compatibility Matters
Platform compatibility isn’t just about picking a gadget brand; it’s about selecting a system that fits how UK homes are wired, wired, and lived in. You’ll value a platform that plays well with existing wiring, energy meters, and typical wall layouts, reducing rework and frustration.
When evaluating options, consider these factors:
- Interoperability across devices and ecosystems
- Local control and privacy options
- Compatibility with common UK standards and regulators
- Clear upgrade paths to address integration challenges
Choosing a cohesive platform supports smart home aesthetics by presenting consistent UI and behavior. It also minimizes maintenance headaches, speeds up troubleshooting, and preserves resale value.
Prioritize proven reliability, robust security, and documented compatibility to guarantee smooth, scalable DIY integration.
UK Habits And Ecosystems
UK homes aren’t one-size-fits-all, so pick a platform that matches how Brits live, work, and wire their spaces. Your choice should reflect Cultural preferences and Lifestyle adaptations that shape daily routines.
In practice, you’ll consider how kitchens, living rooms, and hallways flow, and select a system that integrates with common UK devices and standards. Prioritize compatibility with low-cost, widely available accessories and widely used voice assistants, so tech feels native rather than forced.
Think about seasonal habits—heating, lighting, energy monitoring—and choose platforms that simplify management across multiple rooms. You’ll value straightforward setup, robust security, and clear update paths, reducing frustration later.
The right platform aligns with local norms, supports future-proofing, and minimizes ongoing fiddling, letting you enjoy reliable, intuitive automation.
Ecosystem Longevity And Support
When you’re picking a platform that fits UK homes and habits, longevity and support should be top of mind. Ecosystem longevity matters because you’ll avoid costly migrations and frequent resets.
A robust platform also relies on active support networks, ensuring updates, bug fixes, and accessory compatibility over years. You want a system that communicates roadmaps and offers reliable customer help.
- Verify long-term device availability and backward compatibility
- Check official updates, security patches, and migration paths
- Assess community forums, local installer support, and certified partners
- Confirm clear warranty terms and service-level commitments
Choosing a platform with strong ecosystem durability helps your DIY projects stay functional, secure, and scalable, while solid support networks give practical, timely assistance.
Wired vs Wireless: What Works Best in Older UK Houses
Wired or wireless systems aren’t one-size-fits-all in older UK houses, where the walls and floors often hide quirks that can complicate signal, power, and access. You weigh compatibility, disruption, and future-proofing as you plan.
In practice, you’ll map their paths: copper or fibre routes for power, existing conduit for a tidy install, and potential dead spots for wireless.
Wired setups deliver reliable Wireless signal strength across larger homes, but swapping in unobtrusive cabling can require plaster work.
Wireless options cut disruption and cost, yet signal can falter behind thick walls or metal studs unless you boost with repeaters or mesh.
Consider Smart device aesthetics so gear remains inconspicuous.
Choose hybrid points where robustness meets practicality, aligning with your home’s layout and your ambitions.
DIY Smart Lighting You Can Install Tonight
With a few simple parts and minimal tools, you can have smart lighting up and running tonight. You’ll choose a smart bulb and a compatible hub or use direct Wi‑Fi per device, then mount it in a standard fitting. Wireless control lets you dim, schedule, and group lights without rewiring.
- Install the smart bulb in a lamp or ceiling fitting.
- Connect to your Wi‑Fi or hub, following the app prompts.
- Create schedules and scenes for daily routines.
- Test control from your phone and a voice assistant if available.
This approach keeps wiring unchanged, avoids extra outlets, and delivers immediate, reliable smart lighting.
Smart bulb, wireless control enable quick, practical improvements to your UK home’s ambiance.
Heating and Energy: UK Thermostats, Sensors, and Zoning
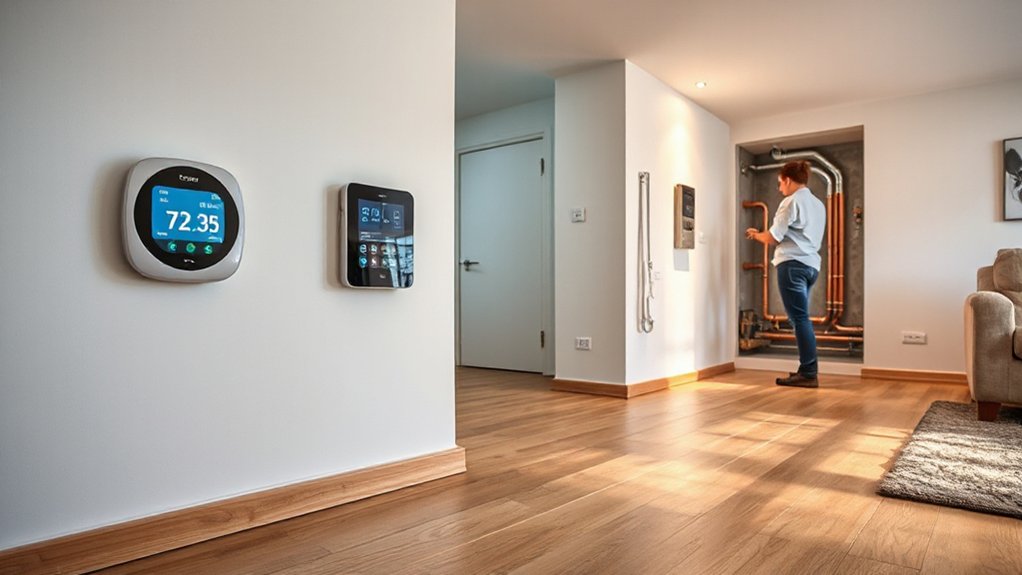
To start, place your smart thermostat where it can read representative room temperatures without being affected by direct sun or drafts.
Then plan zoning to target heat where you actually live, improving comfort and saving energy.
Finally, integrate sensors thoughtfully so you can couple occupancy, temperature, and humidity data for responsive, efficient control.
Smart Thermostat Placement
- Aim for mid-wall height and away from direct sun, drafts, or appliances that skew readings.
- Prioritize central rooms with representative activity to balance zoning and energy use.
- Consider Thermostat aesthetics and discreet mounting to maintain room aesthetics without sacrificing data quality.
- Use multiple sensors in key areas to capture variations and improve control fidelity.
Placement considerations guide your setup, reducing false readings and boosting comfort. You’ll feel the difference as HVAC responds swiftly, intuitively, and efficiently.
Zoned Heating Optimization
Could you heat smarter by zoning your system? Zoned heating splits a home into dedicated temperature zones, letting you tailor warmth where it’s needed most. You’ll install controllable valves, actuators, and zone-based thermostats to regulate flow and response, rather than blasting heat everywhere.
Begin with a layout map: identify high-traffic living spaces, bedrooms, and draft-prone areas, then assign each to a zone. Prioritize comfort in occupied rooms while reducing energy in unused ones.
Use clear schedules and adaptive setback to balance daily routines with efficiency. Confirm that your boiler and circulator can support multiple zones, and check pipe insulation to minimize heat loss.
Regularly audit performance, adjust setpoints, and track savings. Temperature zones translate into tangible comfort and lower bills when applied with precision.
Sensor Integration Strategies
Smart sensors make zoning work in real life. You’ll optimize heating by selecting reliable sensors and mapping zones to room use, doors, and windows. To guarantee consistent performance, focus on sensor placement and understand signal range within your home’s layout.
- Assess main living areas first, then extend to bedrooms and corridors.
- Place sensors away from heat sources, drafts, and directly above radiators.
- Keep line-of-sight for wireless signals and verify signal range across floors.
- Test and recalibrate after any major furniture rearrangement or renovations.
With careful placement, your system responds quickly, maintains comfort, and reduces energy waste. Expect smoother control, fewer temperature swings, and better integration with UK thermostats and zoning strategies.
Security You Can Rely On: Cameras, Doorbells, and Alarms
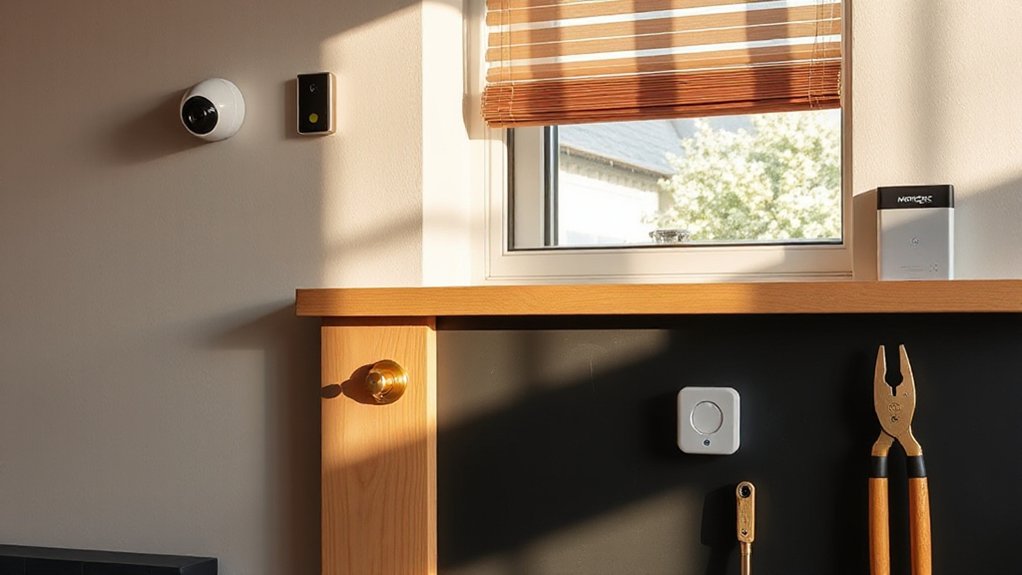
With the right setup, cameras, doorbells, and alarms aren’t just deterrents—they’re a reliable, integrated shield for your home. You’ll pair outdoor surveillance cameras with doorbells that include motion sensing and two‑way audio, so you spot and respond to activity before it escalates.
Choose systems that support local storage alongside cloud backups for resilience, and guarantee alarms are loud enough to deter intruders while still compliant with UK regulations.
Prioritize a central hub that unifies feeds, alerts, and smart automations—like turning lights on when motion is detected.
Consider pet monitoring features to avoid false alarms from curious animals.
Keep firmware up to date, test sensors monthly, and document PINs and recovery codes.
This setup gives you consistent, actionable security without complexity.
Energy Monitoring for UK Mains and Meters
Understanding energy monitoring starts with the basics: what your UK mains meter measures and how to read it, so you can pinpoint where consumption happens.
We’ll cover common metering methods in UK homes and how they influence monitoring options for DIY setups.
With clear steps and practical tips, you’ll be ready to choose and install a system that fits your meter type and goals.
Energy Monitoring Basics
- Determine baseline usage with a plug-in meter to spot phantom loads.
- Track daily and weekly cycles to catch peak periods and optimize timing.
- Log readings alongside costs to reveal real savings from changes.
- Tie findings to Energy audits and renewable sources to plan improvements.
Keep notes, review quarterly, and implement incremental upgrades; progress compounds over time.
UK Mains Metering Methods
If you’ve been tracking energy use with plug-in meters, you’re already primed to map UK mains metering options. UK mains metering methods center on accurate measurement, clear data, and safe integration with your system.
You’ll encounter smart meters, inline analysers, and sub-mains monitors that suit different loads and home layouts. Expect calibration steps that confirm readings align with the grid, and consider UK meter calibration practices to guarantee consistency across devices.
When planning, prioritize a smooth smart meter installation that minimizes disruption and maximizes visibility into consumption patterns. Use meters that support standard interfaces, enable data export, and integrate with your home automation.
Document test readings, verify with the supplier, and maintain calibration records for ongoing accuracy.
Safety Checklists for DIY Smart Installs
Safety checks should come first when you’re tackling DIY smart installs, because a quick, thorough review now prevents costly mistakes later. You’ll rely on practical steps that reinforce safety, ensuring your setup doesn’t introduce hazards or flakiness. Use these core checks to guide your process.
- Safety protocols: confirm devices, tools, and venues comply with guidance and aren’t exposed to moisture or overload.
- Risk assessments: identify potential electrical, heat, and trip risks before you begin, and plan mitigations.
- Secure connections: verify all wiring, terminals, and mounting brackets are snug and correctly rated for your devices.
- Documentation: record model specs, installer date, and any deviations for future maintenance.
Power, Cables and Regulations: What You Must Know in the UK
Power, cables, and regulations aren’t afterthoughts in UK DIY smart installs—they’re the backbone that keeps projects safe, legal, and reliable.
You’ll prioritise power safety from the outset: understand mains circuits, fuses, and RCD protection to prevent shocks or fires.
Plan cable routes before you cut, avoiding cramped spaces and heat sources.
Cable management isn’t cosmetic; it reduces interference, heat, and accidental damage, so label, route, and secure every lead.
Always check UK regulations for consumer devices and alterations to fixed wiring—permit requirements, when applicable, and approved methods.
Use certified adapters and avoid daisy-chaining high-load devices.
Document your work, noting voltages and locations.
If in doubt, consult a qualified electrician.
With careful planning, your smart setup stays safe, compliant, and ready for future upgrades.
Plug-and-Play vs Custom Integrations: Scalable DIY Paths
When you’re deciding how to add smart tech, you can start with plug-and-play devices for quick wins or opt for custom integrations that scale as your needs grow. This choice shapes reliability, cost, and effort, so pick the path that fits your DIY mindset.
Wireless flexibility matters—select devices that connect without messy rewiring, and plan for future upgrades. DIY customization lets you tailor automation rules, schedules, and dashboards to your home’s rhythms.
- Start simple with off-the-shelf hubs and sensors to test compatibility.
- Map your priorities to avoid unnecessary complexity or expense.
- Balance reliability with expandability as projects evolve.
- Document configurations so later tweaks stay coherent and safe.
Voice Control Ecosystems: Which Assistant Fits UK Homes
Choosing a voice assistant for UK home tech comes down to ecosystem compatibility and everyday practicality; you’ll want something that understands UK accents, supports local services, and works reliably with your devices.
In practice, you’ll compare how each option handles common tasks, from lights to thermostats, and whether it plays nicely with existing hubs.
Voice assistants differ in privacy controls, routines, and multi-user support, so test response times and UK compatibility before committing.
Prioritize compatibility with your smart plugs, speakers, and security gear, not just flashy features.
Consider how updates affect reliability and whether the ecosystem offers useful UK-specific skills.
The right choice streamlines daily routines, reduces friction, and keeps your UK home cohesive rather than fragmented.
Loft, Shed, and Extension Conversions: Practical UK Examples
Loft, shed, and extension conversions offer a practical route to expanding living space without the upheaval of a full house rebuild. You’ll tap into smart tech benefits in compact, underused areas, improving daily routines while preserving the core home layout. Practical steps keep projects efficient and compliant.
- Plan early with party-wall and building-control checks to avoid delays.
- Choose smart lighting, heating, and energy monitors that suit mixed-use spaces.
- Prioritise insulation, focusing on loft insulation to minimize heat loss.
- Secure access with sturdy shed security measures and discreet sensors.
Use adaptable wiring, minimal disruption, and clear temporary zones for ongoing work. Finalise finishes with durable, low-maintenance materials.
Troubleshooting and Maintenance You’ll Actually Use
What’s the real value of troubleshooting and maintenance you’ll actually use? It’s about staying ahead, not chasing fixes. Begin with a simple checklist: firmware updates, power cycling, and sensor calibration.
Set a predictable maintenance cadence—weekly quick checks, quarterly firmware reviews, annual hardware audits. Document changes so you don’t duplicate effort.
When a problem surfaces, isolate first, then test in stages to pinpoint causes, avoiding cascading work. Keep cables tidy, mounts secure, and weatherproof enclosures tightened.
Embrace proactive care for outdoor automation—your garden sensors, irrigation timers, and lighting won’t yawn at dawn if you’ve prepped them. In creative gardening setups, routine checks guard plant schedules and data integrity.
The payoff isn’t fixes; it’s reliability, efficiency, and uninterrupted control of your home ecosystem.
Frequently Asked Questions
How to Future-Proof DIY Smart Installs for UK Homes?
Future-proof your DIY smart installs by choosing open standards and modular kits. Prioritize Smart security and energy management with scalable hubs, firmware updates, and local control. Regularly backup configurations and standardize devices across rooms for future compatibility.
What Are Insurance Implications of DIY Smart Upgrades?
Insurance coverage can shift after DIY smart upgrades, so you should notify your insurer and document changes. Do a risk assessment, address wiring, sensors, and data risks, and keep receipts. This shows responsible upgrading and helps avoid claim delays.
Can I Retrofit Smart Tech in Rented UK Properties?
Yes, you can retrofit smart tech in rented UK properties, but you must check your tenancy agreement and get permission. You’ll balance tenant rights with security concerns, ensuring installations are removable and data practices protect both parties.
Do UK Building Regs Affect Smart Device Installations?
Building permits and wiring regulations can affect your smart device installs in the UK; you’ll need to check local requirements, secure approvals where needed, and guarantee cables, power, and safe termination meet evolving standards for compliant integration.
How to Handle Data Privacy and UK GDPR With Smart Tech?
Privacy policies matter; protect your data with robust encryption, and practice prudent permissions. You’ll reinforce data encryption, review Privacy policies, and promptly patch weaknesses, prioritizing compliance and care as you configure smart tech for UK dwellings.
Conclusion
In short, you can dip a toe or dive right in without overhauling your whole place. Start small, plan smart, and choose a path that feels forgiving to your budget and walls. If a hiccup shows up, treat it as a gentle nudge to rethink, not a roadblock. With steady steps, you’ll weave tech into your UK home that’s reliable, scalable, and quietly impressive—an upgrade that respects the house, your time, and your pockets.



