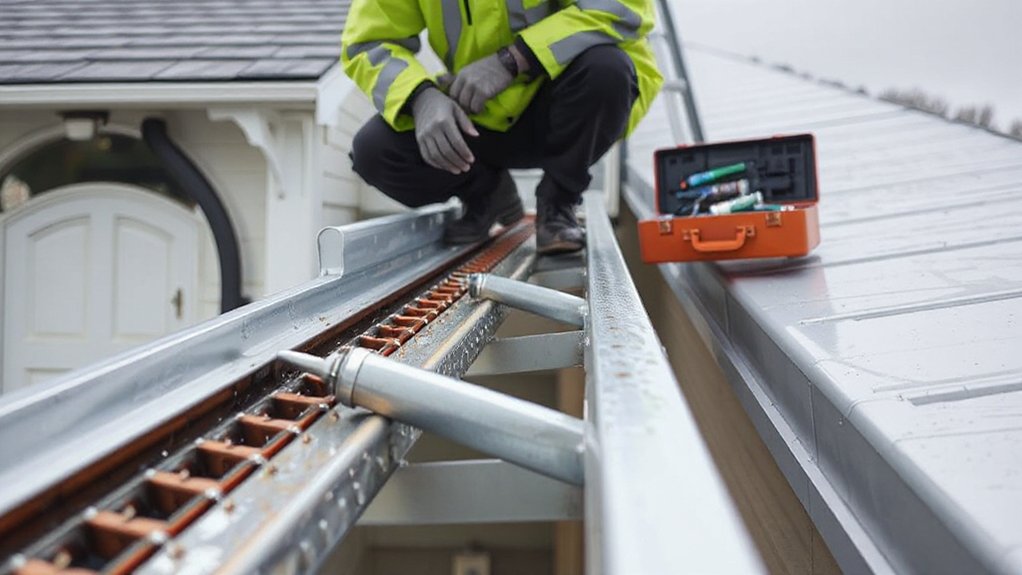

Cleaning and repairing gutter systems starts with a quick inspection to spot sagging sections, loose fasteners, and clogs. Wear gloves and secure a stable ladder, then remove debris with a scoop or trowel and flush the gutters to check flow. Unstop downspouts with a hose or auger, reseal joints with a quality sealant, and re-anchor any loose hangers. Regular checks save you from costly leaks, and you’ll pick up tips that keep everything draining smoothly—if you keep going, you’ll learn more.
Key Takeaways
- Regularly inspect gutters for sagging sections, loose fasteners, rust, peeling paint, and pooling water to pinpoint problem areas.
- Use a sturdy ladder, gloves, eye protection, and a small scoop to remove debris, then flush with water to verify flow.
- Unclog downspouts from roof outlets downward, using a plumber’s snake for stubborn blockages and rechecking drainage.
- Seal gaps at joints with primer and sealant, using backer rods for larger joints and resealing annually.
- Consider gutter material options (aluminum, steel, vinyl, copper) based on climate, cost, maintenance, and warranties.
Why Gutters Protect Your Home

Gutters protect your home by directing rainwater away from the foundation, walls, and roofline. When you maintain them, you prevent driveway erosion, basement flooding, and costly repairs caused by water intrusion.
Your gutters control water flow, reducing soil saturation that can compromise siding and fascia. This is why gutter aesthetics matter: clean, aligned gutters look purposeful and function better, signaling proper drainage to passersby and inspectors.
Water diversion is the core function, guiding runoff to downspouts and away from critical areas. Regular inspection helps you spot sagging sections, loose fasteners, and blockages that impede flow.
Tools and Safety for Gutter Work
Getting the job done safely and efficiently starts with the right gear and a solid plan: know what you need, wear proper PPE, and assess the work area before you start.
For gutter work, equip sturdy gloves, eye protection, non-slip shoes, and a reliable ladder with stabilizers. Use a scoop or trowel for debris and a bucket or bag to collect waste, avoiding overreaching.
A lightweight blower can help dry debris, but don’t rely on it alone. Keep a flashlight for dark sections and a small hand brush for stubborn buildup.
Maintain ladder safety by securing it and never leaning over the gutter line.
Prioritize gutter aesthetics and cleaning frequency to establish a predictable maintenance routine, reducing risk and preserving system performance.
Choosing Gutter Materials: Durability and Cost
When you choose gutter materials, consider longevity, upfront cost, and how weight affects your structure.
Weigh how maintenance needs align with your climate and will, from durability to load, and budget for ongoing care.
This sets the groundwork for selecting options that balance performance, cost, and practicality.
Material Longevity Costs
Choosing gutter materials comes down to longevity and cost: you’ll want options that last while staying within budget. When you weigh material longevity costs, consider expected life span, maintenance needs, and repair frequency.
Aluminum offers corrosion resistance and low upkeep, but stainless or steel can excel in harsh climates with higher upfront costs.
Vinyl is affordable but can warp in heat and may require more frequent replacement.
Copper delivers premium durability and aesthetics but carries a steep price and heavier installation demands.
Assess total cost of ownership, including coatings, fasteners, and potential repainting. You’ll value gutters that resist weathering without frequent replacements.
For practical decisions, factor in gutter aesthetics and gutter installation requirements to balance durability with budget.
Weight And Load
Weight matters as much as cost you’ll pay for gutters, because heavier materials demand stronger support and careful installation. You’ll weigh gutter weight against your home’s structure and fascia, since excessive load can strain fasteners and joints over time.
Consider typical options: aluminum, steel, copper, and vinyl, each with distinct load capacity profiles. Heavier metals offer durability but require updated hangers, brackets, and sometimes larger downspouts to avoid sagging.
Lighter plastics save on installation effort yet may bow under heavy rain or ice unless properly sized. When evaluating load capacity, check manufacturer specs for rated span and support spacing, then match them to your roof runoff volume.
Balance durability, cost, and ease of installation to choose a system that maintains performance without overloading supports.
Maintenance Requirements
Maintenance requirements aren’t optional: selecting gutter materials that balance durability and cost saves you time and money over the long run. You should assess material life expectancy, corrosion resistance, and impact under local weather to prevent frequent replacements.
Durability affects maintenance frequency: sturdier options resist dents, leaks, and sagging, reducing service calls and labor costs. Consider installation compatibility with existing systems to avoid extra labor and costs.
Gutter aesthetics matter because material choice influences curb appeal and property branding, yet you shouldn’t sacrifice function for looks.
Landscaping considerations matter too: heavy runoff, planting proximity, and root intrusion can influence material performance. Choose a material that withstands debris loads and seasonal freezes, while remaining affordable over time.
Prioritize warranties, maintenance ease, and practical inspection access for ongoing reliability.
How to Inspect Gutters for Clogs and Damage
Start by checking for clogs early, looking for standing water, detached joints, and debris buildup.
Next, inspect for damaged sections such as cracks, rust, and loose hangers that could lead to leaks or sagging.
Finally, verify downspout drainage by running water and ensuring it exits properly away from the foundation.
Check For Clogs Early
Wondering why your gutters clog matters now? Start by checking for clogs early, before they harden into costly problems. Inspect downspouts and elbows first; if water backs up, you’ve got a blockage to address.
Use a portable scoop or gloved hand to remove leaves, twigs, and debris, then flush with a hose to confirm flow. Don’t ignore small seeds or mud buildup—these signal ongoing debris introduction.
While you’re at it, note how gutter aesthetics influence your home’s curb appeal, even if you’re prioritizing function. Consider color options that hide residue between cleanings, reducing perceived neglect.
Regular short checks save time and prevent overflow, ice damage, and corrosion. Schedule seasonal sprints, not annual marathons, to keep your system reliable and visually tidy.
Inspect For Damaged Sections
Inspect damaged sections by walking the gutter line and looking for obvious issues: cracks, holes, rust, loose hangers, sagging, and misaligned joints. You’ll spot problem areas faster when you stay methodical: check seams for separation, verify that fasteners bite securely into the fascia, and note any bending or crimping that compromises flow.
Prioritize gutters with visible buildup or streaks, since corrosion and punctures often accompany neglect. While you inspect, consider gutter aesthetics and how damage affects overall curb appeal and drainage performance; small dents can become larger leaks if ignored.
Document locations with simple markers, then plan targeted repairs: reseal joints, tighten hangers, or replace compromised sections. Afterward, confirm the system still drains evenly to support effective gutter landscaping and long-term protection.
Verify Downspout Drainage
To verify downspout drainage, start by clearing the outlet and any visible blockages, then test flow from the end of each downspout as water runs freely into the designated drainage area. Confirm that water exits smoothly without backups, kinks, or unusual sounds.
If flow is sluggish, inspect elbow joints and replace crushed sections or damaged clamps promptly. *Guarantee* extensions direct water away from foundations, landscaping, and crawl spaces. Check for leaks at seams and fasteners, tightening or resealing as needed.
Note any reduced performance after cleaning, which could indicate hidden obstructions or broken internal channels. Consider gutter aesthetics when routing outlets, ensuring they remain unobtrusive and aligned.
For professional presentation, maintain consistent gutter branding across all components and accessories.
Signs Your Gutters Need Urgent Repair
Creaky, overflowing, or misaligned gutters aren’t just unsightly—they’re a warning sign you can’t ignore. When you notice streaked paint, sagging seams, or loose fasteners, address it now.
Repeated leaks at joints indicate structural weakness, while pooling water near foundations signals improper slope or clogged downspouts. Don’t delay if you hear rattling during wind or see rust forming on metal sections; corrosion accelerates failure.
If gutter color options or finishes are peeling, the system may have deeper corrosion beneath. Prioritize fixing leaks, resecuring brackets, and ensuring proper slope to guide runoff away from your home.
Cleaning Gutters: A Step-by-Step Guide
Cleaning gutters is straightforward when you have the right tools and a plan, so start by gathering a sturdy ladder, gloves, a small trowel or scoop, a bucket, and a hose with a spray nozzle.
You’ll work from the ladder, remove debris, and rinse each section to assess performance.
Focus on technique: dislodge blockages, scrub grime, and check seals while keeping contamination to a minimum.
Finish by inspecting hangers and joints for obvious wear, then test water flow from the gutters into downspouts.
1) Inspect for sagging sections and reseat or fasten as needed.
2) Rinse with steady, downward streams to avoid splashing and spillage.
3) Note how gutter aesthetics and landscaping integration align with drainage paths for preferable curb appeal.
Unclogging Downspouts and Stubborn Debris
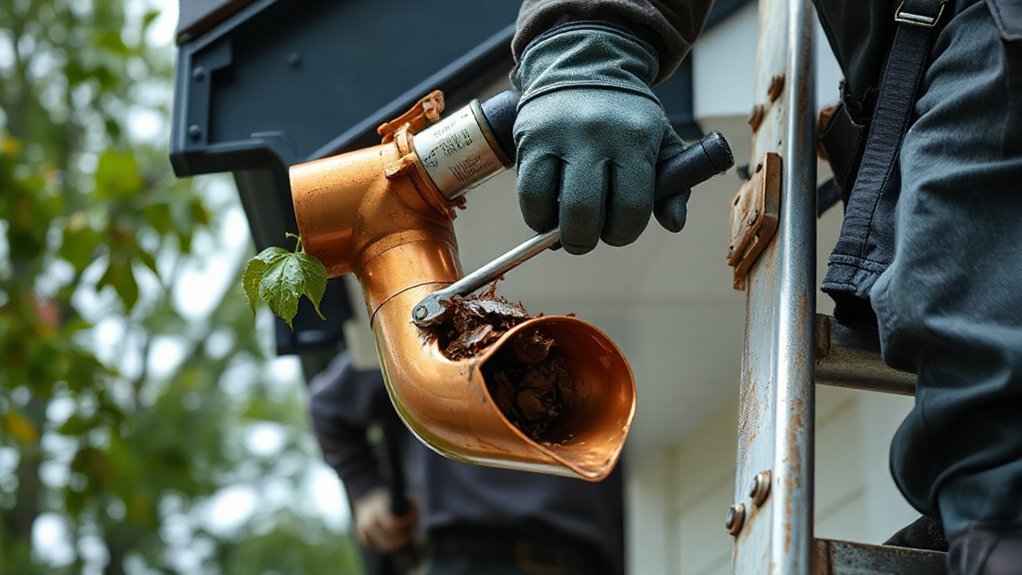
When you’re dealing with clogged downspouts and stubborn debris, start with a quick assessment to pinpoint where the blockage sits and how it’s affecting flow. Inspect from the roof outlet to the ground to determine whether leaves, pine needles, or mud are the main culprits. Use a flashlight to spot partial clogs and signs of standing water.
Remove loose leaf debris by hand, then flush with water or a garden hose to test flow. For stubborn clogs, employ a plumber’s snake or a drain auger, feeding slowly to avoid damage.
Watch for pest infestation indicators like nests or webs; address these after clearing the path. Reassemble with a fresh check of connections, seals, and splash blocks to guarantee consistent drainage.
Fixing Loose Hangers and Sagging Gutters
If a gutter hangs loose or sags, you’ve got to secure it before it starts causing leaks or water damage. You’ll tighten hangers and replace damaged straps, then re-support the run with correct spacing to prevent future sagging. Use sturdy screws and guarantee brackets grip the fascia firmly. Consider adding optional supports if spans are long or terrain shifts.
- Inspect each hanger, replace corroded hardware, and test for movement.
- Re-anchor sections evenly to keep slope consistent toward the downspout.
- Integrate gutter accessories like shields or braces to reinforce structure and help with water flow.
Gutter insulation can reduce weight and temperature-related expansion, while appropriate gutter accessories help you maintain a solid, leak-free system.
Sealing Gaps to Prevent Leaks
Gaps in your gutter system can leak water onto siding and foundations, so sealing them correctly is a priority after fixing loose hangers. You’ll want to identify all visible gaps where joints meet elbows, sections, and end caps.
Clean the area, dry it thoroughly, and apply a high-quality sealant compatible with metal, vinyl, or aluminum. Use a caulk gun to fill gaps smoothly, then smooth with a damp finger or tool to prevent air pockets.
For larger joints, consider a foam backer rod before sealing to improve cure and flexibility. While you seal, avoid overfilling, which can trap moisture.
Think about gutter decorations and gutter landscaping as decorative touches, not substitutes for proper sealing. Maintain yearly inspections to catch shrinking or cracking seals early.
Repairing Leaks With Patching and Sealants
Patching and sealants are your first line of defense for small leaks. You’ll learn to choose the right patch material and sealant, apply it cleanly, and test for lasting adhesion.
This section covers basics and practical techniques to restore a leak-free gutter efficiently.
Patch and Sealants Basics
Patch and sealant basics are all about stopping leaks quickly and reliably. You’ll learn when to patch, what sealants suit metal or plastic gutters, and how to prep surfaces for lasting adhesion. Proper prep matters as much as the sealant itself, so clean, dry, and roughen the area for better grip. Choose compatible products and apply in thin, even layers to resist UV and weathering.
While patching, consider how gutter decoration or aesthetic design can guide your repair to look intentional, not aftermarket.
- Inspect for active leaks and isolate damaged sections
- Clean, dry, and prime the repair area before sealing
- Apply patch material and sealant in thin coats, curing fully
Leak Repair Techniques
When a gutter leak pops up, you should act quickly and methodically: identify the source, select the right patch and sealant, and apply in clean, thin layers for a durable fix.
Start with a dry assessment, then dry-fit the patch to ensure a snug, precise match. Clean the area thoroughly to remove corrosion, dirt, and old sealant before applying.
Choose a high-quality, weatherproof sealant compatible with metal or vinyl, and use a patch that matches the trough profile. Press firmly, smooth edges, and allow curing per instructions.
Recheck joints after a rainfall test, and address any residual seepage promptly.
Remember gutter aesthetics and landscaping impact matter; a proper repair preserves curb appeal while protecting soil and plantings. Routine inspection prevents recurrent leaks and extends system life.
Replacing Damaged Sections and Hangers
- Inspect and measure damaged areas
- Install new sections and tighten hangers
- Test for leaks and resecure as needed
Gutter Materials Compared: Aluminum, Vinyl, Steel
Aluminum, vinyl, and steel each bring different tradeoffs in cost, durability, and appearance, so you’ll want to match material to your climate and maintenance expectations.
You’ll compare aluminum’s light weight and corrosion resistance with vinyl’s affordability and lower strength, and weigh steel for heavy-duty use against its susceptibility to rust.
We’ll also contrast how vinyl and steel fare over time in durability tests, setting the stage for the specific pros and cons you’ll consider next.
Aluminum Pros And Cons
Gutters made from aluminum offer a strong, lightweight option that’s easy to install and maintain. You’ll appreciate its balance of cost and performance, plus the ability to customize finishes for Aluminum aesthetics.
Yet you should weigh aluminum corrosion risks in coastal or humid climates, and factor in potential denting from hail.
1) Pros: lightweight handling, decent strength, and corrosion resistance in many environments.
2) Cons: softer than steel, dents easily, and gradient finishes may fade over time.
3) Best practices: choose thicker gauges for longevity, select protective coatings, and inspect after storms to catch hidden damage.
If you plan upgrades, aluminum offers quick installs and simple repairs, while preserving a clean look that blends with most facades.
Vinyl vs Steel Durability
Vinyl and steel each bring distinct durability traits to gutter systems, so your choice hinges on climate, budget, and how you plan to use the system.
Vinyl offers corrosion resistance and light weight, which makes installation simpler and reduces flex against fascia. It performs well in milder climates and resists rust, but exposure to prolonged sun and impact can cause cracking or warping over time.
Steel delivers robust strength, resisting impact and heavy snow, yet it can rust without proper coating or galvanization in humid or coastal environments.
Consider maintenance needs: painted or coated steel requires periodic touch-ups, while vinyl asks for careful cleaning to avoid discoloration.
For gutter aesthetics and eco-friendly materials, weigh longevity, cost, and climate resilience to determine the best fit.
Sizing Your Gutters: Rain Load and Capacity
Sizing your gutters for rain load and capacity is essential to prevent overflow and damage. You’ll determine capacity by measuring downspout size, roof area, and expected rainfall intensity, then match gutter width and slope to the numbers. It’s practical to plan for at least 5% extra capacity to handle peak storms without overflow.
Take into account leaf debris and continuous clog risk, and choose materials with durable joints to maintain performance. Gutter aesthetics matter, so pick color options that blend with your home while preserving function.
Remember that proper sizing reduces maintenance frequency and protects siding and foundation.
- Calculate roof area and rainfall intensity for your region
- Choose appropriate gutter width, slope, and downspout count
- Align color options with exterior design to satisfy both form and function
Do Gutter Guards Help or Hinder?
Gutter guards can help, but they’re not a cure-all. You’ll gain debris prevention benefits when installed properly, yet guard quality and roof conditions matter.
If you have common shingle debris, pine needles, or mulch, guards can reduce initial clogging, but they don’t eliminate maintenance. Seek designs that balance airflow, water throughput, and ease of cleaning.
Consider guards with slim profiles that prevent large debris while allowing rainfall to pass freely. Misinstalled guards can trap smaller particles, causing faster buildup and overflow risk.
Your approach should pair guards with routine inspections, especially after storms. No guard replaces annual cleanouts or professional checks.
In the end, gutter guards can reduce routine effort, but they’ll still require periodic upkeep to ensure reliable debris prevention and proper drainage.
Downspout Optimization for Drainage
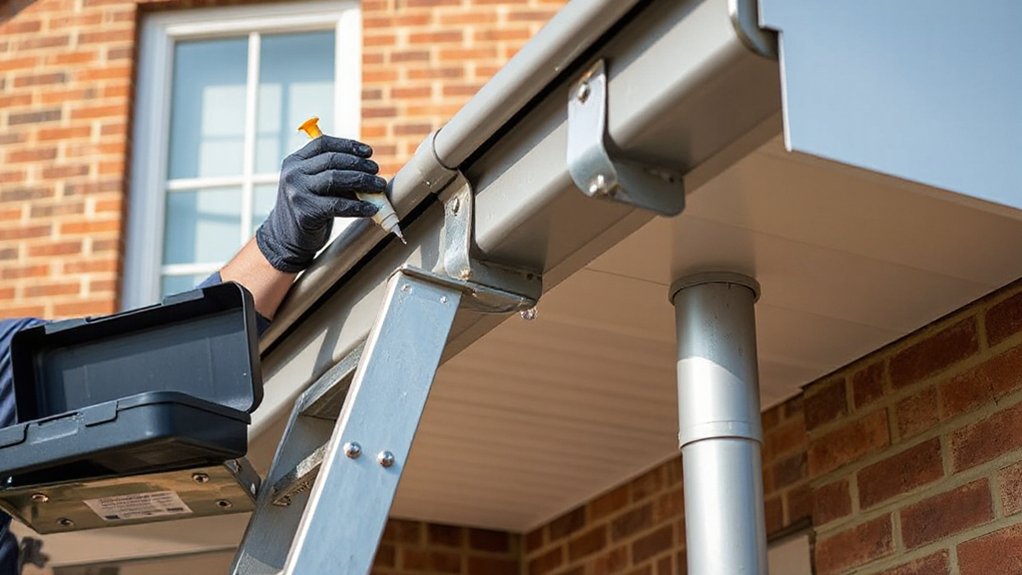
Downspout optimization directly affects how efficiently your system drains, especially after you’ve addressed debris with guards or cleaning. You’ll improve flow by coordinating downspout placement, sizing, and outlet connections to grade and stormwater needs.
Focus on directing water away from foundations, while considering rainwater harvesting and practical runoff paths. A clean, well-angled run prevents pooling and erosion, and contributes to landscaping protection and gutter decoration aesthetics without sacrificing function.
- Align downspouts to maximize quick drainage and minimize splash erosion.
- Use appropriately sized elbows and extensions to reach grading targets.
- Integrate a simple rainwater harvesting approach that fits your roof area and space constraints.
Seasonal Gutter Maintenance Checklist
Seasonal gutter maintenance keeps your system reliable year-round. You’ll run through a focused checklist to protect against leaks, overflow, and ice damming.
Begin by inspecting for loose fasteners and sagging sections; tighten or replace as needed. Clear debris from gutters and downspouts, ensuring free drainage paths. Check sealant joints and flashing, resealing where cracks appear.
Confirm proper slope to direct water toward the downspout; adjust hangers if necessary. Remove debris from roof valleys and check for damaged gutters that require trimming or replacement.
Test the system with a rinsing; watch for leaks during a light rain. Consider gutter aesthetics and decorative accents during cleaning to preserve curb appeal while maintaining function.
Schedule seasonal inspections to catch subtler issues before they worsen.
When to Call a Professional for Gutter Work
If you notice persistent leaks, loose fasteners, or sagging sections after your own maintenance, it’s time to call a professional. A qualified gutter tech quickly assesses structural damage, improper slope, and hidden corrosion, saving you costly fixes later. They also guarantee correct integration with landscaping and downspouts, preventing water damage to foundations and beds.
1) Determine if painting or coating is needed—gutter painting can extend life when surfaces are sound but rust-free.
2) Confirm alignment with landscaping integration to avoid overwatering plant beds or eroding soil.
3) Schedule a full system inspection, including downspouts, hangers, and fascia, to prohibit future leaks and secure proper fall.
Avoid DIY pitfalls; professionals deliver lasting results and protect your property’s value and curb appeal.
Frequently Asked Questions
How Often Should You Test Gutter System Water Flow?
Water flow should be tested monthly. Keep it simple: regularly check for blockages, then test after heavy storms or repairs. Maintain a consistent testing frequency to catch clogs early and guarantee efficient water flow.
Can Gutters Affect Roof Warranty or Warranty Claims?
One in five roof warranty claims involve improper drainage; gutters affect warranty implications. If you ignore corrosion or improper installation, you’ll jeopardize coverage, because gutter corrosion can trigger exclusions or claim denial under many manufacturer warranties.
Do Color Choices Impact Gutter Lifespan Aside From Aesthetics?
Color choices can impact lifespan a bit. You should consider Paint durability and Material longevity, since darker colors may fade faster and some coatings resist corrosion better, extending overall gutter life beyond aesthetics.
Are There Eco-Friendly Gutter Materials Alternatives Available?
Ever mindful of the planet, you can choose eco friendly materials like recycled aluminum or PVC-free options. You’ll find sustainable options that perform well, reduce waste, and last, supporting long-term, responsible gutter care and durability.
What Root Causes Cause Repeated Gutter Sagging Over Time?
Root causes of gutter sagging include overwhelmed support, loose hangers, debris weight, and improper slope. Repeated sagging happens when structural framing weakens or soil settles, causing ongoing gutter sagging and misalignment despite repairs. Inspect, reinforce, and correct drainage.
Conclusion
Gutters protect your home, rain after rain, so stay proactive. You’ll save headaches and money if you inspect, clean, and tighten fittings before problems pile up. When I first ignored a clogged downspout, a small leak turned into costly soffit damage—a clear reminder that prevention beats repair. In a typical season, clean and check twice, seal gaps, and guarantee proper slope. If in doubt, call a pro. Act now, protect later.