



Your garden might be begging for a glow-up because a smart, well-designed space cuts maintenance, boosts resilience, and makes every season shine. Start with a soil test, then tailor nutrients and amendments to real needs. Design beds that breathe, group plants by light and water needs, and water smarter with efficient habits. Budget-friendly upgrades pay off over time, while tracking progress keeps you on course. Keep going, and you’ll discover practical steps to transform your space.
Key Takeaways
- Poor structure and maintenance make a garden look neglected; clear paths, borders, and well-defined zones boost usability and appeal.
- Inconsistent plant choices and lack of year-round interest lead to dull, seasonal gaps and higher upkeep needs.
- Compacted, poorly drained soil reduces health and resilience; improving soil biology and drainage supports easier care.
- Inadequate pollinator resources and plant diversity diminish color, growth, and ecological balance.
- Irregular irrigation and water management cause stress symptoms and wasted effort; efficient, targeted watering keeps thrives with less work.
What a Glow-Up Garden Really Means
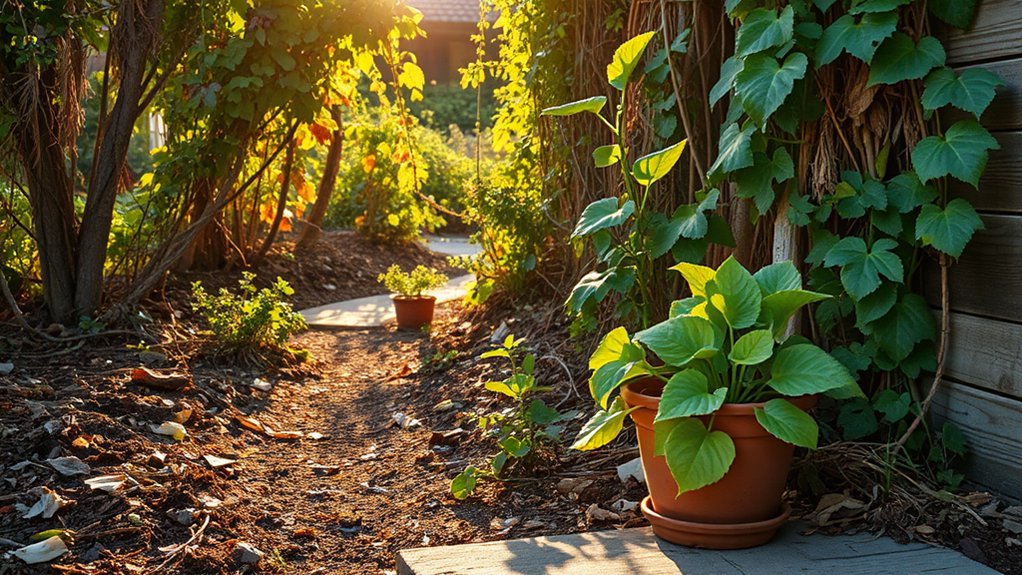
A glow-up garden isn’t about chasing trends; it’s about creating a space that works for you. You measure a glow-up by function, not fame, so you can tend with ease and confidence.
Focus on garden aesthetics that support daily use: clear paths, visible borders, and zones that reduce upkeep. Prioritize plant diversity because it boosts resilience, attracts pollinators, and spreads color across seasons.
Choose a core palette and layer textures—evergreen structure, seasonal blooms, and foliage interest—to keep interest without excess.
Simplify maintenance with smart bed design, mulching, and proper spacing, then observe how microclimates shape growth.
A true glow-up elevates your outdoor routine, making every task quicker and every moment spent outside more satisfying. Your garden, clearly organized, becomes a reliable sanctuary.
Test Your Soil Before Guessing Nutrients
So before you reach for fertilizers, test your soil to know what’s actually there. Start with the basics of soil tests, look for nutrient deficiency clues, and time your testing to match your plant needs.
This approach saves money, guides precise amendments, and prevents guesswork.
Soil Test Basics
Before guessing nutrients, test your soil to learn its pH, texture, and nutrient levels. A basic soil test reveals pH range, organic matter, and key nutrients, guiding how you proceed with amendments.
Collect samples from several spots, mix, and send to a reputable lab or use a reliable home kit. Interpret results by prioritizing pH first, since it governs nutrient availability.
If pH is off, use targeted strategies—organic matter, lime or sulfur, depending on the direction needed.
Apply compost techniques to boost soil biology and structure without overdoing it.
Then adjust nutrient additions based on the test, not assumptions.
Document seasonal shifts and retest after major edits.
Pair amendments with pH balancing where needed to sustain healthy, productive soil.
Nutrient Deficiency Clues
If your soil test is in hand, you can spot nutrient deficiency clues with confidence instead of guessing. You’ll interpret symptoms as guides, not labels. Yellowing leaves on lower stems may signal iron or nitrogen gaps, while uniformly stunted growth points to a macro-nutrient shortage.
Look for interveinal chlorosis, purple tumescence, or pale new growth as starting hints, then verify with soil results before amendments. Test results guide precise fixes, reducing waste and preventing over-application that harms beneficial microbes.
Pair nutrient plans with pest prevention, since some pests exploit weakened plants. Build soil health through composting basics: add organic matter, maintain moisture, and foster a thriving microbial community.
With tests and informed steps, you’ll nurture resilient plants and steady yields, avoiding guesswork altogether.
Testing Timing Tips
Testing timing matters, because a soil test is only as useful as when you run it. You want nutrient data when plants are actively taking up elements, not after a season of storage or heat.
Test soils at key moments: before spring gardening, after a major crop, or when you notice stalled growth. Consider composite samples from multiple spots to avoid hot or lean pockets skewing results.
Follow the lab’s guidelines for depth and pH, and plan for a quick retest after amendments.
Use findings to guide garden art placements and seasonal designs, ensuring visuals align with soil health.
Pair tests with practical composting tips to improve texture and biology, so your glow-up translates to robust, resilient growth.
Design Beds That Breath and Bloom
To design beds that breathe and bloom, you’ll start with structure that supports airflow, drainage, and plant vigor. Build raised outlines or well-edged borders to prevent soil compaction, then loosen soil to improve texture.
Add organic matter to improve water retention without soggy spots, and guarantee a gentle slope for drainage. Space plants according to mature size, and weave plant diversity into the bed to reduce pests and stabilize microclimates.
Use mulch to conserve moisture, suppress weeds, and moderate temperatures. Plan companion planting to leverage natural partnerships, boosting growth and health.
Favor layered textures—tillers, perennials, and annuals—for year-round interest and resilience. Keep paths narrow for accessibility, and rotate beds annually to maintain soil vitality and consistent bloom.
Choose Plants by Light and Water Requirements

Choosing plants by light and water needs guarantees your garden thrives with minimal effort. You’ll map your site’s light spots—full sun, partial shade, and shade—then match each area with species that fit.
Prioritize plant selection that tolerates your available water: drought-tolerant options for hot, dry zones; moisture-loving varieties where irrigation is steady. Consider seasonal shifts; some plants adapt to changing light as the year progresses, while others demand consistent exposure.
Group similar water needs to simplify maintenance and reduce waste. Use mulch and soil amendments to stabilize moisture and root conditions, boosting light adaptation over time.
This approach streamlines decisions, minimizes extra care, and yields reliable color and structure.
Water Smarter With Efficient Habits
Smart watering starts with smart habits. Track your plant needs, water only when soil is dry, and fix leaks or runoff right away.
Use efficient irrigation techniques like drip lines and mulched beds to maximize every drop.
Water-Smart Habits
Inspect soil before watering; if it’s damp within an inch, skip your session. Water deeply but infrequently to encourage deep root growth, and use a watering can or gentle sprinkle to avoid disturbance.
Group plants with similar water needs to stop overwatering the thirsty and underwatering the drought-tolerant.
Collect rain and reuse gray water where allowed, reducing reliance on taps. Track readings and adjust with seasons, avoiding waste.
These habits support garden aesthetics by preventing soggy patches and nutrient leaching, while maintaining healthy, vibrant plant life. Small, consistent actions yield noticeable results.
Efficient Irrigation Techniques
Efficient irrigation starts with precision: tailor watering to real plant needs, not a calendar. You assess soil moisture, plant stage, and weather, then water accordingly. Use a soil probe or simple hand test to guide frequency, not guesswork.
Drip irrigation delivers steady moisture at the root zone, reducing evaporation and leaf wetness that invites disease. Install emitters close to shallow roots and runoff shields to maximize efficiency. Pair systems with smart timers or soil‑moisture sensors to prevent overwatering.
Collect rainwater harvesting runoff in barrels or tanks, then use stored rain for irrigation during dry spells, lowering utility use.
Mulch generously to conserve moisture and stabilize soil temperature.
Regularly inspect lines, filters, and fittings, fixing leaks promptly to maintain performance.
Mulch, Soil Life, and Their Quiet Power
Mulch and soil life quietly underpin a thriving garden: mulch reduces evaporation, moderates temperature, and feeds beneficial microbes that feed your plants.
You’ll improve soil structure by letting organic matter break down, which cushions roots and stores water for dry spells. Mulch acts as a blanket, slowing temperature swings that stress roots and seedlings, while encouraging earthworms and microbial networks to thrive.
To maximize benefits, choose a balanced mulch—organic options like shredded bark, straw, or compost, applied 2–3 inches deep. Maintain soil coverage and avoid piling against stems.
Integrate composting essentials into your routine, feeding the soil gradually rather than dumping all at once.
Prioritize root health by preserving a loose, moist root zone and monitoring moisture, not overwatering.
Feed the Pollinators, Not Just the Plants
Pollinators need as much care as the plants you cultivate. You’ll boost yields and resilience by feeding pollinators, not just tending blooms. Build steady food sources with a mix of nectar and pollen plants, especially through key seasons when forage is scarce.
Create simple pollinator habitats—pollen-rich flowers, shallow water, and sheltered nooks—to invite diverse visitors without attracting pests. Favor native plant selection to adapt to your region’s weather, soil, and predator checks, improving survival and bloom windows.
Space flowering perennials and annuals so there’s continuous forage from spring to fall. Avoid broad-spectrum chemicals that suppress pollinator health.
Track results: note which species attract the most bees and butterflies, then expand those options. Your garden thrives when pollinators find reliable, low-effort nourishment.
Solve Drainage and Soil Compaction Issues

When drainage is poor or soil is compacted, water pools, roots suffocate, and plant growth stalls. You’ll fix this with focused, practical steps.
First, assess soil texture and drainage through simple tests, then choose targeted actions.
For compacted beds, loosen the top 6–12 inches with a pitchfork or broadfork, avoiding deep disruption to established roots.
Improve structure with organic matter—compost, leaf mold, or well-rotted manure—pulsed over time to boost aeration and water movement.
In heavy soils, install drainage solutions such as shallow trenches or perforated pipe to redirect excess moisture away from root zones.
Introduce soil aeration techniques regularly, like yearly aeration or top-dressing with mulch that encourages air exchange.
Monitor after rain and adjust practices to sustain healthy root systems.
Plan for Year‑Round Interest and Resilience
Consider a plan that keeps interest across seasons by pairing a seasonal color palette with hardy, winter-resilient choices. You’ll blend year-round plant pairings that complement each other in bloom, foliage, and texture, so the garden stays dynamic even in cold months.
Start with a practical scaffold: select dependable perennials, evergreens, and seasonal accents that align with your site and maintenance level.
Seasonal Color Palette
A well-planned seasonal color palette anchors year‑round appeal by balancing bloom times, foliage shades, and textures across every bed and container. You curate contrasts and complements so that each season delivers its own focal points without clashing.
Start with a core trio of reliable color anchors, then layer accents that shift with light and temperature. Prioritize seasonal bloom for continuous interest, pairing early-spring bulbs with mid-summer perennials and lasting fall color.
Build color harmony by mixing warm and cool tones in different beds, and repeat motifs across containers for cohesion. Use foliage textures—varied grays, bronzes, and greens—to sustain interest when blooms fade.
Plan with succession, drought tolerance, and pollinator needs to keep your landscape vibrant year round.
Winter-Resilient Design
Choose evergreens and early bloomers that bridge seasons, then layer textures with bark, seedheads, and sculptural forms to keep interest intact.
Prioritize garden art and practical features—timed lighting, reflective surfaces, and focal pieces that glow in dim days without crowding space.
For soil health, commit to composting methods that nourish year-round, then mulch to conserve moisture and warmth.
Plan for rapid cleanup after storms, and use modular elements you can relocate as needs shift.
This approach keeps your outdoor space usable, safe, and visually compelling, even in winter.
Year-Round Plant Pairings
Pair evergreen structure with contrasting seasonal bloomers to keep your garden lively year-round. Year-round plant pairings hinge on deliberate contrasts and durability, balancing color, texture, and interest across seasons. You’ll create steady foundation with evergreen shrubs, then layer color and form above them for dynamic appeal.
- Pair color contrast: choose cool-toned foliage with warm blooms to make each season pop.
- Emphasize foliage texture: mix smooth leaves with crinkled or feathery varieties for depth.
- Schedule bloom shifts: select early-, mid-, and late-season bloomers to cover every month.
- Plan maintenance: group plants with similar water and light needs to minimize upkeep and stress.
Smart Irrigation Options That Save Time and Water
What smart irrigation options save time and water, and how do you choose the best for your garden? You pick scalable systems that fit your site and climate, then tune them for efficiency. Start with a weather-based controller that adjusts schedules after rain or heat waves, reducing waste.
Use soil moisture sensors to prevent overwatering in beds and containers, especially where roots need steady moisture. Drip irrigation minimizes evaporation and delivers water directly to plant roots, while soaker hoses work well for irregular beds.
Pair timers with zone controls for different plant types, and consider a weather feeder for automatic drought adjustments.
Drone photography can reveal dry spots or overwatered patches, guiding tweaks, while composting techniques improve soil structure for better water retention.
Practical Amendments to Improve Soil Structure

To refine your soil texture, start by mixing in well-rotted organic matter to improve structure and water retention.
Add targeted amendments that boost soil health, and tailor them to your soil texture to avoid compaction and promote aeration.
Soil Texture Refinement
- Add coarse organic matter and well-rotted compost to boost aggregation and pore space.
- Incorporate sand or perlite only if you genuinely need drainage enhancement for heavy clay, avoiding compaction.
- Use mulch to protect surface soil and retain moisture without sealing the profile.
- Test regularly for pH and texture shift, adjusting amendments to stabilize root access to nutrients.
Organic Matter Boosts Health
Organic matter boosts soil health by improving structure, water retention, and nutrient availability. When you add well-rotted compost and other organic amendments, you create more stable aggregates that resist crusting and compaction. You’ll notice quicker soil improvement, better root growth, and enhanced microbial activity.
To maximize benefits, vary inputs: leaf mold, manure, and kitchen scraps, plus cover crops that decompose steadily. Compost diversity supports a broader range of nutrients and helps suppress pathogens.
Practice Organic composting by layering materials, maintaining balanced carbon–nitrogen ratios, and turning to aerate. Apply moderate applications at times of active growth, then monitor soil texture and moisture.
Create Microclimates to Extend the Season

Creating microclimates lets you stretch the growing season right in your own garden. You’ll use practical tweaks to convert space into microclimate zones and seasonal microhabitats that protect tender plants and extend harvests.
- Position sun-loving crops on south-facing walls or fences to gain extra warmth.
- Add insulated cold frames or cloches to shield starts on chilly nights.
- Use windbreaks, mulch, and reflective surfaces to moderate temperatures and moisture.
- Group plants by tolerance, staggering crops to maximize usable growing windows.
These steps create predictable microclimates, reducing frost risk and enabling earlier plantings.
Track performance by noting which zones perform best, then refine placements season to season.
With deliberate microclimate design, you’ll enjoy longer harvests and healthier yields.
Observe, Then Manage Pests for Harmony
Observe pest activity before acting, so you’ll manage problems precisely rather than with guesswork. You’re aiming for harmony, not collateral damage, so start by accurate Pest identification.
Watch for patterns: leaf stippling, webbing, or sudden dieback signal specific culprits, not generic distress.
Use simple scouting routines: check a few plants in different spots once a week, note who’s thriving and who’s suffering.
When action’s needed, choose targeted steps—manual removal, traps, or selective deterrents—instead of broad sprays.
Favor approaches that preserve Natural predators, like beneficial insects and birds, which keep populations in balance.
Monitor after interventions, tiny improvements count toward long-term stability.
Record observations to refine your pest picture, then repeat the cycle for steady, garden-wide harmony.
A Low‑Maintenance Maintenance Plan
- Prioritize garden aesthetics by grouping color and texture for year‑round interest.
- Emphasize plant diversity to reduce disease risk and attract pollinators.
- Schedule minimal interventions, such as pruning and watering, during consistent weekly windows.
- Use smart soil and mulch practices to suppress weeds and conserve moisture.
This approach minimizes effort while maximizing results. With a steady cadence, your space remains vibrant and functional.
A clear plan keeps you focused, prevents overload, and sustains plant health. You gain confidence, readability, and predictable beauty in every season.
Budget‑Friendly Upgrades That Pay You Back
Smart, budget-friendly upgrades start with practical choices that boost value. Think budget-smart planting and ROI-friendly upgrades that cut costs now and pay you back later.
You’ll see payoff as healthier growth, lower maintenance, and higher garden returns.
Budget-Smart Planting
- Pick drought-tolerant, zone-appropriate perennials to extend bloom time and stabilize soil.
- Group plants by sun exposure and water needs to cut irrigation and runoff.
- Use mulch and groundcovers to suppress weeds and preserve moisture.
- Add native grasses or flowering shrubs that double as wildlife habitat while complementing your space.
These steps deliver a balanced, budget-smart design that enhances garden art and wildlife habitat without breaking the bank.
ROI-Friendly Upgrades
Look for budget-friendly upgrades that cut ongoing costs and boost property value, then prioritize fixes with quick payback. You’ll want ROI-friendly moves that save money now and later.
Start with low-cost, high-impact changes: efficient irrigation, native plantings, and soil improvements reduce water use and maintenance. Add durable, attractive garden art that requires little upkeep to elevate curb appeal without breaking the bank.
Reframe your pest control approach with preventive, non-toxic tactics—mulching, proper plant spacing, and monitoring reduce chemical needs and protect investments.
Choose compact, drought-tolerant varieties to minimize irrigation.
If you’re selling, emphasize these practical upgrades in listings and disclosures. Document savings and improvements to reinforce value, and avoid overplanting to preserve maintenance time and cost efficiency.
Track Progress to Know When You’re Thriving
Tracking progress is how you know you’re thriving: set clear markers, monitor them consistently, and adjust when results lag. You’ll quantify success with concrete signals, not vibes.
1) Track garden aesthetics: note color harmony, spacing balance, and overall curb appeal each week.
2) Track plant selection outcomes: compare growth rates, flowering, and pest resistance against your plan.
3) Track resource efficiency: log water use, soil health, and fertilizer timing for steady improvements.
4) Track mood of the garden: observe daily vitality, scent, and wildlife activity to confirm momentum.
Use these benchmarks to decide on tweaks—swap a struggling plant, tweak lighting, or refine layouts. Staying objective helps you know when you’re thriving, not just hoping for it.
Real‑World Glow‑Up Success Stories
Real-world glow-up stories show what happens when plans meet persistence: gardeners who tracked benchmarks, adjusted layouts, and tuned care routines consistently see faster blooms, sturdier plants, and longer-lasting curb appeal.
You’ll learn from cases where simple shifts yielded big gains. One backyard transformed with garden art accents that pulled focal points together, elevating overall aesthetic and patient care.
Another porch border became a wildlife habitat by selecting native varieties, adding shelter, and avoiding aggressive chemicals.
These wins come from disciplined observation, timely pruning, and scalable routines you can replicate: map metrics, test layouts, and iterate.
The result isn’t just nicer scenery; it’s healthier soil, resilient plants, and a sustainable, engaging outdoor space you actually use daily.
30‑Day Glow‑Up Action Plan: Next Steps
Now that you’ve seen steady gains from real-world glow-ups, you’ll map a practical Day Glow-Up Action Plan to keep momentum. Focus on garden aesthetics and plant diversity to sustain progress without overhauling wonky choices.
- Assess the current scene: note strong spots, gaps, and color balance, then set clear, observable goals.
- Prioritize a 2–3 week sprint: plant complementary species, rotate containers, and tune soil health for consistent significance.
- Implement a weekly maintenance routine: watering, pruning, mulch, and pest checks stay proactive, not reactive.
- Measure impact and adjust: track bloom timing, foliage texture, and color contrast to refine future steps.
Frequently Asked Questions
How Can I Start a Glow-Up Garden on a Tiny Budget?
Start small and smart: set a simple garden layout, keep paths clear, and choose plant selection that thrives locally and budget-friendly. You’ll maximize space, attract pollinators, and create a cohesive glow-up with thrifted containers and DIY mulching.
Which Glow-Up Steps Yield the Fastest Visible Results?
Quickest results come from tackling garden feng shui and seasonal pruning first; clear clutter, optimize sightlines, and trim damaged growth now so energy flows, plants recover faster, and your space feels instantly more cohesive and productive.
Can a Glow-Up Improve Home Value or Curb Appeal?
Yes, a glow-up can boost home value and curb appeal. You’ll see faster returns through garden lighting and smarter landscape design, juxtaposing night vs. day to highlight architecture, boost safety, and create inviting, practical outdoor living spaces.
What Mistakes Common Beginners Should Avoid First?
Avoid overwatering and skip guesswork; start with Plant pruning and Soil testing. You’ll prune correctly, test soil, amend as needed, and plan gradually. Prioritize small, consistent improvements, and learn seasonal timing before broader, risky changes.
How Do I Measure Success Beyond Blooms and Color?
Balanced bloom metrics matter more than looks: you measure success by soil health improvements and thoughtful plant selection, not just petals. You monitor moisture, structure, and nutrients, noting steady growth, resilience, and sustainable soil health gains with deliberate plant selection.
Conclusion
So you’ve got the glow-up plan, and your garden is ready to rise to the challenge. Test soils, design breathable beds, pick sun- and water-smart plants, and adopt water-wise habits. Budget-friendly upgrades pay you back in beauty and yield, while progress tracking keeps you on target. Ready to see real results in 30 days? If not now, when will your garden truly thrive and glow? You’ve got this—your best garden is just ahead.



