



Autumn is the ideal time for home maintenance because milder weather lets you tackle exterior and interior tasks without summer heat or winter storms getting in the way. You can reseal gaps, clean gutters, and prep HVACs before freezing temps spike energy use. Scheduling is easier with lower contractor demand, and you can batch outdoor and indoor projects for efficiency. This season also flags safety upgrades and moisture control to prevent winter damage—plus a clear plan for ongoing maintenance ahead. You’ll discover more soon.
Key Takeaways
- Weather is mild in many areas, making outdoor maintenance safer and more comfortable than peak summer or winter extremes.
- Off-season pricing and contractor availability often improve in autumn, enabling cost savings and scheduling flexibility.
- Pre-winter checks (insulation, roofs, gutters) prevent ice dams, leaks, and energy loss during cold months.
- Seasonal planning aligns tasks with weather windows, reducing backlog and ensuring timely completion before holidays.
- Early autumn maintenance protects interiors by sealing drafts, maintaining humidity control, and improving indoor air quality.
Autumn Is Your Window for Smart Home Upkeep
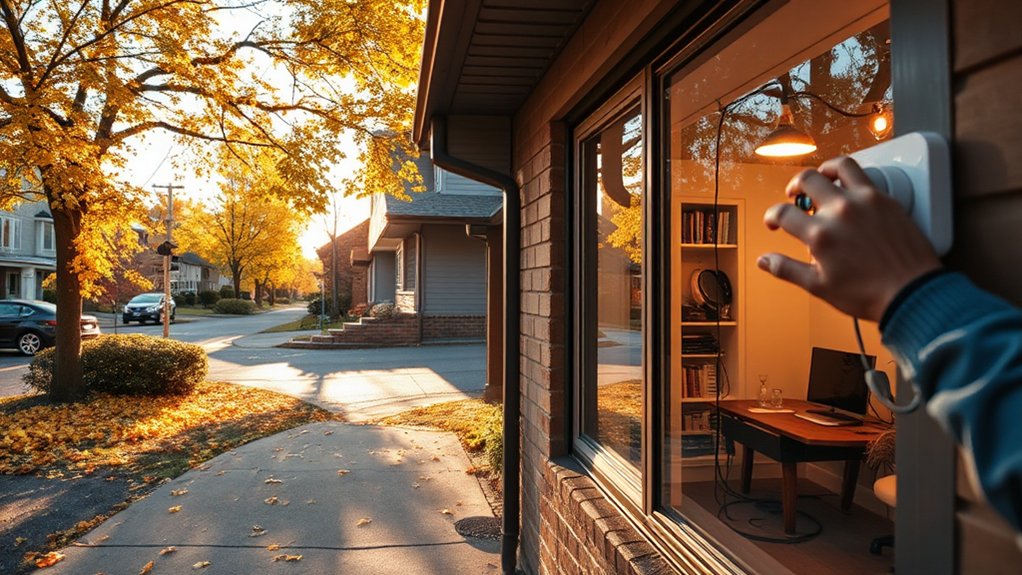
Autumn is the ideal window for smart home upkeep because milder days make inspections comfortable and downtime for installations minimal. You approach routine checks with precision, prioritizing systems that rely on steady temperatures.
Start with Smart thermostats: verify scheduling, update firmware, and confirm compatibility with your HVAC setup. Test sensors, observe response times, and adjust zoning if needed. Document irregularities for later service.
Next, power and network reliability matter; inspect outlets, backups, and router placement to prevent weak signals during peak heating.
While you’re at it, consider garden composting as part of your property’s efficiency: assure sensors monitor moisture and temperature in compost bins, enabling ideal decomposition without inviting pests.
Maintain a concise log of adjustments, and schedule follow-up tweaks before winter demand rises.
The Autumn Maintenance Mindset: Plan Before You Act
You start with a clear plan before you act, outlining what needs doing and when.
Create a seasonal assessment plan that inventories systems, flags weak points, and prioritizes tasks by impact and effort.
With this mindset, you turn autumn into a precise, proactive maintenance window rather than a guesswork sprint.
Plan Before Action
Before you pick up a tool, map out what needs to be done and when. Plan action in concrete steps, not vibes, so you can sequence tasks by priority, duration, and weather windows.
Start with a master checklist: identify tasks, rough estimates, and required materials. Allocate specific days for preparation, execution, and review, and build in buffers for setbacks.
For each task, define success criteria, safety considerations, and potential dependencies—like ensuring ladders or scaffolding are set before exterior work begins.
Coordinate two related activities to maximize efficiency, such as Garden landscaping alongside soil prep, and Exterior painting after surfaces are cleaned and primed.
Document progress, reassess constraints, and adjust the plan to prevent scope creep and downtime.
Seasonal Assessment Plan
A seasonal assessment plan starts with a concise inventory of needs specific to autumn, built from your master plan and recent observations. You’ll identify critical tasks, prioritize safety checks, and align them with weather patterns to avoid last-minute scrambles.
Begin with garden landscaping: prune perennials, tidy beds, and confirm drainage, then note any soil amendments or mulch requirements.
Inventory outdoor lighting—test fixtures, replace bulbs, and address dusk-to-dawn sensors for reliable evening visibility.
Assess exterior surfaces for material wear, seal gaps, and schedule roof and gutter inspections before leaves peak.
Create a calendar with realistic windows for each activity, assigning responsibilities and milestones.
Document costs, vendors, and seasonal warranties.
Use this plan to guide efficient, proactive maintenance, reducing downtime and guarding your home’s value.
Prioritize These 5 Safety Upgrades Before Winter
Winterproofing starts now with five essential safety upgrades. You’ll address the most critical risks first, so you stay ahead of winter’s demands.
1) Install smoke and carbon monoxide detectors on every level and test them monthly; replace batteries twice a year.
2) Create a clear, well-lit egress plan, marking exterior doors and stairs, and keep exits unobstructed.
3) Inspect electrical panels, cords, and space heaters for damage; replace frayed cords and unplug portable heaters when not in use.
4) Secure railings, stairs, and uneven flooring to prevent slips and trips indoors.
5) Stock a winter-ready emergency kit with flashlights, batteries, nonperishable food, and a first-aid kit.
Prioritize safety hazards and emergency preparedness to minimize disruption and protect loved ones.
Seal Gaps This Autumn to Maximize Energy Savings
Autumn is the right time to seal gaps and cut energy waste. You’ll maximize comfort and curb utility bills by targeting openings around doors, windows, electrical outlets, and attic hatches.
Begin with a quick audit: feel for drafts, map cold spots, and note stains or ice on windows after a chilly night.
Use weatherstripping and high-quality caulk to close gaps, prioritizing airtight seals at perimeters and mail slots.
Consider door sweeps and vent covers to stop wind-driven leaks.
Implement weatherproofing tips that address moisture too, like properly sealed attic hatches.
Pair gaps sealing with energy efficient upgrades where feasible, such as insulating sleeves for pipes and duct sealing.
This disciplined approach minimizes heat loss, improves indoor comfort, and supports long-term energy savings.
Service Your HVAC for Efficiency and Longevity

Has your HVAC ever run more than it should last season? If so, you’re paying excess energy bills and risking premature equipment wear.
Begin with a professional inspection to catch refrigerant leaks, faulty capacitors, and clogged condensate lines that throttle efficiency.
Replace or clean air filters monthly during peak use and before heating season starts to sustain ideal airflow and prevent strain.
Schedule a tune-up that includes blower motor inspection, thermostat calibration, and electrical connections tightening to avoid surprises on cold nights.
Check insulation around the furnace and ducts; sealing breaches boosts system performance and reduces cycling.
Use programmable thermostats to align runtime with occupancy, supporting HVAC efficiency.
Implement longevity strategies like sealant checks and vent clearance, then monitor performance after the first cold snap.
Gutter Maintenance to Prevent Water Damage and Ice Dams
Start by clearing gutter debris so water can flow freely; a clogged gutter invites overflow and ice buildup.
Then check for free flow from downspouts and secure any loose hangers or joints to prevent leaks.
Finally, insulate and seal gaps at the gutter line and around connections to reduce heat loss and curb ice dam formation.
Clean Gutter Debris
Gutters full of debris can clog the flow of water, so you must remove leaves, twigs, and sediment first to prevent overflowing and ice dam formation. You’ll inspect from the ground or using a sturdy ladder, wearing gloves and eye protection. Clear large clumps by hand, then use a scoop or trowel to loosen stubborn matter.
Flush with a garden hose to confirm free drainage, watching for leaks at joints. Pay attention to downspouts, ensuring they’re not blocked by dirt or mulch. Address leaf accumulation selectively; don’t let debris hide damage to gutter seams or fascia.
Regularly trimming nearby trees reduces future build-up, lowering gutter clogging risk. This proactive step protects your roof edge and interior from water intrusion and ice-related stress.
Check for Free Flow
After clearing debris, you’ll verify that water can drain freely through every run. You’ll test each downspout and confirm nothing backs up near the foundation. A free flow prevents ice dams and water damage, protecting seasonal decor and outdoor landscaping alike.
- Check slopes and joints for obstructions, clearing any sediment or plant matter.
- Rinse gutters with a hose to confirm consistent drainage and monitor for leaks.
- Inspect hangers and brackets, tightening loose fasteners to maintain proper pitch.
If you notice pooling at corners or overflowing corners when rainfall peaks, address promptly. Keep debris out of yard drainage paths to avoid clogs.
Regular, methodical checks now save costly repairs later, and preserves curb appeal, even as you shift seasonal decor.
Insulate and Seal Gaps
Even when your gutters drain properly, gaps and joints can let in cold air and moisture, increasing the risk of water damage and ice dams. To insulate and seal gaps effectively, start with a thorough inspection of fascia boards, joints, and downspout connections.
Apply low-expansion foam sealant to interior gaps, then press backer rod into larger openings before resealing.
Add weatherstripping where valley covers meet the roofline and ensure drip edge is secure to prevent seepage.
Seal attic hatches and vent openings with airtight caulk to reduce heat loss that fuels ice dam formation.
Maintain downstream protection by clearing debris and checking gutter hangers.
As you work, note how window painting and garden pruning can access points without damaging finishes, keeping access safe and tidy.
Roof Inspection Basics: Catch Hidden Issues Early
Roof inspections should start with a careful walk-around to spot telltale signs before they become costly problems. You’ll detect warped shingles, loose flashing, and missing granules that hint at underlying issues.
By inspecting from ground level up to the ridge, you uncover risks you’d otherwise miss until rain arrives. Focus on connections around protrusions, valleys, and vents, where leaks often hide.
Hidden leaks can show up inside walls long before you see water stains, so note any dampness or staining you encounter. Chimney checks are essential, testing flashing integrity and mortar to prevent seepage.
- Inspect flashing at chimneys and vents for gaps
- Look for loose or cracked shingles and curling edges
- Examine attic entry areas for moisture traces and daylight
Prepare a quick follow-up plan after each check.
Exterior Tasks You Can Tackle in Mild Fall Temps
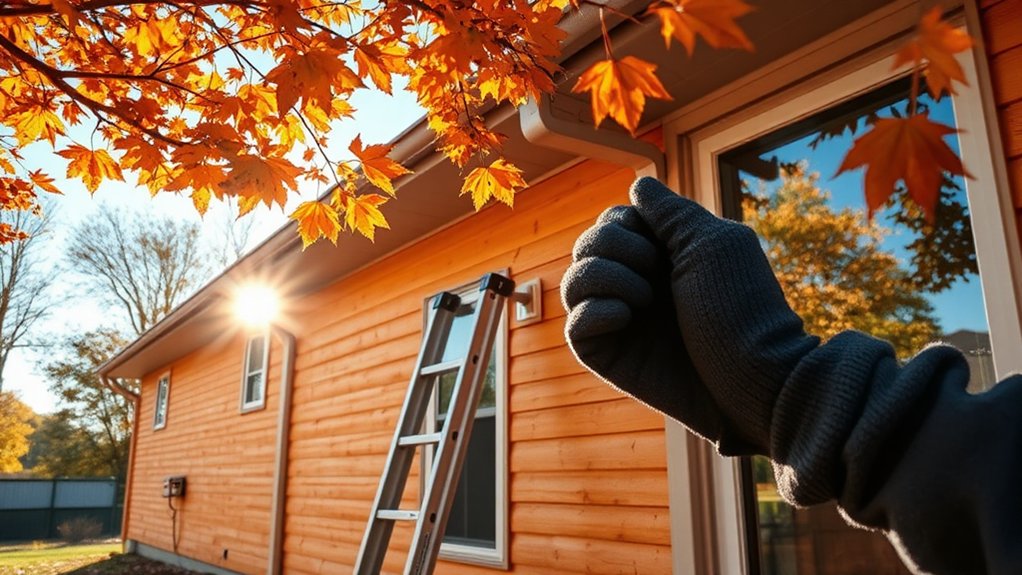
As the mild fall days linger, you can tackle several exterior tasks that prevent winter surprises without overdoing it. Start with garden landscaping: prune overgrown shrubs, rake leaves, and mulch perennials to insulate roots. Edge borders, reseed thin patches, and replenish compost where needed to maintain curb appeal.
Inspect gutters and downspouts; remove debris so water flows freely and prevents ice dams later. Check siding and paint for nicks, touching up where necessary to stop moisture intrusion.
For outdoor lighting, test bulbs, clean lenses, and adjust timing to shorten dark evenings safely. Tighten connections and inspect cables for wear.
Store or cover power tools, and winterize hoses to extend their life. These steps stabilize exterior conditions without extending the job into deep fall.
Plan Interior Projects for Comfort on Cooler Days
Start by checking heat-preserving insulation and filling any gaps so you keep warmth where it belongs.
Then plan cozy room temperatures with clear targets and a straightforward thermostat strategy that avoids unnecessary heat loss.
Finally, lock in a timed indoor project schedule that prioritizes quick, impactful tasks on cooler days.
Heat-Preserving Insulation Checks
To keep your home warm on cooler days, start with a practical, no-nonsense check of insulation in key interior areas. You’ll identify gaps, drafts, and weak spots that waste heat and raise bills. Prioritize air-sealing and material integrity, then verify that insulation loads align with room use. Be precise and efficient, documenting findings for future fixes.
- Inspect attic hatches, crawl spaces, and interior doors for gaps and compression leaks.
- Check insulation depth in walls around outlets, switches, and plumbing penetrations; reseal as needed.
- Assess window treatments and fireplace upkeep to optimize heat retention without blocking airflow.
Keep notes on fixes, and implement them promptly. This approach minimizes drafts and supports steady comfort during chilly days.
Cozy Room Temperature Planning
After tightening gaps and sealing drafts, you’re ready to map cozy temperatures room by room. Start with a baseline of comfortable targets: 68–72°F (20–22°C) for living areas, slightly cooler bedrooms, and warmer bathrooms as needed.
Use a hygrometer to track humidity, aiming for 40–50% to prevent dampness without feeling clammy.
Prioritize zoning: assign smart thermostats or high-quality programmable thermostats to key zones, enabling gradual shifts rather than full-home changes.
Evaluate heat sources for each room—radiant panels, baseboard heat, or space heaters—ensuring safe clearance and efficient use.
Enhance a cozy ambiance with soft lighting, layered textiles, and consistent air movement.
Document adjustments, monitor energy use, and refine when daylight hours shorten.
Temperature control becomes predictable, comfortable, and resilient.
Timed Indoor Project Scheduling
As the days grow cooler, schedule interior projects for comfort on crisp days by prioritizing tasks that boost efficiency and durability first, then fill gaps with targeted improvements. Timed planning keeps disruption low and end results solid.
1) Prioritize weatherproofing and insulation tweaks to reduce later heating demands.
2) Stage indoor lighting and seasonal decor updates for immediate ambiance and energy savings.
3) Map a realistic sequence that fits your calendar, allowing buffer days for ceilings, walls, and floors.
You’ll gain steady progress by batching similar tasks, estimating durations, and assigning responsible days. This approach minimizes trips, keeps rooms usable, and sharpens focus for winter readiness.
Document progress, adjust timelines, and review outcomes to refine future sprints.
Budget and Time Autumn Repairs to Score the Best Discounts
Autumn is the time to lock in savings on home repairs by planning ahead and aligning work with seasonal pricing. You’ll maximize value by batching projects and front-loading purchases before demand spikes.
Start with a clear list of must-daves and nice-to-haves, then map each item to the best timing window—early September for outdoor upgrades, late October for interior refreshes.
Budget with a reality check: price in seasonal gardening tasks and outdoor lighting as separate line items, then compare quotes from multiple vendors to lock in discounts.
Prioritize weather-safe work to avoid weather-driven surcharges. Time your trades to minimize mobilization fees and labor costs, and negotiate bundled deals when possible.
Document warranties, expected lifespans, and maintenance intervals to sustain savings through the season.
Prepare Your Tools: Essential Safety Checks for Autumn

Before you start any autumn work, inspect your safety gear for tears, fraying, or missing straps and replace or repair as needed.
Make certain ladder stability by checking feet, rails, and locking mechanisms, and test it on firm, level ground before use.
Verify smoke alarms are functional, with fresh batteries and unobstructed sensors, and schedule a replacement if older than ten years.
Inspect Safety Gear
Have you checked your safety gear lately to make certain you’re ready for seasonal tasks? Before you reach for tools, verify that your safety gear is functional, clean, and properly stored. An organized setup minimizes delays and reduces risk. Follow a tight inspection checklist to confirm readiness and durability.
- Inspect head, eye, and hearing protection for cracks, wear, and proper fit.
- Check gloves, footwear, and body protection for tears, moisture, and compatibility with tasks.
- Validate reflective gear and breathable layers for visibility and insulation.
If anything fails, replace or repair immediately and document the update. This proactive approach keeps you compliant, focused, and productive, preventing avoidable injuries and downtime as autumn chores begin in earnest.
Safety gear remains your first line of defense.
Check Ladder Stability
To guarantee safe access to ceilings, stairwells, and elevated fixtures, start by confirming your ladder’s stability before climbing. Inspect feet and feet pads for wear, and replace damaged grips that could slip on damp surfaces.
Set the ladder on level ground, extend locking rungs fully, and listen for any creaks as you test weight.
Angle your ladder at the correct ratio, about 4:1 for most setups, and have a helper hold the base if you’re heavy or carrying tools.
Clear debris, oil, and loose gravel from the footprint, and avoid placing ladders near doors or traffic.
Tighten spreader bars after each use, and wear slip-resistant footwear.
Ladder safety hinges on deliberate checks and a steady stance; perform a final stability check before ascent.
Test Smoke Alarms
- Press and hold the test button for a full second to confirm audible alert.
- Replace batteries annually or as indicated by the device, and clean dust from vents.
- Inspect mounting brackets and ensure the unit is interconnected if your system requires it.
Keep multiple units on every floor, especially near sleeping areas, for thorough coverage.
Note expiration dates on detectors and replace units every 10 years.
Establish a fall routine: test after major renovations or power outages.
This disciplined approach minimizes false alarms and maximizes protection for you and loved ones.
Step-by-Step Autumn Home Inspection Checklist
Autumn is the ideal time to walk through your home with a critical eye, prioritizing safety, efficiency, and durability before winter. You’ll perform a methodical, room-by-room inspection, starting at the roof and attic, then sealing gaps around windows and doors.
Check shingles, flashing, and gutters for damage or blockages, and clear downspouts to prevent ice dams. Inspect plumbing for leaks, insulation integrity, and hose bibs; drain exterior lines before freezes.
Test electrical panels, outlets, and lighting; replace damaged cords and worn seals.
Outdoor areas get a quick review too: secure seasonal gardening supplies, store or cover chemicals, and remove trip hazards. Tidy outdoor decor and test exterior lighting.
Document findings, schedule repairs, and update maintenance tasks to keep systems reliable all season.
Evaluate Energy Upgrades for Payback This Season
Assess the payback this season by checking the payback timeline. Then compare energy savings projections against upfront costs. I’ll provide a clear cost-benefit view so you can see which upgrades pay off fastest and how they affect your bills this year.
We’ll pin down concrete numbers for your home and outline the next steps to act on the most promising options.
Payback Timeline This Season
Is the payoff worth the effort this season? Yes, if you time upgrades for peak return and comfort. You’ll gauge payback by seasonal windows, not calendar years, and align projects with early autumn energy use patterns. Consider these steps:
1) Prioritize high-impact changes, like outdoor lighting and insulation improvements, to slash evening heat loss and extend usable daylight.
2) Pair seasonal landscaping with windbreaks and compacted shade strategies to boost curb appeal while lowering cooling costs.
3) Schedule installations before peak demand spikes, ensuring favorable contractor rates and shorter lead times.
Anticipate payback across the heating season, not just months. You gain safer, better-lit exterior spaces, improved property value, and predictable energy use. Outdoor lighting becomes a cornerstone, while seasonal landscaping reinforces efficiency and aesthetics.
Energy Savings Projections
To judge whether energy upgrades pay off this season, start with concrete savings projections tied to your home’s actual usage patterns. You’ll map baseline energy consumption, then model reductions from upgrades such as insulation improvements, more efficient HVAC, and upgraded lighting.
Focus on seasonal Variances: heavier winter loads, heat loss through windows, and dryer or cooking spikes. Translate projections into monthly cash flow, factoring in local utility rates, incentives, and payback timelines.
Include maintenance costs like periodic solar panel maintenance and potential efficiency gains from smarter thermostats. Assess non-monetary benefits too, like steadier comfort and predictable bills.
Tie projections to a three- to five-year horizon, updating as usage data evolves. Plan supplemental actions—winter gardening considerations and proper equipment upkeep—without delaying decisive upgrades.
Cost-Benefit Comparison Now
Now, compare the costs and benefits of each energy upgrade you’re considering to determine which payback best fits this season.
You’ll perform a rigorous cost analysis to quantify upfront costs, installation timelines, and maintenance needs. Then, weigh energy savings against winter usage patterns.
Your investment strategy should prioritize upgrades with the fastest net payback and the greatest reliability, avoiding speculative gains.
Consider product warranties, compatibility with existing systems, and potential rebates or tax credits to adjust the effective cost.
For quick reference, assess these options:
- High-efficiency insulation and air sealing
- Smart thermostat and demand response integration
- Advanced heat pump or high-efficiency furnace upgrade
Document assumptions, run sensitivity checks, and choose the combination that minimizes risk while maximizing seasonal comfort.
Pest Prevention and Moisture Control This Fall
As autumn settles in, now is the time to act on pest prevention and moisture control before tighter heating and longer indoor stays begin. You’ll tighten up entry points and seal gaps around doors, windows, pipes, and vents to reduce easy access for pests.
Install or upgrade moisture barriers in crawlspaces and basements to deter dampness and mold growth. Then verify exterior grading directs water away from the foundation.
Inspect the roof, gutters, and downspouts for blockages and leaks that invite leaks inside walls.
Improve ventilation in high-humidity areas like the bathroom and kitchen, using exhaust fans or dehumidifiers as needed.
Schedule proactive inspections after storms, and keep storage areas elevated and organized to minimize attractants.
Prioritize preventive measures, not reactive fixes.
Schedule Contractors Without Peak-Season Stress
Scheduling contractor work before peak season minimizes delays and costs. You’ll streamline contractor scheduling by aligning tasks with weather windows and lender deadlines, reducing last-minute scrambles.
Use seasonal planning to map needs, budget, and availability, so you’re not chasing empty slots. Here’s how to nail it:
- Identify critical projects and set firm deadlines with each contractor
- Confirm material suppliers and lead times to avoid shortages
- Schedule site access, permits, and inspections upfront, building in buffers
Indoor Air Quality Improvements You Can Do Now
Improving indoor air quality is feasible now with practical, low-effort steps you can implement before winter settles in.
Start with Air filtration: replace disposable filters every 1–3 months, and choose high-efficiency filters (MERV 8–13) for better particle removal without stressing your system. Vacuum and dust regularly, using a vacuum with a HEPA seal, to reduce allergens at the source.
Next, address humidity control: keep indoor moisture in the 30–50% range to minimize mold growth and dust mites. Use a dehumidifier in damp spaces and vent bathrooms and the laundry area to the outside.
Balance ventilation by pairing intermittent exhaust with occasional fresh-air intake when weather allows. Seal obvious air leaks around windows and doors to prevent drafts and contaminants from entering.
Create a Practical Autumn Maintenance Calendar
Autumn is the time to lock in a practical maintenance calendar that spreads tasks evenly and keeps your home running smoothly. You’ll map essential chores to specific weeks, so nothing stacks up or slips through the cracks. A clear plan reduces last-minute scrambling and guides budget decisions.
1) Early autumn: schedule Garden pruning and exterior cleanup, securing tools and securing permits if needed.
2) Mid-autumn: plan Window cleaning, gutter checks, and roof inspections to prevent moisture damage.
3) Late autumn: finalize indoor tasks, seal drafts, and prepare HVAC filters and batteries for seasonal shifts.
This calendar keeps you proactive, not reactive, and aligns outdoor work with milder days. It’s practical, authoritative, and results-focused.
Autumn Maintenance That Delivers Winter Peace of Mind
Autumn maintenance isn’t just about chores—it’s about creating a winter-ready home that stays comfortable, efficient, and safe. You focus on practical steps that deliver consistent peace of mind.
Start with a perimeter check: seal gaps around doors and windows, flush and insulate pipes, and test your heating system before cold snaps hit.
Schedule gutter cleaning to prevent ice dams, and prune trees away from roofs to avoid damage.
Invest in outdoor lighting and sensor-activated fixtures to deter intruders and guide slippery pathways.
Consider garden landscaping adjustments that reduce wind exposure and improve drainage.
Inspect weather stripping, thermostat programming, and carbon monoxide detectors, updating batteries where needed.
Maintain a maintenance log for inspections, repairs, and replacements to streamline spring readiness and minimize surprises.
Frequently Asked Questions
How to Tailor Autumn Maintenance to My Climate?
You tailor autumn maintenance to your climate by evaluating first frost dates, humidity, and wind exposure; then adjust tasks. Prioritize seasonal planting suited to your zone and guarantee outdoor lighting is weatherproof, energy-efficient, and properly wired.
What Small Daily Tasks Save the Most Energy?
You save the most energy by small daily habits: switch to energy efficient lighting, unplug idle electronics, and run full loads. Practice appliance maintenance, clean filters, and seal drafts; these boosts compound, especially when you routinely monitor thermostats and timers.
When Should I Schedule Contractors for Fall Work?
Schedule contractors for fall now, before peak demand, so you secure slots and avoid delays. Prioritize exterior inspections and roofing repairs, coordinating timing with weather windows to prevent leaks and guarantee durable, code-compliant results.
Which DIY Tasks Could Void Warranties or Cause Harm?
Did you know 40% of DIY projects create warranty voiding risks? DIY hazards lurk in electrical, gas, and structural work; you could void warranties or trigger harm. Avoid these tasks, and hire pros for safety-critical repairs and inspections.
How to Track Costs for Seasonal Upgrades Effectively?
You track costs by itemizing energy efficient upgrades and tying each to a budget line. Use receipts, compare quotes, and schedule installations between seasons. Practice meticulous budget planning, monitor actual vs. projected, and adjust forecasts as you gain data.
Conclusion
Autumn isn’t just about pumpkins and leaves—it’s your window to prevent winter headaches. By planning now, you cut emergency fixes by up to 50% and slash energy bills with smarter sealing and HVAC upkeep. A practical calendar lets you tackle safety upgrades, IAQ tweaks, and contractor scheduling before peak season hits. You’ll stay warm, save money, and enjoy quieter, more reliable systems once the first frost arrives. Do the prep now, and winter rewards you with peace of mind.



